
Mental Health First Aid: How to Support Someone in a Mental Health Crisis

Person with a smiley face

What Is Mental Health First Aid?

Mental health first aid is the help provided to a person who is developing a mental health problem, experiencing a worsening of an existing mental health condition, or going through a mental health crisis. Just as physical first aid is administered before professional medical treatment is available, mental health first aid bridges the gap between the onset of a mental health crisis and the arrival of professional support.

In Canada, one in five people will experience a mental health problem or illness in any given year, and by the age of 40, approximately 50 percent of the population will have had or currently have a mental illness. Despite these staggering numbers, most Canadians receive no training in how to recognize or respond to mental health emergencies. This gap in knowledge contributes to delays in treatment, worsening outcomes, and tragically, preventable deaths from suicide. Learning mental health first aid is just as important as learning physical first aidβ€”and often, the two go hand in hand.

Why Mental Health First Aid Training Matters

The stigma surrounding mental illness remains one of the greatest barriers to people seeking help. Many individuals experiencing a mental health crisis do not reach out for professional support because they feel ashamed, fear judgment, or do not believe their suffering is “serious enough” to warrant help. A person trained in mental health first aid can be the catalyst that encourages someone to seek the treatment they need.

Mental health first aid training equips you to recognize the signs and symptoms of common mental health conditions including depression, anxiety disorders, psychosis, substance use disorders, and eating disorders. It teaches you how to approach someone who may be struggling, how to have a supportive conversation without judgment, how to assess the risk of self-harm or suicide, and how to connect the person with appropriate professional resources. In workplace settings, mental health first aid training is increasingly recognized as essential alongside physical first aid and CPR training.

Psychological First Aid Training Available

Coast2Coast offers Psychological First Aid courses taught by certified instructors. Learn to support someone in a mental health crisis with confidence.

Explore Our Courses β†’

Recognizing a Mental Health Crisis

A mental health crisis is any situation in which a person’s behaviour puts them at risk of hurting themselves or others, or prevents them from being able to care for themselves or function effectively in the community. Mental health crises can manifest in many ways, and the signs are not always obvious.

Warning signs that someone may be experiencing a mental health crisis include sudden withdrawal from social activities, relationships, or work. Dramatic changes in mood, energy level, or behaviour that are out of character for the person. Expressions of hopelessness, worthlessness, or feeling trapped. Talking about being a burden to others or having no reason to live. Increased use of alcohol, drugs, or prescription medications. Giving away possessions or making arrangements as if preparing for death. Extreme agitation, rage, or reckless behaviour without apparent cause. Hearing voices or experiencing beliefs that are disconnected from reality.

It is important to understand that a person in crisis may not look or act the way you expect. They may appear calm on the surface while experiencing intense internal distress. They may use humour to mask their pain. They may deny that anything is wrong when directly asked. Effective mental health first aid requires looking beyond surface behaviour and paying attention to patterns and changes over time.

The ALGEE Action Plan

Mental health first aid training commonly teaches the ALGEE action plan, a structured approach to supporting someone who may be experiencing a mental health problem or crisis.

A β€” Approach, assess, and assist with any crisis. If you believe someone is in immediate danger of harming themselves or others, do not leave them alone. Call 911 if there is an imminent safety threat. Approach the person calmly and non-judgmentally. Express your concern clearly and directlyβ€”for example, “I have noticed you seem really down lately, and I am worried about you.”

L β€” Listen non-judgmentally. Active, empathetic listening is the most powerful tool in mental health first aid. Let the person talk at their own pace without interrupting, minimizing, or offering unsolicited advice. Use open-ended questions like “How are you feeling?” and “What has been going on?” Avoid phrases like “just cheer up,” “everyone goes through this,” or “you have so much to be grateful for”β€”these well-intentioned comments can make a person feel dismissed and less likely to open up further.

G β€” Give reassurance and information. Reassure the person that mental health conditions are common, treatable, and nothing to be ashamed of. Share information about available resources without being pushy. Normalize their experience by saying something like “what you are going through sounds really difficult, and it makes sense that you are struggling.”

E β€” Encourage appropriate professional help. Gently encourage the person to seek professional support from a counsellor, therapist, physician, or crisis service. Offer to help them find a provider, make an appointment, or accompany them to their first session. Recognize that the decision to seek help ultimately belongs to the personβ€”your role is to encourage and support, not to force.

E β€” Encourage self-help and other support strategies. Support the person in connecting with their existing support network, including family, friends, faith communities, and peer support groups. Encourage healthy coping strategies such as physical activity, mindfulness, journaling, and maintaining routines. Follow up with the person after your initial conversation to show that your concern was genuine and ongoing.

How to Talk About Suicide

One of the most important and most feared aspects of mental health first aid is addressing suicidal thoughts directly. Many people avoid asking about suicide because they worry that bringing it up will “plant the idea” in someone’s mind. Research consistently and clearly shows that this is not the case. Asking someone directly about suicidal thoughts does not increase their riskβ€”it can actually reduce their distress by showing them that someone cares enough to ask the difficult question.

If you suspect someone may be thinking about suicide, ask clearly and directly: “Are you thinking about ending your life?” or “Are you having thoughts of suicide?” If the person says yes, take their disclosure seriously. Do not leave them alone. Help them contact a crisis service such as the 988 Suicide Crisis Helpline (call or text 988 in Canada), or call 911 if the danger is immediate. Remove or secure any means of self-harm if possible. Stay with the person until professional help arrives or the immediate crisis has passed.

Register for CPR or First Aid Training

Register today for a CPR or First Aid training course at one of our 30+ locations across Canada and the U.S. Check out our facilities and book your spot now.

Register Now

Mental Health First Aid in the Workplace

Canadian workplaces are increasingly recognizing the importance of mental health support. The Mental Health Commission of Canada estimates that mental health problems cost Canadian employers approximately 51 billion dollars annually in lost productivity, absenteeism, and disability claims. Training designated employees in mental health first aid creates a more supportive work environment, reduces the stigma around seeking help, and enables early intervention before mental health problems escalate into crises.

Many Canadian employers now include Psychological First Aid certification as part of their workplace health and safety programs, alongside emergency preparedness training. Coast2Coast First Aid & Aquatics offers Psychological First Aid courses that can be delivered on-site at your workplace or at any of our training centres across Canada, including North York, Vaughan, Markham, and Newmarket.

Supporting Your Own Mental Health

Mental health first aiders must also care for their own wellbeing. Supporting someone through a mental health crisis can be emotionally draining, and it is important to recognize your own limits. Practice self-care after intense conversationsβ€”debrief with a trusted colleague or friend, take time for activities that recharge you, and do not hesitate to seek your own professional support if needed. Remember that you are not a therapist or counsellorβ€”your role is to provide initial support and connect the person with professional resources, not to treat the condition yourself.

Learning to manage stress and build resilience is a valuable complement to mental health first aid training. The stress management techniques taught in first aid and psychological first aid courses apply to both the people you help and to yourself.

Conclusion

Mental health first aid saves lives just as surely as CPR does. In a country where mental illness affects millions of people every year, the ability to recognize a crisis, have a supportive conversation, and connect someone with professional help is one of the most valuable skills anyone can develop. You do not need to be a mental health professional to make a differenceβ€”you just need to care enough to learn how to help.

A

About the Author

Ashkon Pourheidary, B.Sc. (Hons) β€” Co-Founder, Coast2Coast First Aid & Aquatics

Ashkon has been a certified First Aid and CPR instructor since 2011 and an Instructor Trainer since 2013. He is also a certified Emergency Medical Responder (EMR) instructor, Psychological First Aid instructor, and BLS (Basic Life Support) instructor. Ashkon graduated with honours with a Bachelor of Science in Neuroscience from the University of Toronto in 2016. As co-founder of Coast2Coast First Aid & Aquatics, he has helped grow the organization to over 30 locations across Canada and into the United States. Ashkon has served on the First Aid Council for the Canadian Red Cross. He spends his time coaching the team of over 100 instructors at Coast2Coast to ensure that students training at Coast2Coast locations receive the best training experience. Connect on LinkedIn

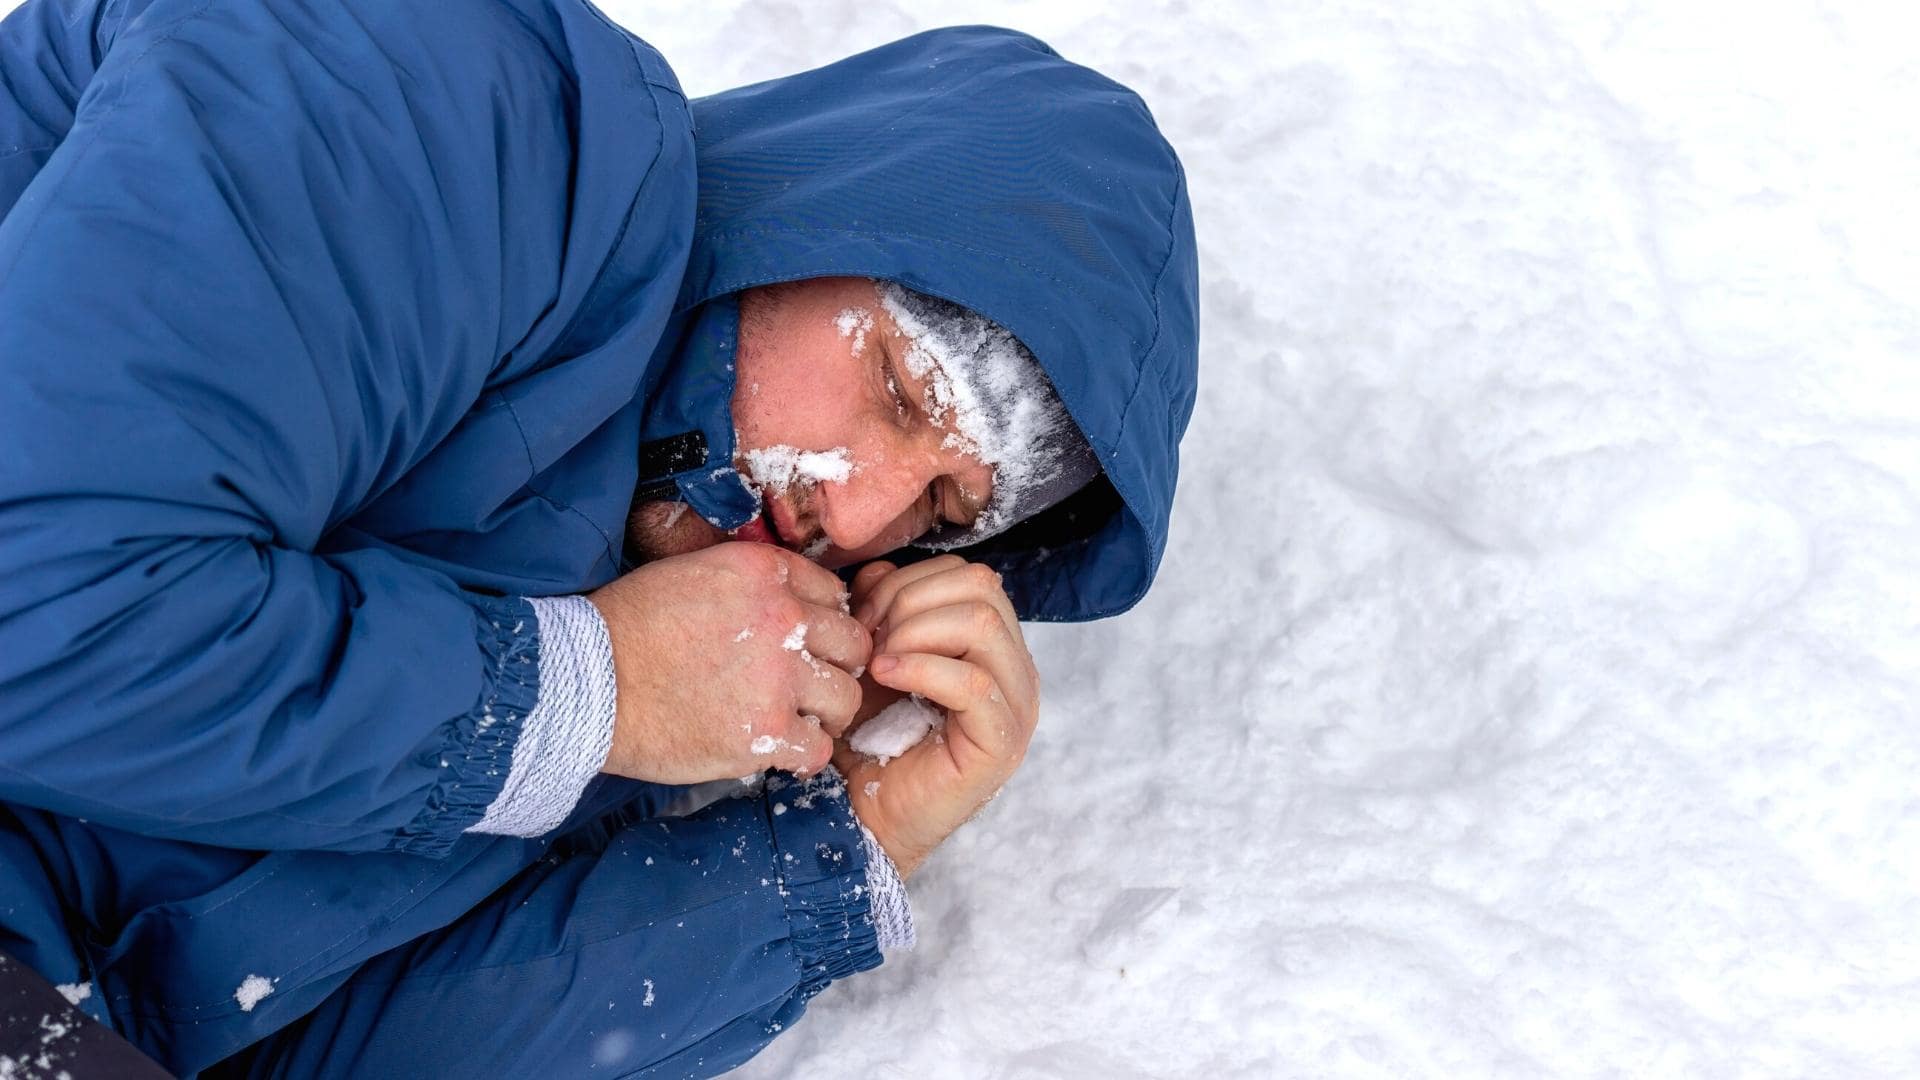
Heat Stroke First Aid: How to Recognize and Treat Heat-Related Emergencies

A woman suffering from dehydration

What Is Heat Stroke and Why Is It Dangerous?

Heat stroke is the most severe form of heat-related illness and a true medical emergency that can cause permanent organ damage or death within minutes if not treated immediately. It occurs when the body’s temperature regulation system fails and the core body temperature rises above 40 degrees Celsius (104 degrees Fahrenheit). Unlike milder heat-related conditions such as heat cramps or heat exhaustion, heat stroke represents a complete breakdown of the body’s ability to cool itself.

In Canada, heat stroke cases have been increasing due to more frequent and intense heat waves driven by climate change. The 2021 heat dome in British Columbia was a stark reminder that extreme heat is not just a concern for tropical climates. Urban areas across the country, from Toronto to Calgary to Ottawa, experience dangerous heat events during summer months, and Canadians who are unaccustomed to extreme heat are particularly vulnerable. Understanding how to recognize and respond to heat stroke is an essential first aid skill for everyone.

Heat Exhaustion vs. Heat Stroke: Knowing the Difference

Heat exhaustion and heat stroke are often confused, but distinguishing between them is critical because the first aid response differs significantly. Heat exhaustion is a serious but less dangerous condition that precedes heat stroke. If heat exhaustion is recognized and treated promptly, it can be reversed before it progresses to heat stroke.

A person with heat exhaustion will have heavy sweating, cool and pale or flushed skin, a fast but weak pulse, nausea or vomiting, muscle cramps, headache, dizziness, and fatigue. Critically, a person with heat exhaustion is still sweating and their mental status is normal or only mildly affected.

Heat stroke, by contrast, presents with hot, red, and dry skin (sweating has typically stopped because the cooling system has failed), a rapid and strong pulse, a body temperature above 40 degrees Celsius, confusion, slurred speech, irritability, altered consciousness or unresponsiveness, and possible seizures. The key distinguishing features are the cessation of sweating combined with altered mental status. If someone who has been in the heat suddenly stops sweating and becomes confused, agitated, or unresponsive, treat it as heat stroke and act immediately.

Heat Stroke Is a 911 Emergency

Learn to recognize the warning signs before it’s too late. Our Standard First Aid course covers all heat-related emergencies.

Find a Course Near You

First Aid for Heat Stroke: Step-by-Step Response

Heat stroke requires aggressive, immediate cooling. Every minute that body temperature remains elevated above 40 degrees Celsius increases the risk of permanent brain damage, organ failure, and death. Follow these steps without delay.

Step 1: Call 911 immediately. Heat stroke is a life-threatening emergency that requires hospital treatment. Do not wait to see if the person improvesβ€”call for help first and begin cooling while waiting for paramedics.

Step 2: Move the person to a cool environment. Get them out of the sun and into the shade, an air-conditioned building, or the coolest available area. Remove unnecessary clothing to expose as much skin as possible to facilitate cooling.

Step 3: Begin rapid cooling. The most effective cooling method is cold water immersionβ€”submerging the person in a tub or pool of cold water up to their neck. If immersion is not possible, apply cold water to the skin using a hose, bucket, or spray bottle, and fan the person vigorously to promote evaporative cooling. Apply ice packs or cold compresses to the neck, armpits, and groinβ€”areas where large blood vessels run close to the surface. Wrap the person in cold, wet sheets if other methods are unavailable.

Step 4: Monitor the person’s condition. Check their level of consciousness, breathing, and pulse regularly. If the person becomes unresponsive and stops breathing, begin CPR immediately. Heat stroke can cause cardiac arrest, and CPR training could save a life.

Step 5: Do not give fluids if the person is confused or unresponsive. Unlike heat exhaustion, where encouraging fluid intake is appropriate, a person with altered mental status from heat stroke is at risk of choking if given liquids. Fluid replacement for heat stroke patients is typically done intravenously by paramedics.

Who Is Most at Risk?

While heat stroke can affect anyone, certain populations face significantly higher risk. Older adults over 65 are vulnerable because the body’s temperature regulation becomes less efficient with age, and many seniors take medications that affect sweating or hydration. Infants and young children are at risk because their body temperature rises three to five times faster than adults, and they rely on caregivers to keep them cool and hydrated. Parents should pay close attention to keeping children safe during summer activities.

Outdoor workers in construction, agriculture, landscaping, and other physically demanding occupations face elevated risk due to prolonged heat exposure combined with physical exertion. Athletes, particularly those participating in endurance sports during hot weather, are also highly vulnerable. People with chronic medical conditions including heart disease, obesity, diabetes, and respiratory conditions are at increased risk, as are individuals taking certain medications such as diuretics, beta-blockers, and antihistamines that can impair the body’s cooling mechanisms.

Prevention: Staying Safe in the Heat

Preventing heat-related illness is far better than treating it. During hot weather, stay hydrated by drinking water regularly even if you do not feel thirstyβ€”by the time you feel thirst, you are already becoming dehydrated. Avoid strenuous activity during the hottest parts of the day, typically between 11 a.m. and 3 p.m. Wear lightweight, loose-fitting, light-coloured clothing that allows air circulation. Take frequent breaks in shaded or air-conditioned areas when working or exercising outdoors. Never leave children, pets, or vulnerable individuals in parked vehicles, even for a few minutesβ€”the interior temperature of a car can exceed 50 degrees Celsius in under 30 minutes.

Employers have a legal obligation to protect outdoor workers from heat-related illness. This includes providing access to water and shade, scheduling rest breaks, adjusting work intensity during heat warnings, and ensuring that supervisors and first aid trained employees can recognize and respond to heat emergencies. Coast2Coast’s corporate training programs include heat-related emergency modules tailored to workplace environments.

Register for CPR or First Aid Training

Register today for a CPR or First Aid training course at one of our 30+ locations across Canada and the U.S. Check out our facilities and book your spot now.

Register Now

First Aid for Heat Exhaustion

Since heat exhaustion precedes heat stroke, treating it promptly can prevent a life-threatening emergency. Move the person to a cool environment, have them lie down with legs elevated, remove excess clothing, cool them with wet cloths or fanning, and encourage them to sip cool water slowly. If symptoms do not improve within 15 to 20 minutes, or if the person’s condition worsens, treat the situation as heat stroke and call 911. Professionals at Coast2Coast’s Mississauga facility train students to recognize the progression from heat exhaustion to heat stroke so they can intervene at the right moment.

Why Heat Emergency Training Matters

Heat-related emergencies are increasing in frequency and severity across Canada. Climate projections indicate that heat waves will become longer, hotter, and more frequent in the coming decades. The Canadian population, particularly in urban centres, is not well-adapted to extreme heat, making education and preparedness essential. A certified first aid course teaches you to distinguish between heat exhaustion and heat stroke, apply the correct treatment for each condition, perform CPR if heat stroke leads to cardiac arrest, and prevent heat-related illness in your family, workplace, and community.

Coast2Coast First Aid & Aquatics offers Standard First Aid and CPR courses at training centres across Canada, including Toronto, London, Guelph, and Windsor. Do not wait for the next heat wave to realize you are unpreparedβ€”get trained today.

Conclusion

Heat stroke is a preventable and treatable condition, but only when bystanders know how to recognize it and act immediately. The difference between heat exhaustion and heat stroke can be the difference between a recoverable illness and a fatal emergency. Aggressive cooling, calling 911, and monitoring the person’s condition are the three pillars of heat stroke first aid. Combined with prevention strategies and formal first aid training, you can protect yourself, your family, and your community from one of summer’s most dangerous threats.

A

About the Author

Ashkon Pourheidary, B.Sc. (Hons) β€” Co-Founder, Coast2Coast First Aid & Aquatics

Ashkon has been a certified First Aid and CPR instructor since 2011 and an Instructor Trainer since 2013. He is also a certified Emergency Medical Responder (EMR) instructor, Psychological First Aid instructor, and BLS (Basic Life Support) instructor. Ashkon graduated with honours with a Bachelor of Science in Neuroscience from the University of Toronto in 2016. As co-founder of Coast2Coast First Aid & Aquatics, he has helped grow the organization to over 30 locations across Canada and into the United States. Ashkon has served on the First Aid Council for the Canadian Red Cross. He spends his time coaching the team of over 100 instructors at Coast2Coast to ensure that students training at Coast2Coast locations receive the best training experience. Connect on LinkedIn
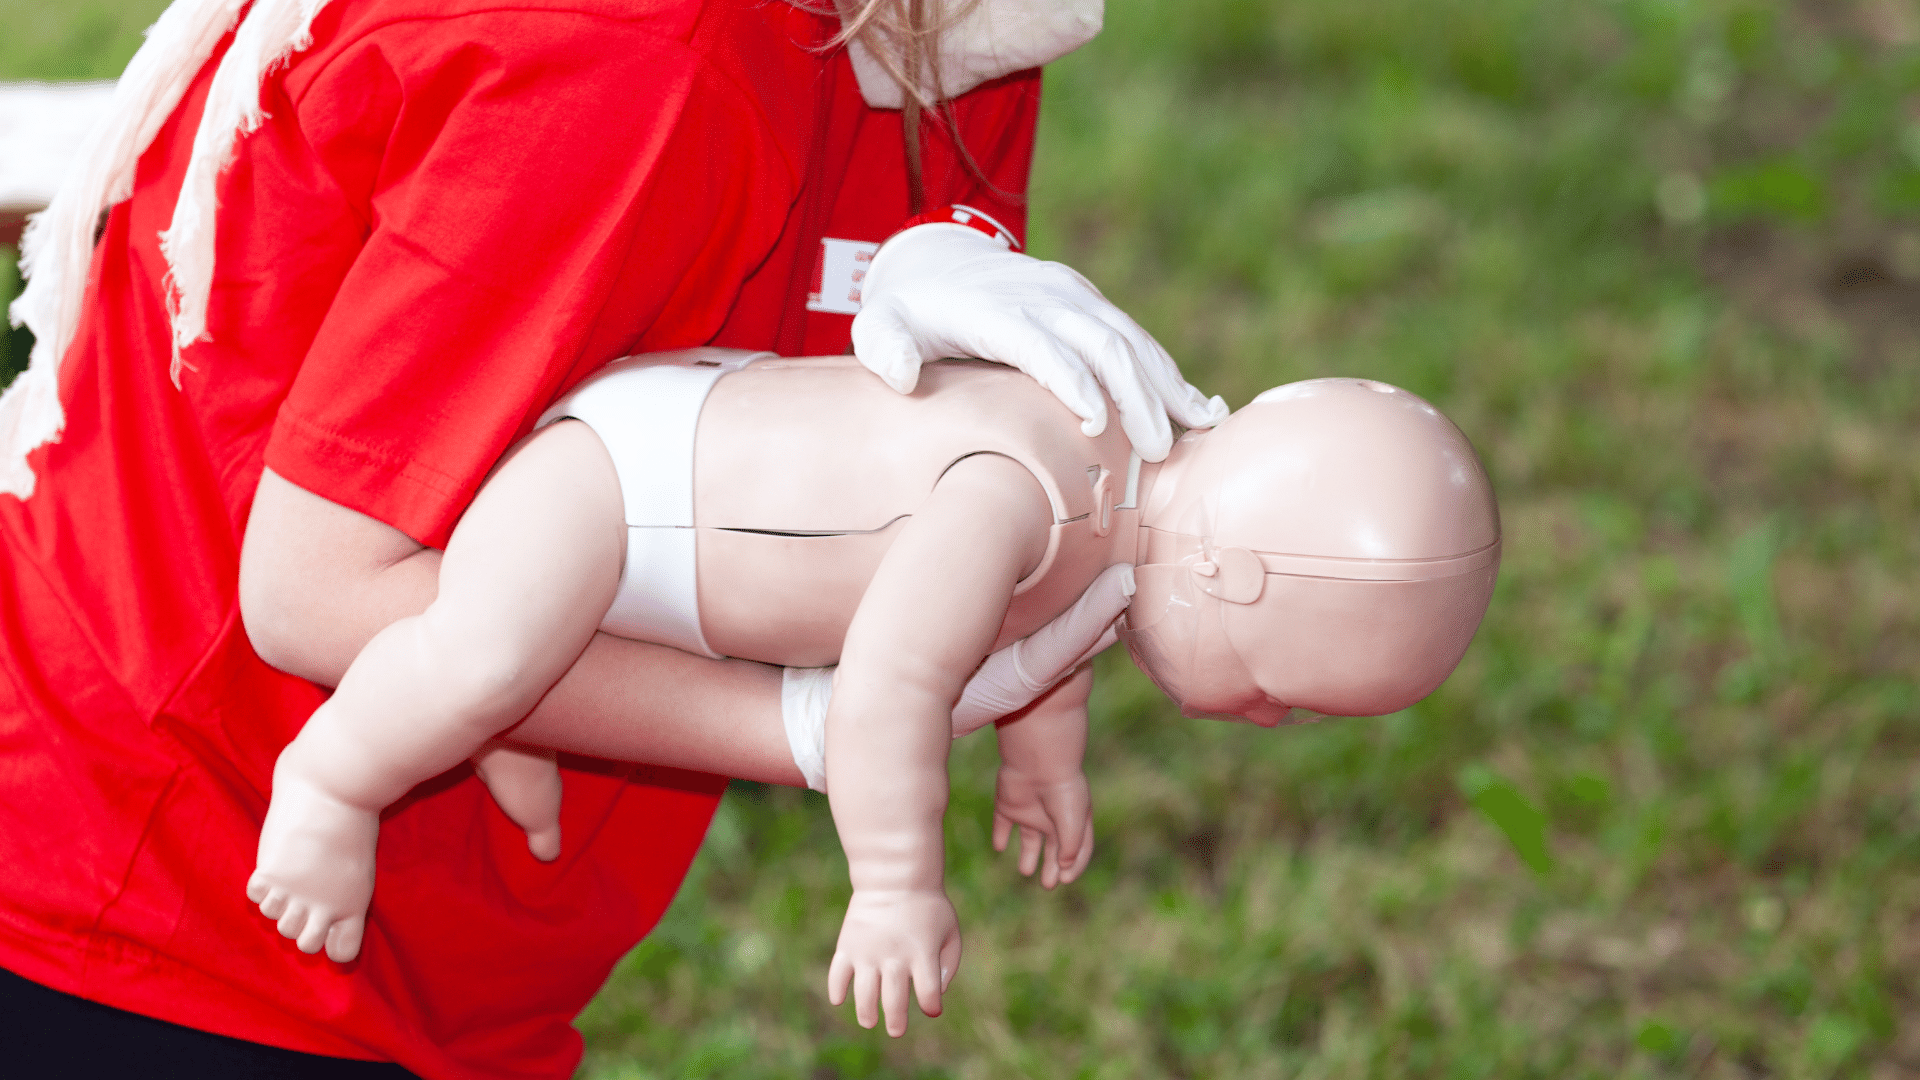
Hypothermia and Frostbite First Aid: How to Recognize and Treat Cold Weather Emergencies

Understanding Hypothermia and Frostbite

Canada’s harsh winters expose millions of people to dangerously cold temperatures every year. Whether you are commuting to work in January, enjoying winter sports, working outdoors, or simply walking your dog on a cold evening, the risk of cold-related emergencies is real and often underestimated. Hypothermia and frostbite are two of the most common cold weather emergencies, and both can become life-threatening if not recognized and treated promptly.

Hypothermia occurs when the body loses heat faster than it can produce it, causing the core body temperature to drop below 35 degrees Celsius (95 degrees Fahrenheit). Frostbite occurs when skin and underlying tissues freeze due to prolonged exposure to cold temperatures, particularly in extremities such as fingers, toes, ears, and the nose. While these conditions can occur independently, they frequently occur together, and a person with frostbite should always be assessed for hypothermia as well. Understanding how to handle these medical emergencies is essential for anyone living in or visiting cold climates.

Recognizing the Signs of Hypothermia

Hypothermia develops in stages, and early recognition is critical because treatment becomes more complex and survival less certain as the condition progresses. In mild hypothermia, the person will experience intense shivering, numbness in the hands and feet, difficulty with fine motor tasks like zipping a jacket or texting, slightly slurred speech, and mild confusion or impaired judgment. At this stage, the person is still conscious and able to help themselves with assistance.

As hypothermia progresses to moderate severity, shivering becomes violent and uncontrollable, the person may stumble or have difficulty walking, confusion worsens significantly, speech becomes notably slurred, the person may make poor decisions such as removing clothing (a paradoxical behaviour known as “paradoxical undressing”), and drowsiness sets in. This is a dangerous stage because the person may resist help or not recognize the severity of their situation.

In severe hypothermia, shivering stops entirelyβ€”this is a critical warning sign, not an improvement. The person may become semiconscious or unconscious, their breathing and pulse slow dramatically, the skin appears pale or blue, and muscles become rigid. Severe hypothermia is a true medical emergency requiring immediate professional intervention. Without treatment, cardiac arrest and death can follow.

Be Winter-Ready

Coast2Coast’s Standard First Aid course covers hypothermia, frostbite, and other environmental emergencies with hands-on scenarios. Find a course near you β†’

First Aid for Hypothermia

The primary goal of hypothermia first aid is to prevent further heat loss and begin gentle rewarming while waiting for emergency medical services. The approach differs depending on the severity of the hypothermia.

For mild to moderate hypothermia: Call 911 or arrange transportation to a medical facility. Move the person to a warm, sheltered environment as quickly as possible. Remove any wet clothing, as wet fabric accelerates heat loss by up to 25 times compared to dry clothing. Wrap the person in dry blankets, sleeping bags, or coats, covering the head and neck where significant heat loss occurs. Apply warm compresses or heating pads to the chest, neck, and groinβ€”areas with major blood vessels close to the surface. Never apply heat directly to the arms or legs, as this can cause cold blood from the extremities to rush back to the heart and potentially trigger cardiac arrest. Offer warm, sweet, non-alcoholic, non-caffeinated beverages if the person is fully conscious and able to swallow safely.

For severe hypothermia: Call 911 immediatelyβ€”this is a life-threatening emergency. Handle the person extremely gently. Rough handling of a severely hypothermic person can trigger fatal cardiac arrhythmias. Do not attempt active rewarming in the field for severe casesβ€”gentle passive rewarming (insulation and shelter) is appropriate, but aggressive rewarming should be left to hospital teams with the ability to warm the person from the inside out using heated intravenous fluids and other advanced techniques. If the person is not breathing, begin CPR. Be prepared for CPR to take significantly longer in hypothermia casesβ€”medical teams have successfully resuscitated hypothermic patients after prolonged resuscitation efforts.

Recognizing and Treating Frostbite

Frostbite also progresses through recognizable stages. Frostnip, the earliest stage, involves redness and a cold sensation in the affected skin, followed by numbness and tingling. Frostnip does not cause permanent damage and can be treated by simply rewarming the skin gently. Superficial frostbite causes the skin to feel warm despite being frozen, indicating that deeper tissue layers are being affected. The skin may appear white, grey, or yellowish, and fluid-filled blisters may develop after rewarming. Deep frostbite affects all layers of the skin and the underlying tissues, including muscles and bones. The skin becomes hard, waxy, and completely numb. After rewarming, large blood-filled blisters develop, and the tissue may turn black as it dies.

First aid for frostbite includes the following steps: Move the person to a warm environment. Protect the frostbitten area from further cold exposure and physical contact. Do not rub or massage frozen tissueβ€”this causes additional tissue damage. Do not break any blisters that form. If there is no risk of refreezing, rewarm the affected area by immersing it in warm water (37 to 39 degrees Celsius) for 20 to 30 minutes. The water should feel comfortably warm to an unaffected handβ€”never use hot water, as frostbitten skin cannot feel temperature and can be easily burned. Rewarming will be painful as sensation returnsβ€”this is a normal sign that blood flow is being restored.

Do not rewarm frostbitten tissue if there is any possibility that it will refreeze before reaching medical care. Refreezing after thawing causes dramatically worse tissue damage than the initial frostbite. If the person also shows signs of hypothermia, treat the hypothermia first, as it is the more immediately life-threatening condition. Residents of cities like Regina, Saskatoon, and Edmonton face particular risk during the winter months when temperatures can plummet well below minus 30 degrees Celsius with wind chill.

Register for CPR or First Aid Training

Register today for a CPR or First Aid training course at one of our 30+ locations across Canada and the U.S. Check out our facilities and book your spot now.

Register Now

Prevention: Staying Safe in Cold Weather

The best treatment for hypothermia and frostbite is prevention. Dress in layers using the layering systemβ€”a moisture-wicking base layer, an insulating middle layer, and a windproof and waterproof outer layer. Cover exposed skin, particularly the head, face, ears, and hands, as these areas are most vulnerable to frostbite. Avoid alcohol consumption before or during cold exposure, as alcohol dilates blood vessels and accelerates heat loss despite creating a temporary sensation of warmth. Stay dryβ€”wet clothing loses most of its insulating value. Carry extra dry clothing, an emergency blanket, and high-energy snacks when participating in winter outdoor activities.

For outdoor workers, employers have a legal responsibility under occupational health and safety regulations to provide warm-up breaks, adequate protective clothing, and first aid training for employees who work in cold environments. Supervisors should monitor workers for early signs of cold-related illness and ensure that warm shelter is accessible at all times.

Why First Aid Training Matters for Cold Weather Emergencies

Cold weather emergencies often occur in remote or outdoor settings where professional medical help may be delayed. In these situations, the actions of bystanders and companions in the first few minutes can determine whether the outcome is a minor inconvenience or a serious medical emergency. A certified first aid course teaches you to recognize the signs of hypothermia and frostbite at every stage, prioritize treatment correctly when multiple conditions are present, perform CPR modifications appropriate for hypothermic patients, and avoid common mistakes that can worsen the injury.

Coast2Coast First Aid & Aquatics includes comprehensive cold weather emergency modules in our Standard First Aid courses. With training centres across Canadaβ€”from Toronto and Ottawa to Calgary and Halifaxβ€”we make it easy to get certified before winter arrives. Do not wait until you are facing a cold weather emergency to wish you had been trained.

Conclusion

Hypothermia and frostbite are preventable and treatable conditions, but only when you know what to look for and how to respond. Early recognition, proper first aid, and prompt medical attention can prevent permanent tissue damage and save lives. As a Canadian, cold weather is part of lifeβ€”make sure your first aid knowledge is as prepared for winter as your wardrobe is.

A

About the Author

Ashkon Pourheidary, B.Sc. (Hons) β€” Co-Founder, Coast2Coast First Aid & Aquatics

Ashkon has been a certified First Aid and CPR instructor since 2011 and an Instructor Trainer since 2013. He is also a certified Emergency Medical Responder (EMR) instructor, Psychological First Aid instructor, and BLS (Basic Life Support) instructor. Ashkon graduated with honours with a Bachelor of Science in Neuroscience from the University of Toronto in 2016. As co-founder of Coast2Coast First Aid & Aquatics, he has helped grow the organization to over 30 locations across Canada and into the United States. Ashkon has served on the First Aid Council for the Canadian Red Cross. He spends his time coaching the team of over 100 instructors at Coast2Coast to ensure that students training at Coast2Coast locations receive the best training experience. Connect on LinkedIn

Infant CPR and Choking: A Parent’s Guide to Saving Your Baby’s Life

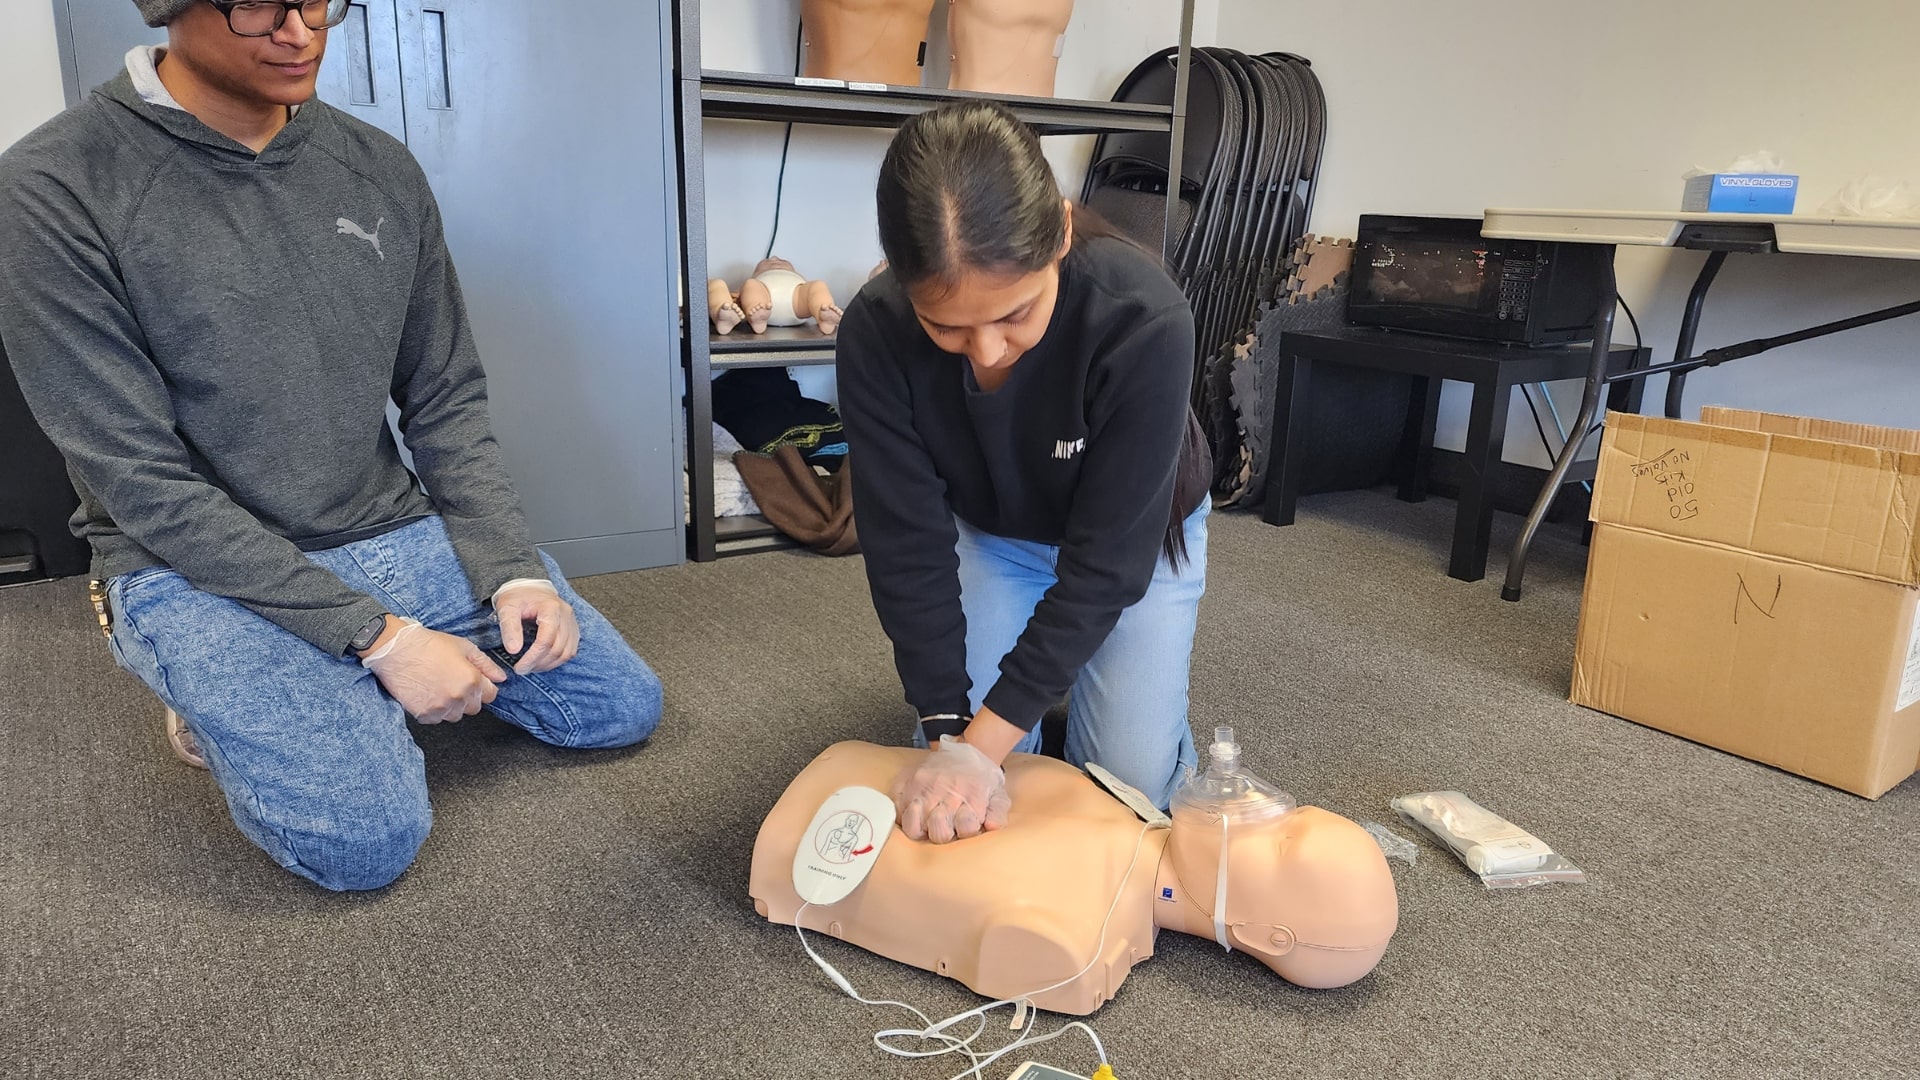
back blows on a choking baby

Why Every Parent and Caregiver Needs Infant CPR Training

The thought of an infant choking or becoming unresponsive is every parent’s worst nightmare. Yet the reality is that choking is one of the leading causes of injury and death among children under the age of four in Canada. Infants are particularly vulnerable because they explore the world by putting objects in their mouths, their airways are significantly smaller than those of older children or adults, and they have not yet developed the coordination to chew food thoroughly.

Knowing how to perform CPR on an infant and how to clear a choking infant’s airway are two of the most critical first aid skills a parent, grandparent, babysitter, or childcare professional can possess. Unlike adult CPR, infant CPR involves different hand positions, compression depths, and techniques that must be learned and practiced specifically for babies under one year of age.

How Infant CPR Differs from Adult CPR

Infant CPR follows the same general principles as adult CPRβ€”maintain circulation and oxygenation until professional help arrivesβ€”but the technique is significantly different to account for the infant’s small body and fragile physiology.

For compression hand position, adult CPR uses the heel of both hands placed on the centre of the chest. Infant CPR uses only two fingersβ€”the index and middle fingersβ€”placed just below the nipple line on the centre of the breastbone. For healthcare providers performing two-rescuer infant CPR, the two-thumb encircling technique is preferred, where both thumbs press on the sternum while the hands encircle the infant’s torso.

Compression depth for adults is at least 5 centimetres, while infant compressions should depress the chest approximately 4 centimetres, roughly one-third of the chest depth. The compression rate remains the same at 100 to 120 compressions per minute for both adults and infants. The compression-to-breath ratio for single-rescuer infant CPR is 30 compressions to 2 breaths, identical to the adult ratio.

Rescue breaths for infants are delivered differently as well. Rather than tilting the head back significantly as you would for an adult, the infant’s head should be placed in a neutral position or only slightly tilted. Over-extending an infant’s neck can actually close the airway rather than open it. Breaths should be gentle puffsβ€”just enough to make the chest visibly riseβ€”rather than the fuller breaths given to adults. For infant rescue breaths, cover both the baby’s nose and mouth with your mouth to create a proper seal.

Did You Know?

Hands-on practice is the only way to learn proper infant CPR technique. Online-only courses cannot teach you the correct compression depth and hand position on an infant mannequin.

Book a Hands-On Course β†’

Step-by-Step: How to Perform Infant CPR

If you find an infant who is unresponsive and not breathing normally, follow these steps immediately.

Step 1: Check for responsiveness. Tap the bottom of the infant’s foot and shout their name. Never shake an infant, as this can cause serious brain injury. If the infant does not respond, they are unresponsive.

Step 2: Call 911. If you are alone, perform two minutes of CPR (approximately five cycles of 30 compressions and 2 breaths) before calling 911. If someone else is present, have them call 911 immediately while you begin CPR. This “CPR first” approach for infants differs from the adult protocol because the most common cause of cardiac arrest in infants is a breathing emergency rather than a heart problem.

Step 3: Place the infant on a firm, flat surface. A table, floor, or firm mattress works well. Ensure the surface is stable so your compressions are effective.

Step 4: Open the airway. Place one hand on the infant’s forehead and gently tilt the head into a neutral or slightly extended position. Lift the chin with the fingertips of your other hand. Do not press on the soft tissue under the chin, as this can obstruct the airway.

Step 5: Check for breathing. Look, listen, and feel for normal breathing for no more than 10 seconds. Occasional gasps are not normal breathingβ€”if the infant is only gasping, treat them as not breathing.

Step 6: Give 2 rescue breaths. Cover the infant’s mouth and nose with your mouth. Give two gentle puffs of air, each lasting about one second, watching for the chest to rise. If the chest does not rise, reposition the head and try again.

Step 7: Begin chest compressions. Place two fingers on the centre of the infant’s chest, just below the nipple line. Press down approximately 4 centimetres (one-third of the chest depth) at a rate of 100 to 120 compressions per minute. Allow the chest to fully recoil between each compression.

Step 8: Continue cycles of 30:2. Alternate 30 compressions with 2 rescue breaths. Continue CPR until the infant begins breathing on their own, emergency medical services arrive and take over, an AED becomes available and advises a shock, or you become too physically exhausted to continue. Instructors at Coast2Coast’s Brampton facility emphasize that high-quality compressions are more important than perfect techniqueβ€”push hard, push fast, and do not stop.

How to Help a Choking Infant

Choking in infants requires a different approach than the abdominal thrusts (Heimlich manoeuvre) used for adults and older children. Because of the infant’s size and the risk of internal organ damage, back blows and chest thrusts are used instead.

Step 1: Confirm the infant is choking. A choking infant may be unable to cry, cough, or breathe. Their skin may turn blue or dusky. If the infant can cough forcefully, encourage them to keep coughingβ€”do not interfere. Only intervene if the infant cannot cough, cry, or breathe effectively.

Step 2: Position the infant face-down on your forearm. Support the infant’s head and jaw with your hand, keeping the head lower than the chest. Rest your forearm on your thigh for support.

Step 3: Deliver 5 back blows. Using the heel of your free hand, deliver five firm back blows between the infant’s shoulder blades. Each blow should be a distinct, forceful strike designed to dislodge the object.

Step 4: Turn the infant face-up. Supporting the head and neck, carefully turn the infant onto their back on your other forearm, again keeping the head lower than the chest.

Step 5: Deliver 5 chest thrusts. Place two fingers on the centre of the chest, just below the nipple line (the same position used for infant CPR compressions). Deliver five quick chest thrusts, pressing down approximately 4 centimetres each time.

Step 6: Repeat until the object is dislodged. Continue alternating five back blows and five chest thrusts until the object comes out, the infant begins to cry or breathe, or the infant becomes unresponsive. If the infant becomes unresponsive, immediately begin infant CPR and call 911 if not already done.

Common Choking Hazards for Infants

Prevention is always the best strategy. Understanding what commonly causes infant choking helps parents and caregivers create a safer environment. Food items that frequently cause choking in infants include hot dogs and sausages (particularly when cut into round coins rather than lengthwise strips), whole grapes, raw carrots, popcorn, nuts and seeds, chunks of meat or cheese, hard candy, chewing gum, and spoonfuls of peanut butter.

Non-food items that pose choking risks include small toy parts, buttons, coins, batteries (particularly button batteries, which also pose a chemical burn risk), balloons, pen caps, and small balls. The general guideline is that any object small enough to fit through a toilet paper tube is a potential choking hazard for an infant or toddler. Learning about child safety through a comprehensive first aid course helps parents identify and mitigate these risks before an emergency occurs.

Register for CPR or First Aid Training

Register today for a CPR or First Aid training course at one of our 30+ locations across Canada and the U.S. Check out our facilities and book your spot now.

Register Now

When to Seek Formal Training

Reading about infant CPR and choking response is a valuable starting point, but it is not a substitute for hands-on training with qualified instructors. The physical techniques involved in infant CPRβ€”compression depth, hand position, breath volume, and head positioningβ€”must be practiced on a mannequin under expert supervision to develop true competency and confidence.

Coast2Coast First Aid & Aquatics offers Standard First Aid and CPR Level C courses that include dedicated modules on infant and child emergencies, choking response for all age groups, and AED operation. These courses are available at over 30 locations across Canadaβ€”including Hamilton, Kitchener, Edmonton, and Oakvilleβ€”and in the United States at our Los Angeles location. New parents, grandparents, babysitters, daycare workers, and anyone who cares for infants or young children should prioritize getting certified.

Conclusion

Infant CPR and choking response are skills that every parent and caregiver should learn before they ever need to use them. The techniques differ significantly from adult CPR, and proper training ensures that you can act confidently and correctly in the critical minutes before paramedics arrive. Whether your baby is six weeks old or ten months old, whether you are a first-time parent or an experienced grandparent, the time to learn these skills is nowβ€”not during an emergency.

A

About the Author

Ashkon Pourheidary, B.Sc. (Hons) β€” Co-Founder, Coast2Coast First Aid & Aquatics

Ashkon has been a certified First Aid and CPR instructor since 2011 and an Instructor Trainer since 2013. He is also a certified Emergency Medical Responder (EMR) instructor, Psychological First Aid instructor, and BLS (Basic Life Support) instructor. Ashkon graduated with honours with a Bachelor of Science in Neuroscience from the University of Toronto in 2016. As co-founder of Coast2Coast First Aid & Aquatics, he has helped grow the organization to over 30 locations across Canada and into the United States. Ashkon has served on the First Aid Council for the Canadian Red Cross. He spends his time coaching the team of over 100 instructors at Coast2Coast to ensure that students training at Coast2Coast locations receive the best training experience. Connect on LinkedIn
How to Use an EpiPen: A Step-by-Step First Aid Guide

What Is an EpiPen and Why Does It Matter?

An EpiPen is a brand-name auto-injector that delivers a pre-measured dose of epinephrine (adrenaline) to a person experiencing a severe allergic reaction known as anaphylaxis. Anaphylaxis is a life-threatening emergency that can cause the airway to swell shut, blood pressure to drop dangerously low, and the body to go into shock within minutes. Without prompt treatment with epinephrine, anaphylaxis can be fatal.

Despite the widespread availability of EpiPens in Canadian schools, workplaces, and homes, many people have never been trained to use one. Studies consistently show that bystanders hesitate to administer epinephrine because they are unsure of the correct technique, afraid of causing harm, or do not recognize the signs of anaphylaxis in time. This hesitation costs lives every year. Understanding how to use an EpiPen correctly is one of the most important first aid skills anyone can learn.

Recognizing Anaphylaxis: When to Use an EpiPen

Before you can use an EpiPen, you need to know when to use it. Anaphylaxis typically develops rapidly after exposure to a trigger allergen. The most common triggers include food allergens such as peanuts, tree nuts, shellfish, milk, and eggs, as well as insect stings from bees and wasps, certain medications including antibiotics and non-steroidal anti-inflammatory drugs, and latex.

The signs and symptoms of anaphylaxis can appear within seconds to minutes of exposure and may include difficulty breathing or wheezing, swelling of the throat, tongue, or lips, a sudden drop in blood pressure causing dizziness or fainting, widespread hives or skin flushing, nausea, vomiting, or abdominal cramps, a feeling of impending doom, and rapid or weak pulse. If you observe two or more body systems being affected simultaneouslyβ€”for example, skin symptoms combined with breathing difficultyβ€”treat the situation as anaphylaxis and prepare to use the EpiPen immediately.

Step-by-Step Guide: How to Use an EpiPen

Using an EpiPen is designed to be straightforward, even for people with no medical training. The device is engineered for emergency use by laypeople. Follow these steps carefully to administer epinephrine correctly.

Step 1: Call 911 immediately. Even if you plan to administer the EpiPen right away, call emergency medical services first or have someone else call while you prepare the injector. Epinephrine provides temporary relief, and the person will need professional medical emergency care afterward.

Step 2: Remove the EpiPen from its carrier tube. Flip open the cap of the carrier tube and slide the auto-injector out. Do not remove the blue safety cap until you are ready to inject.

Step 3: Grip the EpiPen firmly. Hold the EpiPen in your dominant hand with your fist wrapped around the middle of the device. The orange tip should point downward, and the blue safety cap should face upward. Remember the phrase “blue to the sky, orange to the thigh.”

Step 4: Remove the blue safety cap. Pull the blue safety cap straight off with your other hand. Do not bend or twist it. Do not touch the orange tip, as this is where the needle deploys.

Step 5: Inject into the outer mid-thigh. Swing the orange tip firmly into the outer mid-thigh at a 90-degree angle. You can inject through clothingβ€”there is no need to remove pants or jeans. The injection site should be on the outer portion of the thigh, roughly halfway between the hip and the knee. Press firmly until you hear or feel a click, which indicates the needle has deployed and the epinephrine is being delivered.

Step 6: Hold in place for 10 seconds. Keep the EpiPen pressed firmly against the thigh for a full 10 seconds to ensure the complete dose is delivered. Count slowly to ten before removing the device.

Step 7: Remove and massage the injection site. Pull the EpiPen straight out from the thigh. The orange tip will extend to cover the needle automatically. Gently massage the injection site for 10 seconds to help the medication absorb into the bloodstream more quickly.

Step 8: Note the time and monitor the person. Record the time of the injection. Continue monitoring the person’s condition until emergency medical services arrive. If symptoms do not improve or worsen after 5 to 15 minutes, a second EpiPen may be administered if available. Place the person in a comfortable positionβ€”if they are having difficulty breathing, allow them to sit upright. If they are feeling faint or dizzy, lay them down and elevate their legs to manage shock.

Register for CPR or First Aid Training

Register today for a CPR or First Aid training course at one of our 30+ locations across Canada and the U.S. Check out our facilities and book your spot now.

Register Now

Common Mistakes When Using an EpiPen

Even with clear instructions, people make preventable errors when using an EpiPen under the stress of a real emergency. Being aware of these common mistakes will help you avoid them when it matters most.

The most frequent error is injecting into the wrong location. The EpiPen should always be injected into the outer mid-thighβ€”never into the buttocks, arms, hands, feet, or veins. Injecting into the wrong area can reduce the medication’s effectiveness or cause serious tissue damage, particularly if injected into the fingers or hands, where reduced blood flow can lead to tissue death.

Another common mistake is not holding the device in place long enough. Many people instinctively pull the EpiPen away immediately after feeling the click, but the medication requires a full 10 seconds to fully deploy. Removing it too soon means the person receives only a partial dose.

Some people accidentally inject themselves in the thumb by placing their thumb over the orange tip while trying to remove the blue safety cap. Always keep your fingers and thumbs clear of both ends of the device. If you accidentally inject yourself, seek medical attention immediately, as epinephrine in the thumb can restrict blood flow to the digit.

Finally, many people do not call 911 before or immediately after using the EpiPen. Epinephrine’s effects are temporaryβ€”typically lasting 15 to 20 minutesβ€”and the allergic reaction can return once the medication wears off. This rebound reaction, known as a biphasic reaction, occurs in up to 20 percent of anaphylaxis cases. Hospital monitoring for at least four to six hours after an episode is strongly recommended by the Canadian medical community.

EpiPen Storage and Maintenance

An EpiPen is only useful in an emergency if it is properly stored and not expired. Epinephrine degrades over time and when exposed to extreme temperatures or direct sunlight. Store your EpiPen at room temperature between 15 and 25 degrees Celsius, away from direct heat and sunlight. Do not refrigerate or freeze the device, and do not store it in a car during summer or winter months when temperatures can reach extremes.

Check the expiration date on your EpiPen regularly. In Canada, EpiPens typically have a shelf life of 12 to 18 months from the date of manufacture. Before each use, look through the viewing window on the device to verify that the liquid inside is clear and colourless. If the solution appears discoloured, cloudy, or contains particles, the EpiPen should be replaced. Training courses offered at Coast2Coast’s Toronto training centre include hands-on practice with EpiPen trainers so you can build confidence without the pressure of a real emergency.

Who Should Carry an EpiPen?

Anyone who has been diagnosed with a severe allergy that puts them at risk of anaphylaxis should carry at least two EpiPens at all times. Carrying two devices is recommended because a single dose may not be sufficient to fully reverse a severe reaction, and a second dose may be needed if symptoms return before emergency services arrive.

Parents of children with known allergies should ensure that EpiPens are available at home, at school, and during all activities outside the home. In many Canadian provinces, schools are required to have anaphylaxis policies in place, and teachers and staff should be trained in EpiPen administration. Workplaces that handle food, operate in outdoor environments, or employ individuals with known allergies should also maintain accessible EpiPens and ensure that trained first aiders are available on site.

Even if you do not have a personal allergy, learning to use an EpiPen is valuable because you may be the only trained person present when a coworker, friend, family member, or stranger experiences anaphylaxis. First aid and CPR courses in Mississauga and across Canada include comprehensive allergy and anaphylaxis training as part of the standard curriculum.

Canadian Laws Protecting Good Samaritans Who Use an EpiPen

Some bystanders hesitate to use an EpiPen on another person because they fear legal consequences if something goes wrong. In Canada, Good Samaritan legislation exists in every province and territory to protect individuals who provide emergency assistance in good faith. As long as you act reasonably and within the scope of your training, you are legally protected when administering an EpiPen to a person experiencing anaphylaxis.

This legal protection reinforces the importance of completing a certified first aid course. Choosing a reputable training provider like Coast2Coast First Aid & Aquatics ensures that your training is recognized by employers, regulatory bodies, and the legal system. With training centres available in Calgary, Ottawa, and Los Angeles, getting certified has never been more accessible.

Ready to learn life-saving skills? Coast2Coast’s Standard First Aid and CPR courses cover EpiPen administration, anaphylaxis response, and dozens of other emergency scenarios. Find a course near you β†’

Conclusion

Knowing how to use an EpiPen can mean the difference between life and death during an anaphylactic emergency. The steps are simpleβ€”remove, grip, pull the safety cap, inject into the outer thigh, hold for 10 seconds, and call 911β€”but they must be performed quickly and confidently under pressure. Regular first aid training builds that confidence and ensures your skills remain sharp when seconds count. Whether you are a parent, teacher, coach, healthcare professional, or simply someone who wants to be prepared, mastering EpiPen use is a critical part of your first aid toolkit.

A

About the Author

Ashkon Pourheidary, B.Sc. (Hons) β€” Co-Founder, Coast2Coast First Aid & Aquatics

Ashkon has been a certified First Aid and CPR instructor since 2011 and an Instructor Trainer since 2013. He is also a certified Emergency Medical Responder (EMR) instructor, Psychological First Aid instructor, and BLS (Basic Life Support) instructor. Ashkon graduated with honours with a Bachelor of Science in Neuroscience from the University of Toronto in 2016. As co-founder of Coast2Coast First Aid & Aquatics, he has helped grow the organization to over 30 locations across Canada and into the United States. Ashkon has served on the First Aid Council for the Canadian Red Cross. He spends his time coaching the team of over 100 instructors at Coast2Coast to ensure that students training at Coast2Coast locations receive the best training experience. Connect on LinkedIn
BLS vs CPR: What’s the Difference and Which Course Do You Need?

difference between bls cpr

Life-threatening emergencies can happen at any time, and it’s crucial to know how to respond quickly and effectively. If you’re not trained in emergency response, terms like “BLS” and “CPR” might sound confusing and even interchangeable. However, understanding the difference between these two life-saving certifications will help you be prepared and meet workplace requirements.

Continue reading

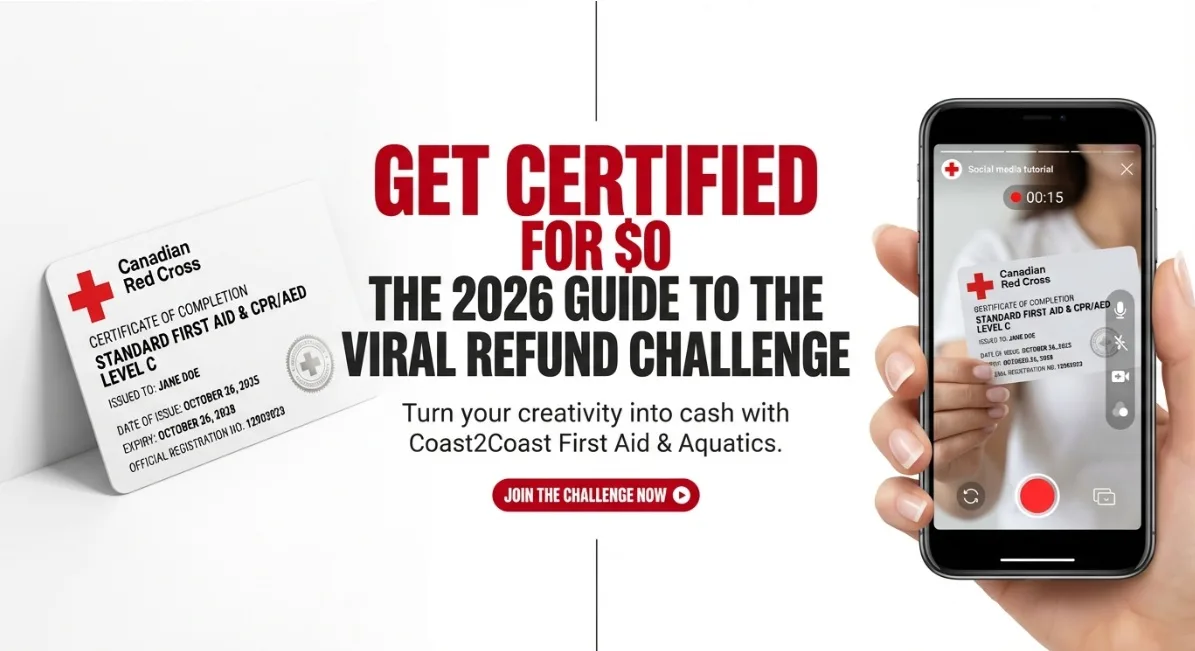
Free BLS, First Aid & CPR Course 2026 Guide to Get Certified for $0

  • Executive Summary: The Deal at a Glance
  • The Offer: Register for a course, film your experience, and post it online.

  • The Goal: Hit 5,000 views on Instagram, TikTok OR 2,000 views on YouTube.

  • The Reward: A FULL REFUND of your course fee.

  • Eligible Courses: Standard First Aid, Emergency First Aid, CPR Level C, and Basic Life Support (BLS).

  • Locations: Toronto, Brampton, Ottawa, Calgary, Edmonton, and more.

  • Terms and conditions apply. Views must be organic. Limited time offer.

free first aid bls course at a glance

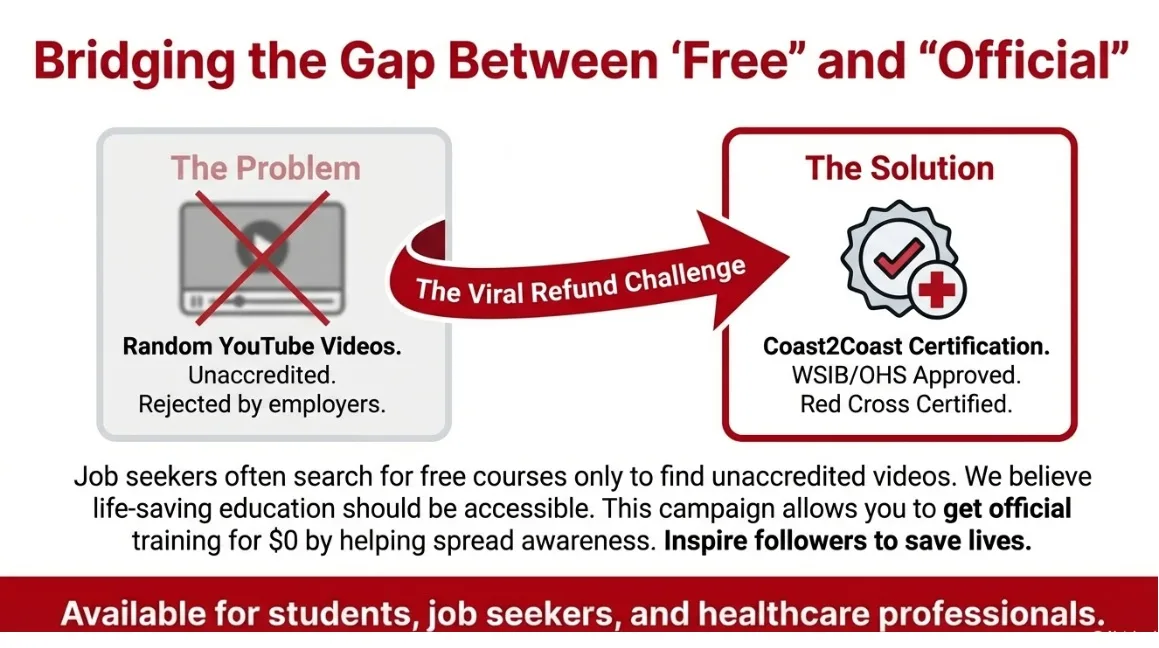
We know that for students, job seekers, and healthcare professionals, training costs can add up. You are constantly searching for a free first aid and cpr course or a free bls course near me, only to find that most “free” options online are just informational videos that don’t offer the official WSIB-approved certification you need to actually get hired.

At Coast2Coast First Aid & Aquatics, we believe life-saving education should be accessible to everyone. That is why we are launching our biggest student-creator campaign ever. We are giving you the chance to turn your creativity into cashβ€”literally.

Here is your complete guide on how to get official Red Cross training for $0, plus everything you need to know about choosing the right course.

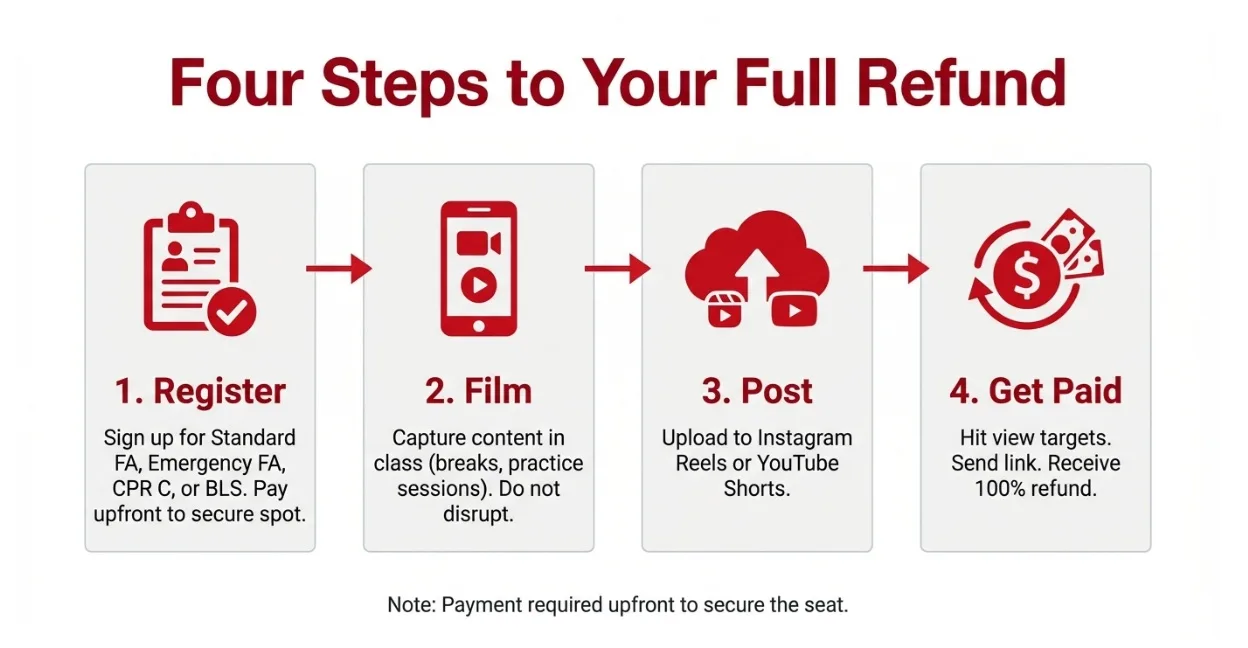
How It Works: 4 Steps to a Free Course

You don’t need to be a professional influencer to qualify. You just need a smartphone and a little creativity during your training session.

1. Register for Your Course

Sign up for any of our eligible training sessions across Ontario or Alberta. You pay for the course upfront to secure your spot.

2. Film Your Experience

During your class (during break times or practice sessions, ensuring you don’t disrupt the class), capture content!

  • Film yourself practicing CPR on a mannequin.

  • Show off your bandaging skills.

  • Share a “Day in the Life” of getting certified.

3. Post & Tag Us

Upload your video to Instagram Reels, TikTok or YouTube Shorts.

4. Hit the Views & Get Paid

If your video hits 5,000 Views on Instagram, TikTok OR 2,000 Views on YouTube, email us at marketing [at] c2cfirstaidaquatics.com and mention that you have took part in this challenge and you have hit the mark by sending us the link! Once verified, we will issue a full refund to your original payment method.

(Terms and conditions apply. Views must be organic. Offer valid for a limited time.)

free first aid bls course steps

Why Are We Doing This?

We want to spread awareness about the importance of CPR and First Aid. When you search for a first aid and cpr course free, you often find non-accredited videos that won’t help you get a job. We want to change that.

By sharing your journey, you aren’t just getting a free cpr course; you are inspiring your friends and followers to learn skills that save lives.

Wait, Which Course Do I Need? (The Ultimate Guide)

Before you sign up and start filming, you need to make sure you are taking the right course. Choosing the wrong certification is the most common mistake students make.

Here is a simple breakdown to help you pick the perfect training for your needs.

1. Standard First Aid & CPR/AED Level C

  • Best For: Construction workers, daycare staff, lifeguards, and general workplace compliance.

  • What It Covers: This is our most comprehensive course. It covers everything from spinal injuries and bone fractures to severe bleeding and CPR for adults, children, and infants.

  • Validity: 3 Years.

2. Emergency First Aid & CPR/AED Level C

  • Best For: Security guards, fitness instructors, government employees, or those needing a basic overview.

  • What It Covers: A shorter, 1-day course focusing on immediate life-saving interventions like choking, CPR, and using an AED.

  • Validity: 3 Years.

3. Basic Life Support (BLS)

  • Best For: Healthcare professionals (Nurses, Dentists, Paramedics, Firefighters).

  • What It Covers: This is a high-intensity, fast-paced course that focuses on high-performance CPR, trauma response, and team dynamics in a clinical setting.

  • Validity: 1 Year (Annual renewal is required).

The “Blended Learning” Advantage

If you are looking for an online cpr course free of classroom time, “Blended Learning” is the closest you can get while still remaining certified.

How It Works:

  1. Online Theory: You complete the “textbook” portion of the course online, at your own pace, from the comfort of your home.

  2. In-Class Skills: You attend a shorter, focused in-person session to practice hands-on skills.

Why Students Love It:

  • Flexible: Study late at night or on weekends.

  • Efficient: Cut your classroom time in half.

  • WSIB & OHS Approved: Yes, it is fully recognized by employers in Ontario and Alberta.

Tips to Go Viral (and Get Your Refund)

Want to hit those 5,000 views fast to secure your refund? Here are some content ideas that perform well on social media:

  • The “Stayin’ Alive” Challenge: Perform CPR compressions to the beat of the famous Bee Gees song.

  • Nursing Student Vlogs: Show the reality of your BLS course online free study session vs. the intense in-class practical training.

  • “Did You Know?”: Share a surprising fact you learned from your Coast2Coast instructor (e.g., “I bet you didn’t know this about using an AED…”).

  • Local Vibes: Tag your location! Whether it’s First Aid in Vaughan, CPR in London, or Training in Mississauga, local content trends faster.

(Terms and conditions apply. Views must be organic. Offer valid for a limited time.)

free first aid bls course gap

Frequently Asked Questions (FAQ)

We know you have questions. Here are the answers to the most common queries about our courses and the refund offer.

About the “Free Course” Offer

1. Is this really a free first aid and cpr course with certificate? Yes! You pay upfront to reserve your seat and receive your official Canadian Red Cross certificate. However, if you meet the social media view requirements, we refund 100% of your fee, effectively making it a free cpr course with certificate.

2. Can I find a free bls course near me? Official BLS (Basic Life Support) training usually requires payment because it is a professional-level certification. However, our campaign applies to BLS courses too! If you are a nursing student looking for a free bls course, this challenge is your best route to getting certified for free.

3. Does this apply to the online cpr course free portion? Our courses are “Blended Learning,” meaning you do half online and half in-class. The refund covers the entire cost of the training, including the online access and the in-person workshop.

4. I am looking for a free cpr refresher course. Does this count? Absolutely. Whether it is a full certification or a cpr refresher course online free of charge (via refund), the challenge applies as long as you are registered in a Coast2Coast session.

5. Is this available in my city? This offer is valid at all Coast2Coast locations. So whether you are searching for a free cpr course Toronto, free cpr course Ottawa, free cpr course Calgary, or a free cpr course Belleville, you are eligible to participate!

About Certification & Validity

6. Is the certificate WSIB approved? Yes. Unlike many generic online free cpr course options you find on the web, our training is fully WSIB (Ontario) and OHS (Alberta) approved.

7. How long is my First Aid certificate valid? For Standard and Emergency First Aid, your certificate is valid for 3 years. If you take Basic Life Support (BLS), you must renew it every 1 year.

8. Can I recertify instead of taking the full course? Yes! If your current Standard First Aid certificate has not expired yet, you can take a shorter Recertification Course. This saves you time and money.

9. Can I do the cpr course online free without attending class? No. To get the official certificate, you must attend the in-class skills session. Purely online courses are rarely accepted by employers in Canada.

10. What if I lose my certificate? All Canadian Red Cross certificates are digital. You can access your profile online at any time to download a new copy for free.

Logistics & Details

11. Do I need to bring my own equipment? No. We provide all mannequins, AED trainers, and first aid supplies.

12. Can I get a free cpr course with certificate if I am not a student? Yes! This offer is open to everyoneβ€”students, parents, teachers, and professionals.

13. What if I am taking the course for a group? The refund applies to the individual who posts the content. If you book for a group, each person can post their own video to try and earn their own refund.

14. Does the bls course free offer include the manual? The digital eBook is included in your course registration.

15. How long does the refund take? Once you email us your video link and we verify the views, the refund is typically processed within 5-10 business days.

16. Can I combine this with other promo codes? Since the reward is a full refund, it cannot be combined with other discounts. You are getting the whole course for free!

17. What hashtags should I use to help it go viral? We recommend using local tags like #TorontoLife, #CalgaryViews, or #StudentLife alongside our official tag #Coast2CoastFirstAid.

18. Where do I send my video link? Send your booking ID and the link to your viral video to our marketing team email (listed on our contact page) with the subject line “Go Viral Refund Claim.”

19. What if I don’t hit the view count? You still walk away with a valuable, federally recognized certification that boosts your resume. You have nothing to lose!

20. Can I post on TikTok instead? Currently, our tracking is set up for Instagram Reels, TikTok and YouTube Shorts as they allow for the best reach verification. However, feel free to cross-post to TikTok for extra exposure!

Ready to Go Viral?

Don’t settle for an unaccredited online free cpr course that your employer won’t accept. Get the Gold Standard of Red Cross training, have fun filming it, and let us foot the bill.

Find Your Course & Register Now

(Terms and conditions apply. Views must be organic. Offer valid for a limited time.)