What is the Coast2Coast Mobile Swim School?

mobile swimming or public swimming

The Coast2Coast Mobile Swim School brings certified swimming instructors directly to your home pool, backyard pool, or community pool across Canada. Private and semi-private lessons are available for all ages and skill levels, from toddlers to competitive swimmers, with flexible scheduling including evenings and weekends. Formal swim lessons reduce the risk of drowning in children under 5 by up to 88 percent, making this one of the most important investments a Canadian family can make.

Book Now
✓ Certified Instructors · Fully Insured

Book Mobile Swim Lessons Near You

Professional swimming instruction delivered to your home pool, backyard pool, or community pool. Flexible scheduling across Canada.

Contact Us to Book

88%
Reduction in drowning risk with formal swim lessons for children under 5
2-3x
Faster skill progression in private vs group lessons
All Ages
Toddlers through seniors, all skill levels

What Is a Mobile Swim School and How Does It Work?

A mobile swim school is a swim instruction program where certified swimming instructors travel to the student rather than the student travelling to a fixed facility. Instead of fitting your schedule around a swim school’s class times, a mobile swim program fits around you. Lessons are booked at times that work for your family, including evenings and weekends, and take place at a pool of your choosing.

Coast2Coast Mobile Swim School operates across Canada, delivering certified private swim and semi-private instruction directly to residences and community pools. Most mobile swim programs tailor lesson plans according to standard Canadian aquatic levels, ensuring your child progresses through a recognized, nationally consistent curriculum. Lessons can be booked individually or in packages, and programs are designed to suit all ages and skill levels, with beginners starting with the basics before progressing to more advanced skills, from toddlers taking their first lesson to competitive swimmers preparing for tryouts.

Why Choose Mobile Swim Lessons Over a Traditional Swim School?

Flexible Scheduling Around Your Family

Mobile swim lessons are built around your schedule. There are no fixed class times, no waitlists, and no need to rearrange your week. Coast2Coast offers flexible scheduling including evenings and weekends. For families juggling work, school, and extracurricular activities, the ability to offer flexible scheduling around existing commitments is one of the most significant advantages of mobile swim lessons.

Private Swimming Lessons vs Group Classes

Unlike large group classes where each child receives only a fraction of the instructor’s attention, private swimming lessons place the instructor’s full focus on one student. In a standard group class with six to eight students, meaningful instruction time is limited. Private swim lessons eliminate this problem entirely, delivering individual attention in every session and producing measurably faster skill development.

Individual Attention and Faster Progress

Mobile swim lessons typically involve one-on-one or small group instruction, which allows for more individual attention and faster skill development compared to traditional group classes. Swimmers who receive private instruction often progress two to three times faster than those in large group settings, helping them feel confident in the water sooner. Individual attention also means issues with technique are identified and corrected immediately rather than being reinforced through repetition.

Personalized Lesson Plans for Every Swimmer

Every swimmer is different. Coast2Coast instructors create personalized lesson plans tailored to each student’s current ability, learning style, and goals. Whether a swimmer needs to overcome a fear of water, master a specific stroke such as learning freestyle after the basics are in place, or prepare for a swim team tryout, the lesson plan is built around their individual needs. Instructors bring all necessary teaching equipment to each lesson so families do not need to provide anything beyond access to the pool.

Fun, Confidence-Building Lessons for Kids

Lessons at Coast2Coast are designed to be fun and engaging, particularly for young learners. When kids enjoy their lessons, they stay motivated, build confidence faster, and develop a lifelong positive relationship with water. A fantastic instructor who connects with your child makes all the difference. Every family deserves a fantastic instructor who understands their child’s personality, pace, and learning style. Finding that right match is something we take seriously at Coast2Coast.

Best Learning Experience for Special Needs

Instructors specializing in adaptive aquatics and behavioral support techniques are trained to work with individuals with special needs, ensuring the best learning experience in a safe and effective environment. Private mobile lessons are particularly well-suited to swimmers who benefit from one-on-one attention, reduced sensory distractions, and a consistent routine in a familiar environment.

We Come to You

Learn to Swim in Your Own Pool

No travel, no crowded change rooms, no fixed schedules. Our certified swim instructors come to your home pool, backyard pool, or community pool across Canada.

Book Your First Lesson

What Do Mobile Swim Lessons Cover?

Water Safety Fundamentals

Every swimming journey begins with water safety. Younger and newer swimmers learn essential survival skills including safe pool entry and exit, floating on their back, treading water, recognizing water hazards, and understanding pool rules and boundaries. Water safety education extends beyond the pool, covering the dangers of open water swimming and waves, the importance of life jackets when boating or kayaking, and how to recognize the signs of drowning, which often looks nothing like the dramatic scenes depicted in movies or TV dramas.

Home Swim Lessons: Learning in Your Own Pool

Learning to swim in your own pool transforms the experience for many students. Home swim lessons in a familiar environment remove the anxiety that comes with unfamiliar public facilities, allowing swimmers to focus entirely on skill development. Kids transition from water play to structured instruction more naturally at home, and adults who feel self-conscious in public pools find private home lessons far more comfortable. Home lessons are conducted at your home pool, backyard pool, or preferred community pool, wherever you are most comfortable.

Advanced Stroke Development and Competitive Swimmers

For advanced swimmers looking to refine technique, Coast2Coast mobile lessons offer instruction focused on stroke efficiency, endurance, race starts and turns, and competitive preparation. Advanced lessons may include video analysis and interval training sets tailored to competitive goals. Competitive swimmers benefit from the focused, distraction-free environment that mobile lessons provide.

Adult Swimming Lessons

It is never too late to learn to swim. Many adults never had the opportunity as children or experienced a water event that left them fearful. Private mobile lessons provide a judgment-free environment where adults can learn at their own pace without the discomfort of a crowded public pool. Adult lessons cover the same progression from water safety fundamentals through to full stroke development, adapted for adult learners at all starting points.

Toddlers and Young Children

Mobile swim lessons are particularly effective for toddlers and young children. The familiar environment of a home pool or backyard pool allows young swimmers to transition from water play to structured instruction naturally. Early lessons build water confidence by teaching the basics and essential safety concepts first, while giving parents peace of mind knowing their kids have fundamental survival skills in and around water.

Our Swim Instructors: Certified, Experienced, and Insured

Every Coast2Coast Mobile Swim School instructor is a certified, experienced instructor and aquatic professional. Our team includes instructors who specialize in toddlers, children with special needs, adults with water anxiety, seniors, and competitive swimmers. Every student is matched with the instructor best suited to their needs, skill levels, and goals.

First Aid Certified Instructors

Certified swimming instructors are required to hold current certifications in lifesaving, swimming instruction, CPR, and first aid. Many also hold Basic Life Support (BLS) certification. All Coast2Coast instructors hold current Intermediate First Aid certification aligned with CSA Z1210:24 standards, meaning every lesson takes place in the presence of someone trained to respond to any aquatic emergency. This combination of swimming expertise and first aid knowledge makes Coast2Coast instructors uniquely qualified to keep your family safe in and around water.

Insured Instructors and Full Peace of Mind

Coast2Coast instructors are fully insured. Swim instructors are vetted through background checks and must demonstrate experience and expertise in delivering effective swim lessons before joining our team. Using a trusted Canadian mobile swim network ensures insured instructors are professional, certified, and fully insured, giving parents and families complete peace of mind. It is advisable to always use trusted Canadian mobile swim networks to ensure instructors are professional, certified, and insured.

For Organizations and Communities

Pair Swimming with First Aid Training

Complete aquatic safety means knowing how to swim and knowing how to respond in an emergency. Coast2Coast offers both: Canadian Red Cross certified first aid alongside professional swim instruction.

Find a First Aid Course

Who Is the Coast2Coast Mobile Swim School For?

Mobile swim lessons are designed to suit all ages and skill levels. Coast2Coast serves:

  • Toddlers and young children: building water confidence and foundational safety skills
  • School-age kids: progressing through Canadian aquatic levels at their own pace
  • Children with special needs: adaptive instruction in a low-stress, familiar environment
  • Teenagers: stroke refinement and competitive preparation
  • Adults: learning to swim for the first time or overcoming water anxiety
  • Seniors: low-impact aquatic fitness and safety skills
  • Competitive swimmers: advanced technique, endurance, and race preparation

Backyard Pool Lessons: What to Expect Before Your First Lesson

If you have a backyard pool or home pool, basic pool safety measures should be in place before lessons begin. Ensure your pool is surrounded by a four-sided fence at least 1.2 metres high with a self-closing, self-latching gate. The fence should not have footholds children could use to climb over. Never rely on pool covers as a substitute for proper fencing. Remove pool toys from the water after each use to avoid attracting young kids unsupervised to the pool area.

Your instructor will arrive with all teaching equipment needed for the session. You simply need to ensure the pool is clean, the water temperature is comfortable for swimming, and that you have towels available. Whether you are booking for summer lessons or a year-round program, our team will advise on any specific preparation needed for your pool and swimmer.

These safety measures, combined with formal swimming instruction, provide the strongest possible protection against drowning for your family.

Safety Tip: If you have a backyard pool, ensure it is surrounded by a four-sided fence with a self-closing, self-latching gate. Pool fences should be at least 1.2 metres high. Never rely on pool covers as a substitute for proper fencing, and always supervise children around water regardless of their swimming ability.

How to Book Mobile Swim Lessons

Booking mobile swim lessons with Coast2Coast is straightforward. Contact our team to discuss your needs, schedule, and preferred pool location. We will match you with a qualified experienced instructor and create personalized lesson plans tailored to the swimmer’s current ability and goals. Lessons can be booked individually or in packages with flexible scheduling to suit your family’s routine.

Whether you are a parent looking to give your child the gift of swimming, an adult wanting to finally learn, a senior looking for low-impact aquatic fitness, or a competitive swimmer seeking to take your skills to the next level, the Coast2Coast Mobile Swim School is here to help you achieve your aquatic goals safely and effectively.

Key Takeaway

Mobile swim lessons at home in Canada bring certified, insured instructors directly to your pool, eliminating travel and scheduling barriers. Formal swim lessons reduce drowning risk in children under 5 by up to 88 percent. Private lessons produce 2 to 3 times faster skill progression than group classes. Coast2Coast serves all ages from toddlers to seniors, with personalized lesson plans, flexible scheduling, and first aid certified instructors at every session.

Canada’s Top-Rated Aquatic Safety Provider

Join 150,000+ Canadians Trained by Coast2Coast

Canada’s largest Canadian Red Cross Training Partner. Swimming instruction and first aid certification under one roof.

4.9 stars across 20,491 Google reviews.

Book Mobile Swim Lessons

Frequently Asked Questions: Mobile Swim Lessons in Canada

Q1: What is a mobile swim school?

A: A mobile swim school is a swimming instruction program where certified swim instructors travel to the student’s location rather than the student attending a fixed facility. Lessons take place at your home pool, backyard pool, community pool, or indoor pool. Coast2Coast Mobile Swim School operates across Canada, providing private swim and semi-private swimming lessons tailored to all ages and skill levels.

Q2: Who are mobile swim lessons suitable for?

A: Mobile swim lessons are suitable for all ages and skill levels, from toddlers taking their first lesson to competitive swimmers refining advanced technique. Programs are designed to suit children, adults, seniors, and individuals with special needs. Every student is matched with an experienced instructor whose expertise aligns with their specific goals and learning needs.

Q3: Where do mobile swim lessons take place?

A: Lessons can take place at your home pool, backyard pool, community pool, or indoor pool, wherever you swim. Coast2Coast instructors travel to your preferred location across Canada including North York, Toronto, and communities nationwide. If you do not have your own pool, we can help identify a suitable community pool.

Q4: How are mobile swim instructors certified?

A: All Coast2Coast Mobile Swim School instructors hold current certifications in lifesaving, swimming instruction, CPR, and first aid, with many also certified in Basic Life Support (BLS). Insured instructors are vetted through background checks before joining our team. All hold Intermediate First Aid certification aligned with CSA Z1210:24 standards.

Q5: How quickly do swimmers progress with private lessons?

A: Swimmers in private mobile swim lessons typically progress two to three times faster than those in large group classes because the instructor’s full attention is on one student. Personalized lesson plans, flexible scheduling, and a familiar comfortable environment all contribute to faster skill development and help swimmers feel confident sooner.

Q6: Can mobile swim lessons help children with special needs?

A: Yes. Coast2Coast instructors specializing in adaptive aquatics and behavioral support techniques are trained to work with children and adults with special needs. Private mobile lessons are particularly well-suited to swimmers who benefit from one-on-one attention, reduced sensory distractions, and a consistent routine in a familiar environment.

Q7: Do you offer adult swimming lessons?

A: Yes. It is never too late to learn to swim. Coast2Coast Mobile Swim School provides private swimming lessons for adults in a judgment-free environment where adults can learn at their own pace. Adult home swim lessons cover everything from basic water safety and floating to full stroke development, adapted for adult learners at all starting points.

More FAQs: Scheduling, Safety, and Booking

Q8: How do I book mobile swim lessons?

A: Contact the Coast2Coast team to discuss your needs, schedule, and preferred pool location. We will match you with a qualified experienced instructor and create lesson plans tailored to the swimmer’s current ability and goals. Lessons can be booked individually or in packages with flexible scheduling to suit your family’s routine.

Q9: What ages do you teach?

A: Coast2Coast Mobile Swim School teaches swimmers of all ages from toddlers through to adults and seniors. Our experienced instructors adapt their teaching approach to the developmental stage of each learner, ensuring lessons are age-appropriate, fun, and effective for every student.

Q10: Are your instructors insured?

A: Yes. All Coast2Coast Mobile Swim School instructors are fully insured. Using a trusted Canadian mobile swim network ensures that every instructor is professional, certified, and insured, providing parents and families with complete peace of mind.

Q11: What is covered in a beginner home swim lesson?

A: Beginner home lessons focus on water safety fundamentals including safe pool entry and exit, floating on the back, treading water, and understanding pool rules and water hazards. These foundational survival skills are taught before any stroke technique, ensuring every swimmer has life-saving knowledge from their very first lesson.

Q12: Can lessons take place in a community pool?

A: Yes. If you do not have a home pool or backyard pool, lessons can be arranged at a community pool or indoor pool of your choice. Coast2Coast instructors travel to your preferred aquatic facility, maintaining all the benefits of private swimming lessons in a setting that works for your family.

Q13: What is the difference between private and semi-private lessons?

A: Private swim lessons involve one instructor and one student, providing maximum individual attention and the fastest skill progression. Semi-private lessons involve two to three students with one instructor, offering a balance of personalized instruction and peer interaction. Both formats provide far more individual attention than a standard group class.

Q14: How does drowning prevention fit into mobile swim lessons?

A: Drowning prevention is at the core of every Coast2Coast lesson. Drowning is the leading cause of death for children under 5, but formal swim lessons reduce that risk by up to 88 percent. Every swimmer learns essential water safety skills alongside stroke development, and our instructors integrate safety education throughout the curriculum at every level.

Q15: How is the Coast2Coast Mobile Swim School different from other swim programs?

A: Coast2Coast combines professional aquatic instruction with the broader safety expertise of Canada’s largest Canadian Red Cross Training Partner. Every instructor holds first aid and CPR certification, lessons are fully insured, and the curriculum integrates water safety education at every level. This holistic approach combining swimming skill with emergency preparedness sets Coast2Coast apart from standard mobile swim providers.

Legal Disclaimer
The information in this article is for educational and informational purposes only. Swimming lessons do not guarantee drowning prevention. Always supervise children around water regardless of their swimming ability. Coast2Coast First Aid Inc. assumes no liability for any outcomes resulting from aquatic activities. All instructors hold current certifications and insurance as described.

About This Article, Expertise and Sources
Content produced by the Coast2Coast First Aid and Aquatics team. Drowning statistics sourced from the Public Health Agency of Canada and the Lifesaving Society of Canada. Swim instruction methodology aligned with Canadian Red Cross and Lifesaving Society aquatic standards. CSA Z1210:24 first aid certification requirements apply to all Coast2Coast instructors. Coast2Coast First Aid Inc. is Canada’s largest Canadian Red Cross Training Partner. Last reviewed: May 2026. For information contact info@c2cfirstaidaquatics.com or 1-866-291-9121.

The Need to Know’s of an Emergency Medical Responder Course

A person wearing blue gloves performs CPR chest compressions on another individual lying on the ground. A second person assists with a bag-valve mask in the background, providing ventilation. Both wear red uniforms, indicating emergency medical services.

What Is an Emergency Medical Responder (EMR) Course?

An Emergency Medical Responder (EMR) course is an advanced pre-hospital care training program that prepares individuals to provide immediate life-saving medical assistance in emergency situations. Unlike standard first aid or CPR/AED courses, EMR training goes significantly deeper into patient assessment, trauma management, medical emergencies, and the use of specialized equipment. EMR-certified individuals serve as the critical bridge between the moment an emergency occurs and the arrival of paramedics or hospital-based care, making this certification invaluable for anyone working in high-risk environments or pursuing a career in emergency services.

In Canada, the EMR certification program is designed to meet the standards set by provincial regulatory bodies and is recognized nationally as a foundational credential in the emergency medical services profession. Whether you are a firefighter, lifeguard, security professional, remote worker, or someone considering a career in paramedicine, EMR training provides the knowledge and skills to manage complex medical emergencies with competence and confidence.

Emergency Medical Responder training course in Canada

Who Should Take an EMR Course?

While EMR certification is valuable for virtually anyone, certain groups benefit particularly from this advanced level of training:

Aspiring Paramedics and Healthcare Professionals

For individuals pursuing a career in paramedicine, nursing, or emergency medicine, EMR certification serves as an essential stepping stone. Many paramedic programs across Canada either require or strongly recommend EMR certification as a prerequisite for admission. The course provides a solid foundation in patient care principles, medical terminology, and clinical skills that prepare students for the more advanced training that follows in paramedic college programs.

Firefighters and Law Enforcement Officers

First responders such as firefighters and police officers are frequently the first to arrive at emergency scenes. EMR training equips these professionals with the medical knowledge to assess patients, manage injuries, and provide stabilizing care while waiting for ambulance services. Many fire departments and police services across Canada require or encourage their members to hold EMR certification.

Industrial and Remote Workers

Workers in mining, oil and gas, forestry, construction, and other industrial sectors often operate in remote locations where ambulance response times may be 30 minutes or longer. For these workers, EMR-level training can be the difference between life and death, as they may need to manage serious injuries and medical emergencies for extended periods before professional medical help arrives. Many employers in these industries require EMR certification as a condition of employment.

Lifeguards and Aquatic Professionals

Aquatic environments present unique emergency scenarios including drowning, spinal injuries from diving accidents, and hypothermia. Lifeguards with EMR certification possess advanced assessment and management skills that complement their water rescue training, making them more effective at managing complex aquatic emergencies. BLS certification is often a companion credential for aquatic professionals alongside EMR.

Safety Tip: EMR training teaches the systematic patient assessment approach used by all emergency medical professionals. Learning to assess a patient from head to toe using a structured method ensures that no injuries or conditions are missed during an emergency.

What You Will Learn in an EMR Course

An EMR course covers an extensive curriculum designed to prepare you for a wide range of medical emergencies. The training combines theoretical classroom instruction with hands-on practical skills sessions and realistic emergency simulations. Here is an overview of the major topics covered:

Core Competencies of an Emergency Medical Responder Course

Enrolling in an Emergency Medical Responder course transitions a student from basic first aid to advanced clinical intervention. The primary objective of an Emergency Medical Responder course is to master the “Primary Survey,” where you learn to identify and treat life-threatening issues with the airway, breathing, and circulation (ABCs) in seconds. Throughout an Emergency Medical Responder course, you will move beyond simple bandages to utilizing specialized equipment like manual suction units, oxygen cylinders, and cervical collars. By the end of an Emergency Medical Responder course, participants are capable of leading a medical team during multi-system trauma events, ensuring that high-level care is maintained until a paramedic transport unit arrives.

Patient Assessment

The cornerstone of EMR training is learning how to systematically assess a patient. You will learn to perform primary surveys to identify and address immediately life-threatening conditions, followed by secondary surveys that involve a thorough head-to-toe physical examination. You will also learn to obtain a patient history using standardized questioning techniques, take vital signs including blood pressure, pulse, respiratory rate, and oxygen saturation, and document your findings accurately for handover to paramedics.

Airway Management and Oxygen Therapy

Managing a patient’s airway is the single most critical skill in emergency medicine. EMR training covers advanced airway management techniques including the use of oropharyngeal and nasopharyngeal airways, suctioning equipment, and supplemental oxygen delivery systems. You will learn to recognize and manage airway obstructions, perform advanced rescue breathing techniques, and use bag-valve-mask (BVM) devices for assisted ventilation.

Trauma Management

Traumatic injuries — from motor vehicle accidents, falls, workplace incidents, and other causes — require specialized knowledge to manage effectively. The EMR course covers wound care, splinting and immobilization of fractures and dislocations, spinal motion restriction techniques, management of chest and abdominal injuries, burn treatment, and multi-system trauma assessment. You will learn to rapidly identify the most serious injuries and prioritize treatment accordingly.

Medical Emergencies

Beyond trauma, EMR students learn to recognize and manage a wide range of medical conditions including cardiac emergencies, stroke, diabetic emergencies, seizures, respiratory distress, allergic reactions and anaphylaxis, poisoning, and environmental emergencies such as hypothermia and heat stroke. Understanding these conditions and their management is essential for providing effective pre-hospital care.

first responder course

CPR and Defibrillation

EMR training includes comprehensive CPR and AED certification at the healthcare provider level. This goes beyond basic CPR to include two-rescuer CPR techniques, advanced airway management during resuscitation, and the integration of AED use into a coordinated resuscitation effort. You will practice these skills extensively to develop the muscle memory needed to perform them effectively under the stress of a real cardiac arrest.

Watch: What EMR Training Involves

Course Structure and Duration

The EMR course is significantly more comprehensive than standard first aid training. Depending on the training provider and delivery format, the course typically ranges from 40 to 80 hours of instruction. This includes classroom lectures covering medical theory and protocols, hands-on skills labs where you practice techniques on mannequins and simulated patients, scenario-based training using realistic emergency simulations, and written and practical examinations to assess your competence.

Some training providers offer intensive formats that condense the course into consecutive days, while others spread the training over several weekends to accommodate working professionals. Blended learning options may also be available, allowing you to complete theoretical components online before attending in-person practical sessions. Regardless of the format, the practical skills component requires in-person attendance, as hands-on practice is essential for developing the competence needed to perform these skills in real emergencies.

EMR Certification Requirements and Recertification

To earn your EMR certification, you must successfully complete all course components and pass both written and practical examinations. The written exam tests your theoretical knowledge of anatomy, physiology, pathophysiology, and treatment protocols. The practical exam evaluates your ability to perform patient assessments and manage simulated emergency scenarios under timed conditions. Most provinces require a minimum passing grade of 70 to 75 percent on both components.

EMR certification is typically valid for three years, after which you must complete a recertification course to maintain your credentials. Recertification ensures that your skills remain current and that you are updated on any changes to treatment protocols or best practices. Staying current with your certification demonstrates professionalism and commitment to providing the highest standard of emergency care.

Career Opportunities with EMR Certification

EMR certification opens doors to a variety of career paths in emergency services and beyond. Certified EMRs work in fire departments, industrial sites, event management companies, private ambulance services, remote medical facilities, security firms, and outdoor recreation organizations. The certification also serves as a competitive advantage for lifeguards, security professionals, and fitness instructors who want to differentiate themselves in the job market.

For those pursuing paramedicine as a career, EMR certification provides invaluable practical experience that strengthens paramedic school applications and prepares students for the academic rigour of advanced emergency medical training. Many successful paramedics credit their EMR training as the foundation that gave them the confidence and clinical thinking skills needed to excel in their careers.

Executive Summary: An Emergency Medical Responder (EMR) course provides the advanced clinical skills necessary to manage complex trauma and medical crises. Far exceeding Basic or Intermediate First Aid, this 80-hour program aligns with 2026 CSA Z1210:24 standards for high-risk workplace responders. Whether you are preparing for a career in paramedicine or securing a remote industrial site, EMR certification ensures you can provide emergency room level assessment and stabilization in the field.


Start Your EMR Training Journey

Take your emergency response skills to the next level with an Emergency Medical Responder course from Coast2Coast First Aid and Aquatics. Prepare for a rewarding career in emergency services with comprehensive, hands-on training.

Register Now

A

About the Author

Ashkon Pourheidary, B.Sc. (Hons) — Co-Founder, Coast2Coast First Aid & Aquatics

Ashkon has been a certified First Aid and CPR instructor since 2011 and an Instructor Trainer since 2013. He is also a certified Emergency Medical Responder (EMR) instructor, Psychological First Aid instructor, and BLS (Basic Life Support) instructor. Ashkon graduated with honours with a Bachelor of Science in Neuroscience from the University of Toronto in 2016. As co-founder of Coast2Coast First Aid & Aquatics, he has helped grow the organization to over 30 locations across Canada and into the United States. Connect on LinkedIn

Child Choking First Aid: How to Help a Choking Child (2026)

Parent and child reviewing an emergency kit checklist at home as part of first aid preparedness in Toronto

If a child is choking and cannot breathe, speak, or cough, call 911 and begin the five-and-five approach: alternate 5 back blows between the shoulder blades with 5 abdominal thrusts just above the belly button. For infants under one year old, use chest thrusts instead of abdominal thrusts. If the child becomes unresponsive, begin CPR immediately. Do not perform a blind finger sweep.

Get Certified
✓ Canadian Red Cross Approved

Find a First Aid Course Near You

Canadian Red Cross Intermediate / Intermediate / Standard First Aid and Child Care First Aid courses covering child and infant choking response across Ontario, Nova Scotia, Alberta, and California.

View All 30+ Locations

5+5
Back blows and abdominal thrusts: the five-and-five approach
Under 1
Use chest thrusts, never abdominal thrusts, for infants
Under 4
Age group at highest risk of choking on small objects

How to Recognize When a Child Is Choking

Choking occurs when the airway becomes partially or completely blocked by a foreign object, which can lead to unresponsiveness and death if not addressed quickly. In young children, choking is particularly common, and certain behaviours such as talking or laughing with a full mouth or eating too quickly can increase the risk. A child who is choking typically has a panicked, confused, or surprised facial expression and may place one or both hands on their throat. Signs of choking include the inability to speak, cry, or cough forcefully if the airway is completely blocked, and the child’s skin may turn pale or bluish as oxygen is deprived.

Mild Choking vs Severe Choking

Not all choking emergencies require intervention. A mild blockage means the airway is only partially blocked and the child can still cough, speak, or cry. For children over 1 year old who are choking but are still making sounds, encourage them to cough. Encouraging a child to cough is an effective way to naturally clear an airway blockage without intervention. Do not interfere with a child who is coughing forcefully.

A severe choking emergency means the airway is completely blocked. Signs of severe choking include silent coughing, inability to speak or cry, blue or pale skin, clutching the throat with one or both hands, and high-pitched sounds or no sounds at all. If a child is showing signs of severe choking, such as silent coughing or bluish skin, immediate action is required to clear the blockage.

Child Choking First Aid: Step by Step

Step 1: Assess the Situation and Call for Emergency Help

If a child is choking and cannot breathe, speak, or cough, call 911 immediately or instruct someone nearby to call while you begin first aid. Do not leave the child alone. If you are alone, perform 5 cycles of back blows and abdominal thrusts before calling 911 if the obstruction has not cleared.

Step 2: Five Back Blows

Lean the child forward into a forward leaning position, supporting their upper body with one arm across their chest. Using the heel of your free hand, deliver 5 firm back blows between the child’s shoulder blades. Each blow should be a separate, distinct strike aimed at creating an artificial cough effect to dislodge the foreign object. Check the child’s mouth after each set of back blows to see if the object has been expelled. If you can see the object in the child’s mouth, carefully remove it with your fingers. Do not perform a blind finger sweep, as doing so may push the obstruction deeper into the airway.

Step 3: Perform Abdominal Thrusts (Heimlich Maneuver)

The Heimlich maneuver, also known as abdominal thrusts, is a first aid technique used to relieve choking by applying pressure to the abdomen to expel an object blocking the airway. It is recommended for adults and children over the age of one who are choking and cannot speak, cry, or breathe. To perform child abdominal thrusts:

  • Kneel or stand behind the child and wrap your arms around their waist
  • Make a clenched fist with one hand and place the thumb side of your fist against the child’s upper abdomen, slightly above the belly button and well below the breastbone
  • Grasp your fist with your other hand
  • Pull sharply inwards and upwards with quick, firm thrusts
  • Give 5 abdominal thrusts, each a separate and distinct movement

After 5 abdominal thrusts, check the child’s mouth again. If the object is visible, remove it carefully. Do not perform a blind finger sweep.

Step 4: Alternate Five Back Blows and Five Abdominal Thrusts

Alternate between 5 back blows and 5 abdominal thrusts, checking the child’s mouth after each cycle. Continue this pattern until the object is expelled, the child can breathe normally, emergency help arrives, or the child becomes unresponsive. Use this sequence for a choking person who cannot speak, cry, or cough forcefully.

Step 5: Begin CPR If the Child Becomes Unresponsive

If the child loses consciousness, carefully lower them to a flat surface. Call 911 if not already done. Begin CPR immediately, starting with chest compressions. Before giving rescue breaths, look in the child’s mouth each time you open the airway. If you can see the foreign object, remove it. Never perform a blind finger sweep on an unresponsive child. Continue cardiopulmonary resuscitation until emergency help arrives or the child begins breathing normally. Intermediate / Intermediate / Standard First Aid with CPR C covers the full transition from choking response to CPR as part of the core curriculum.

Safety Tip: Do not perform a blind finger sweep. Only remove an object from the child’s mouth if you can clearly see it. Blind finger sweeps risk pushing the obstruction deeper into the airway and can cause serious injury.

Infant Choking First Aid: Under One Year Old

For infants under one year old, the technique is different. Abdominal thrusts are never used on infants because they risk serious injury to internal organs. Instead, use chest thrusts.

Infant Back Blows

Hold the infant face down along your forearm, supporting the baby’s face in your hand with the baby’s head lower than the chest. Using the heel of your other hand, deliver 5 firm back blows between the infant’s shoulder blades. Support the infant’s head carefully throughout.

Chest Thrusts for Infants

After 5 back blows, turn the infant face up on your forearm, keeping the head lower than the body. Place two fingers on the centre of the child’s chest, just below the nipple line. Give chest thrusts 5 times, pressing down approximately one-third to one-half the depth of the chest. Check the infant’s mouth after each cycle. If an object is visible, remove it carefully. Do not perform a blind finger sweep. Alternate 5 back blows and 5 chest thrusts until the object is cleared or the infant becomes unresponsive. If the infant loses consciousness, begin infant CPR immediately and call 911.

What NOT to Do with an Infant

  • Do not perform abdominal thrusts on an infant under one year old
  • Do not shake or hang the infant upside down during a choking emergency as this risks further injury
  • Do not perform a blind finger sweep
  • Do not give liquids or force the infant to vomit, as this may worsen the airway blockage

For Parents and Caregivers

Learn This Skill in a Real Classroom

Reading about choking first aid is a start. Hands-on practice is what builds the confidence to act in a real emergency. Child Care First Aid courses are specifically designed for parents, grandparents, and childcare workers.

View Child Care First Aid

Performing Abdominal Thrusts

Perform Abdominal Thrusts on a Child

To correctly perform abdominal thrusts on a child, stand or kneel behind the child. Wrap your arms around their waist. Make a clenched fist with one hand. Place the thumb side of your fist against the child’s upper abdomen, between the belly button and the lower end of the breastbone. Grasp your fist firmly with your other hand. Pull sharply inwards and upwards in five quick, distinct thrusts. Each thrust should apply enough pressure to create an artificial cough that dislodges the object.

Performing Abdominal Thrusts on Yourself

To perform the Heimlich maneuver on yourself if you are choking and alone, place a clenched fist slightly above your belly button and grasp it with the other hand. Bend over a hard surface such as a chair back or countertop and thrust inward and upward firmly. This self-applied pressure can dislodge a foreign object when no one is available to help.

Aid Choking: What NOT to Do

Knowing what not to do is as important as knowing the correct steps. Common mistakes can worsen the obstruction or injure the child.

Do not perform a blind finger sweep. Only remove an object from the child’s mouth if you can clearly see it. Blind finger sweeps risk pushing the obstruction deeper into the airway.

Do not give liquids or force vomiting. Do not give the child anything to eat or drink or force them to vomit, as this may worsen the airway blockage.

Do not shake or hang the child upside down. This risks further injury and does not help clear the blockage.

Do not slap a choking child on the back while they are upright. Back blows must be delivered with the child leaning forward so gravity assists the dislodging of the object.

Do not delay calling 911. If back blows and abdominal thrusts do not clear the blockage within the first two cycles, call 911 while continuing the five-and-five approach.

Emergency Help: When to Call 911 for a Choking Child

Call 911 immediately in any of the following situations:

  • The child cannot breathe, speak, or cough
  • Back blows and abdominal thrusts have not cleared the blockage after several cycles
  • The child becomes unresponsive or loses consciousness
  • The child’s skin turns blue or grey
  • The child is an infant under one year old with a suspected airway blockage
  • The object has been removed but the child is still having difficulty breathing

After a choking incident, even if the object has been successfully removed, seek medical help. Internal injuries from abdominal thrusts or residual airway inflammation may require assessment. The Canadian Red Cross recommends that any child who received abdominal thrusts during a choking emergency be evaluated by a healthcare professional.

How to Prevent Choking in Children

Prevention is the most effective approach to child choking emergencies. The following strategies reduce choking risk significantly.

Foods That Pose a Choking Risk

Parents should supervise mealtimes with young children and avoid giving them foods that can easily get lodged in the throat, such as hot dogs, nuts, hard candies, grapes, large pieces of meat, popcorn, and raw carrots. Cut all food into small pieces appropriate for the child’s age. Teach children to sit while eating, eat slowly, and not talk or laugh with food in their mouth.

Small Objects and Toys

To prevent choking in children, keep small objects like marbles, coins, latex balloons, and button batteries out of reach, especially for children under 4 years old. Small toys or toys with small parts should be kept out of the child’s reach. Regularly inspect play areas for small objects that could be swallowed.

Supervision and Safe Habits

Supervise young children during mealtimes and playtime. Teach older children about choking risks. Ensure toys are age-appropriate and inspect them regularly for broken pieces. Keep the child’s reach clear of small objects at floor level.

How First Aid Training Prepares You for Choking Emergencies

First aid training courses often include instruction on how to respond to choking emergencies, teaching techniques such as back blows and abdominal thrusts. Certified first aid training courses are designed to prepare individuals to act quickly and effectively in choking emergencies, which can be life-threatening. Hands-on practice in a training environment builds the muscle memory needed to perform these techniques confidently under the pressure of a real emergency.

Intermediate / Intermediate / Standard First Aid with CPR C courses cover adult, child, and infant choking response, including the Heimlich maneuver, back blows, chest thrusts, and the transition to CPR when a choking victim becomes unresponsive. Child Care First Aid courses provide additional training specifically focused on pediatric emergencies, making them ideal for parents, grandparents, childcare workers, and teachers.

The Canadian Red Cross recommends that anyone who regularly cares for children complete first aid and CPR certification that covers pediatric choking response. Private group training can be arranged for daycares, schools, and organizations that want to ensure their entire team is prepared.

Key Takeaway

If a child is choking, use the five-and-five approach: alternate 5 back blows between the shoulder blades with 5 abdominal thrusts above the belly button. For infants under one year old, replace abdominal thrusts with chest thrusts. Never perform a blind finger sweep. If the child becomes unresponsive, begin CPR immediately and call 911. Hands-on first aid training is the most effective way to build the confidence and competence to act correctly under pressure.

Canada’s Top-Rated Training Partner

Join 150,000+ Canadians Who Are Certified

Coast2Coast is Canada’s top-rated Canadian Red Cross Training Partner.

4.9 stars across 20,491 Google reviews. Register online in 2 minutes.

View All 30+ Locations

Frequently Asked Questions: Child Choking First Aid 2026

Q1: What is the first thing to do if a child is choking?

A: If a child is choking and cannot breathe, speak, or cough, call 911 immediately and begin the five-and-five approach. Lean the child forward and deliver 5 firm back blows between the shoulder blades. Then give 5 abdominal thrusts by placing a clenched fist above the belly button and pulling sharply inwards and upwards. Alternate between back blows and abdominal thrusts until the object is dislodged or emergency help arrives.

Q2: How do you perform abdominal thrusts on a child?

A: Stand or kneel behind the child and wrap your arms around their waist. Make a clenched fist and place the thumb side against the child’s upper abdomen, above the belly button and below the breastbone. Grasp your fist with your other hand and pull sharply inwards and upwards. Give 5 abdominal thrusts in quick, distinct movements. Check the child’s mouth after each cycle for the object, removing it only if clearly visible.

Q3: What is the difference between child and infant choking first aid?

A: For children over one year old, the five-and-five approach uses 5 back blows and 5 abdominal thrusts. For infants under one year old, abdominal thrusts are never used because they risk injuring internal organs. Instead, alternate 5 back blows with 5 chest thrusts, using two fingers placed just below the nipple line on the infant’s chest. Hold the infant face down for back blows and face up for chest thrusts.

Q4: What should I do if the choking child becomes unresponsive?

A: If the child loses consciousness, carefully lower them to a flat surface. Call 911 if not already done. Begin CPR immediately, starting with chest compressions. Each time you open the airway to give rescue breaths, look in the child’s mouth. If you can see the foreign object, remove it carefully. Do not perform a blind finger sweep. Continue cardiopulmonary resuscitation until emergency help arrives.

Q5: What is the Heimlich maneuver?

A: The Heimlich maneuver, also known as abdominal thrusts, is a first aid technique used to relieve choking by applying pressure to the abdomen to expel a foreign object blocking the airway. It is recommended for children over one year old and adults who are choking and cannot speak, cry, or breathe. The technique involves placing a clenched fist above the belly button and pulling sharply inwards and upwards in five quick thrusts.

Q6: Should I do a finger sweep to remove the object?

A: Only remove an object from the child’s mouth if you can clearly see it. Do not perform a blind finger sweep, as this may push the obstruction deeper into the airway. After each cycle of back blows and abdominal thrusts, look in the child’s mouth. If the object is visible, carefully remove it with your fingers.

Q7: When should I call 911 for a choking child?

A: Call 911 immediately if the child cannot breathe, speak, or cough, if back blows and abdominal thrusts have not cleared the blockage within several cycles, if the child becomes unresponsive, if their skin turns blue, or if the child is an infant. After the object is removed, seek medical help regardless, as internal injury from abdominal thrusts or residual airway swelling may require assessment.

More FAQs: Prevention, Infants, and Training

Q8: What foods are most likely to cause choking in children?

A: Foods most likely to cause choking in young children include hot dogs, grapes, nuts, hard candies, popcorn, raw carrots, large pieces of meat, and chunks of cheese. Cut all food into small pieces appropriate to the child’s age. Supervise mealtimes and teach children to sit while eating and not talk or laugh with food in their mouth.

Q9: How do I perform infant choking first aid?

A: For infants under one year old, hold the infant face down along your forearm with the head lower than the body. Deliver 5 firm back blows between the shoulder blades. Then turn the infant face up and give 5 chest thrusts using two fingers placed just below the nipple line on the chest. Alternate between back blows and chest thrusts, checking the mouth after each cycle. Never use abdominal thrusts on an infant.

Q10: What objects are most likely to cause choking in young children?

A: Young children most commonly choke on food and small objects including coins, marbles, button batteries, small toys, latex balloons, and small pieces of broken toys. Keep all small objects out of the child’s reach, especially for children under 4 years old. Inspect play areas regularly and ensure toys are age-appropriate.

Q11: Can a child choke on something and still be able to breathe?

A: Yes. A mild or partial airway blockage allows some air to pass, so the child may still be able to cough, speak, or breathe with difficulty. In mild choking, encourage the child to cough, as this is the most effective way to naturally clear a partial blockage. Only intervene with back blows and abdominal thrusts if the child cannot breathe, speak, or cough at all.

Q12: What is the five-and-five approach?

A: The five-and-five approach is the primary first aid procedure for a conscious, severely choking child or adult. It involves alternating between 5 back blows to the area between the shoulder blades and 5 abdominal thrusts to the upper abdomen. After each set of five, check the mouth for the object. Continue alternating until the object is dislodged, the person can breathe normally, or emergency services take over.

Q13: Is choking first aid different for large children vs small children?

A: The technique is the same for all children over one year old, but the amount of force applied should be proportional to the child’s size. For a small child, gentler back blows and abdominal thrusts are appropriate. For a larger child approaching adult size, more force may be needed. The positioning and mechanics of the five-and-five approach remain consistent regardless of the child’s size.

Q14: What should I do after a child has been successfully treated for choking?

A: After the object has been removed and the child can breathe normally, seek medical help. The Canadian Red Cross recommends that any child who received abdominal thrusts during a choking emergency be evaluated by a healthcare professional. Internal injuries, rib bruising, or residual airway swelling may not be immediately apparent. Keep the child calm, monitor their breathing, and transport to a healthcare provider.

Q15: Where can I learn child choking first aid in Canada?

A: Coast2Coast First Aid and Aquatics offers Canadian Red Cross certified Intermediate / Intermediate / Standard First Aid and Child Care First Aid courses across more than 30 locations in Ontario, Nova Scotia, Alberta, and California. All course levels cover child and infant choking response, including back blows, abdominal thrusts, chest thrusts, and the transition to CPR. Online blended learning is available for those who prefer to complete theory at home before attending an in-person skills session.

Legal Disclaimer
The information in this article is for educational and informational purposes only and does not constitute medical advice. In any choking emergency, always call 911 immediately. Choking response techniques should be learned and practised under the supervision of a qualified first aid instructor. Coast2Coast First Aid Inc. assumes no liability for any outcomes resulting from the application or misapplication of information in this article.

About This Article, Expertise and Sources
Content reviewed by the Coast2Coast First Aid and Aquatics certified instructor team. Child choking first aid information sourced from the Canadian Red Cross First Aid Guidelines, the CSA Z1210:24 First Aid Training Standard, and Health Canada child safety guidelines. Coast2Coast First Aid Inc. is Canada’s largest Canadian Red Cross Training Partner. Last reviewed: May 2026. For corrections or additional information, contact info@c2cfirstaidaquatics.com or 1-866-291-9121.

How to Become a Competitive Swimmer in Canada: Youth Swimming Guide (2026)

A group of people swimming in a pool, using kickboards. They are aligned in a row, each focusing on swimming. The pool area has blue tiles and a modern look, with some equipment visible in the background.

Julia Lane from Windsor, Ontario proves to Canada and the world that anyone can swim, no matter what obstacles one may face.

The 18-year-old competed with hundreds of youths and adults at the Down Syndrome World Swimming Championships in Truro, Nova Scotia in July, coming home with a silver medal and four bronze medals – a feat for any trained competitive swimmer. Lane was one of only twenty-two swimmers representing Canada, with over twenty-five countries representing themselves at the Championship.

Continue reading

Basic / Emergency First Aid Help: How to Respond to Mass Casualty and Trauma Emergencies (2026)

Toronto skyline with the CN Tower and various skyscrapers under a blue sky with clouds. Buildings are reflected in the calm water in the foreground, creating a mirrored effect.

Emergency first aid help in a mass casualty or trauma event starts with the Check, Call, Care framework: check the scene is safe, call 911, then care for the injured. The most critical skill is severe bleeding control using direct pressure, wound packing, or tourniquet application. A person can bleed to death in 3 to 5 minutes. Begin CPR immediately if the person has no pulse and is not breathing. First aid certification is valid for three years in Canada under CSA Z1210:24 standards.

Get Certified
✓ Canadian Red Cross Approved

Find a First Aid Course Near You

Canadian Red Cross Basic / Emergency First Aid, Intermediate / Intermediate / Standard First Aid, and EMR courses covering trauma response, bleeding control, CPR, and AED use across Canada.

View All 30+ Locations

3-5 min
Time for a person to bleed to death from a major wound without intervention
3 years
First aid certification validity in Canada under CSA Z1210:24
6-8 hrs
Typical duration of an emergency first aid course in Canada

The Critical Importance of Bystander Response

First aid is the immediate care given to someone who is ill or injured, involving simple, life-saving techniques that can be performed by anyone, from lay responders to medical professionals. In a mass casualty event or serious trauma emergency, knowing how to provide emergency first aid help in the minutes before emergency medical services arrive can be the difference between life and death. Everyone should know essential first aid techniques like CPR, the Heimlich maneuver, and severe bleeding control, as they can save a life before professional medical help arrives.

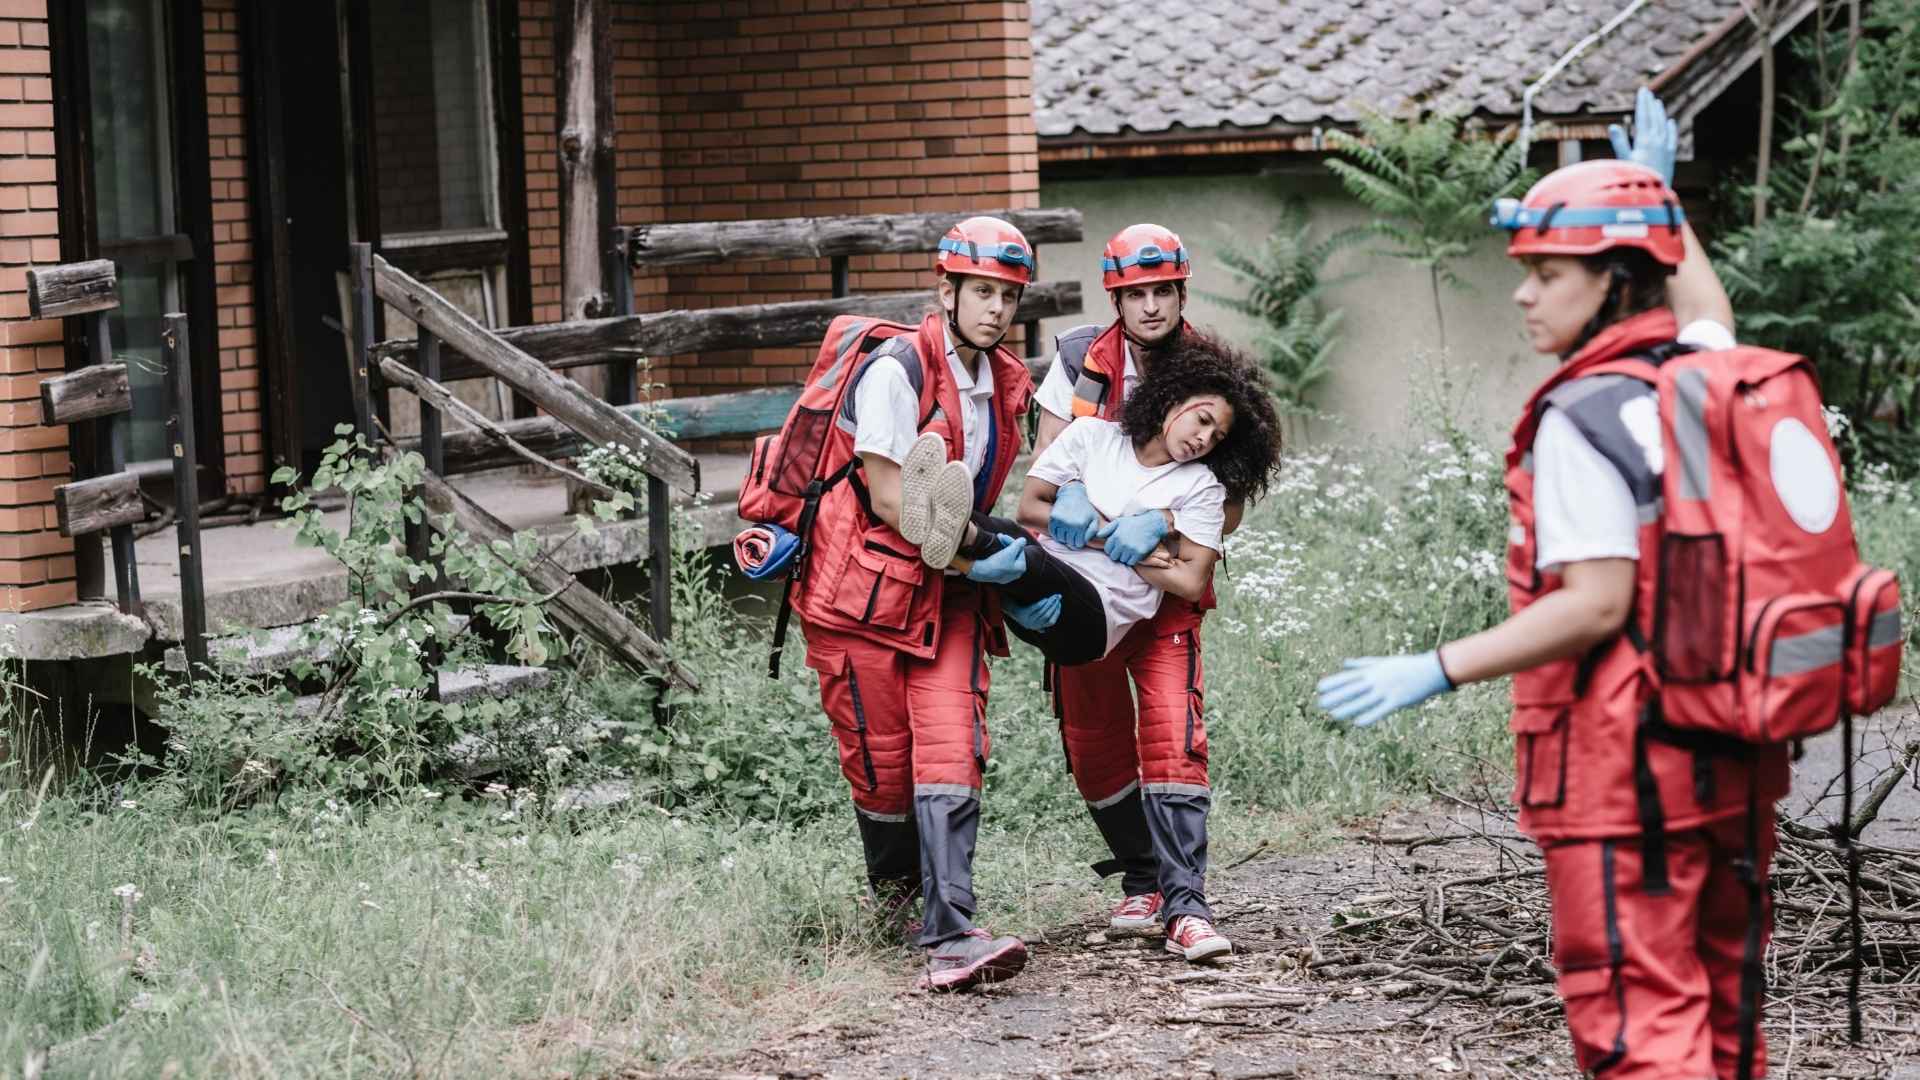
In any mass casualty event, emergency medical services face extraordinary challenges. The sheer number of victims, the need to secure the scene, and the logistical complexity of deploying multiple ambulances all contribute to delayed medical care. The standard protocol for responding to a medical emergency follows the Check, Call, Care framework: check the scene for safety, call emergency services, and provide care to the injured person. First aid training equips individuals with the knowledge, practice, and confidence to respond effectively to common medical emergencies until professional help arrives.

The concept of the Platinum Ten Minutes, the first ten minutes after a traumatic injury, highlights how critical immediate intervention is. Hemorrhage, or severe bleeding, is the number one cause of preventable death in trauma situations. A person can bleed to death from a major wound in as little as three to five minutes. Prompt action prevents severe blood loss and potential shock. This timeline makes it clear that waiting for paramedics is simply not an option when someone is bleeding profusely.

Prioritizing Your Safety First

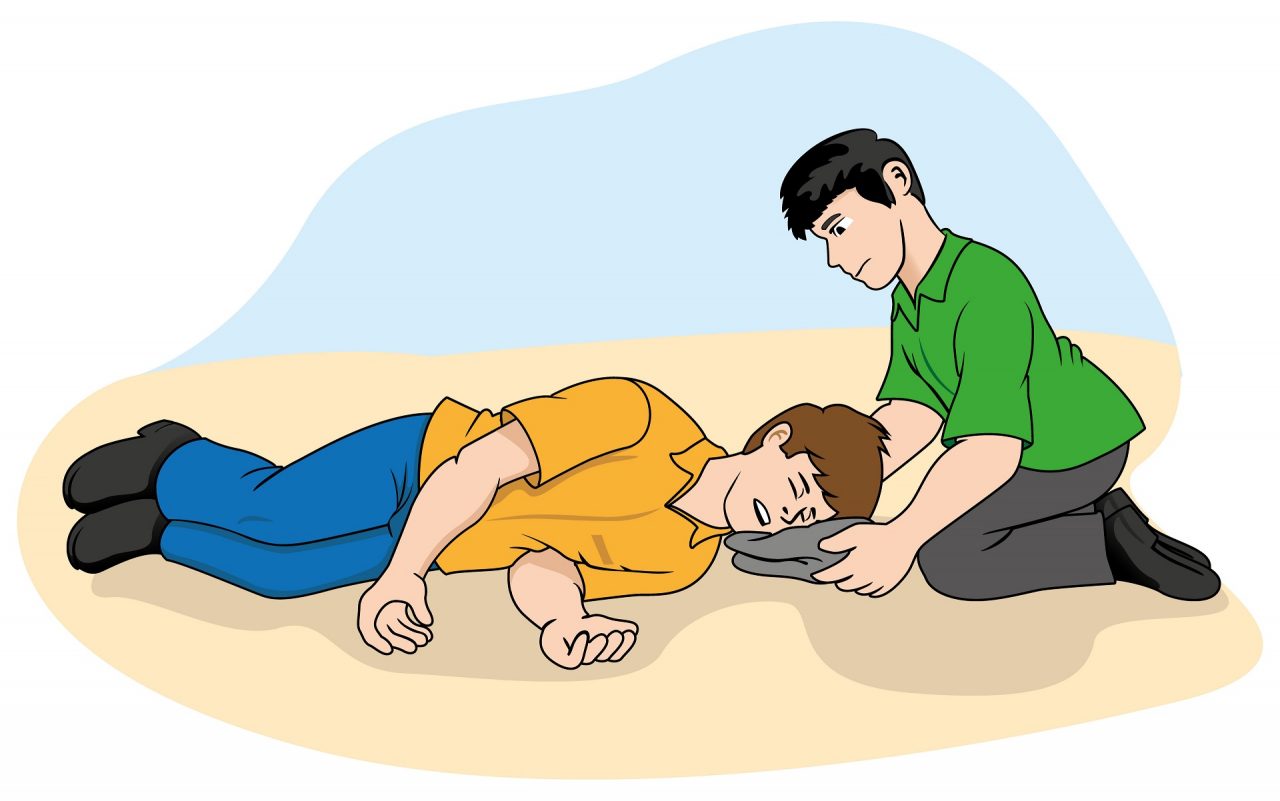
Before rushing to help any injured person, you must ensure your own safety. This principle is fundamental to all emergency response and is the first thing taught in every first aid course and first aid training program. In an active threat situation, seek cover immediately and do not attempt to provide first aid until the area has been secured by law enforcement or you are confident the threat has passed.

Once you have determined it is safe to act, quickly assess hazards to protect yourself and others before approaching, then call 911 immediately if it has not already been done. Provide the dispatcher with as much information as possible, including the location, the number of injured people you can see, and the types of injuries present. Use any available protective equipment, such as gloves, if it is on hand. If multiple bystanders are available, delegate the 911 call to someone specific while you begin providing basic first aid.

Safety Tip: Remember the acronym RUN-HIDE-FIGHT during an active threat. Only provide emergency first aid once the scene is safe. Your safety is the top priority. You cannot help others if you become a casualty yourself.

Basic / Emergency First Aid Help: Controlling Severe Bleeding

The single most important first aid skill in a mass casualty scenario is the ability to control severe bleeding. Shock can occur rapidly after severe trauma or heavy blood loss and is a life-threatening emergency. Apply firm, direct pressure to the wound using a clean cloth, sterile dressing, or your hands. There are several techniques depending on the location and severity of the wound.

Direct Pressure

For most wounds, applying firm, direct pressure is the first and most effective method of controlling bleeding. Use a clean cloth, clothing, or gauze and press it firmly against the wound. Do not lift the material to check if the bleeding has stopped, as this disrupts any clots that may be forming. If blood soaks through the first layer of material, add more on top without removing the original dressing. Maintain steady, firm pressure until emergency medical services arrive.

Wound Packing

For deep wounds, particularly those in areas where a tourniquet cannot be applied such as the neck, armpit, or groin, wound packing is essential. This involves stuffing clean material directly into the wound cavity and then applying firm pressure on top. While this may seem uncomfortable for the injured person, it is a proven life-saving technique that stops internal bleeding by creating pressure from within the wound itself.

Tourniquet Application

For severe bleeding from an arm or leg that cannot be controlled with direct pressure alone, a tourniquet may be necessary. A commercial tourniquet is ideal, but in an emergency, you can improvise one using a belt, tie, or strip of fabric at least 4 centimetres wide. Apply the tourniquet 5 to 7 centimetres above the wound, never directly on a joint, and tighten it until the bleeding stops. Note the time of application, as this information is critical for medical professionals. Contrary to outdated beliefs, modern medical guidance confirms that properly applied tourniquets save lives and rarely result in limb loss.

Treating Chest Wounds

Gunshot wounds to the chest are particularly dangerous because they can cause a condition called pneumothorax, commonly known as a collapsed lung. If you see a wound on the chest that is bubbling or making a sucking sound, this is a sucking chest wound and requires immediate attention. Cover the wound with an occlusive dressing. Any non-porous material such as plastic wrap, a plastic bag, or even a credit card can work in an emergency. Seal the dressing on three sides, leaving the fourth side open to allow air to escape but preventing air from being sucked into the chest cavity. This improvised chest seal can prevent a life-threatening tension pneumothorax.

Managing Shock

Victims of traumatic injuries frequently go into a life-threatening condition called shock, though it can also follow a sudden medical illness, where the body’s organs are not receiving enough blood flow. Signs of shock include pale or clammy skin, rapid shallow breathing, confusion, weakness, and a rapid pulse. To manage shock, keep the victim lying down with their legs elevated about 30 centimetres if possible and if their injuries allow. Cover them with a blanket or jacket to maintain body temperature. Reassure them calmly and continuously, as psychological support is an important component of shock management. Do not give them anything to eat or drink.

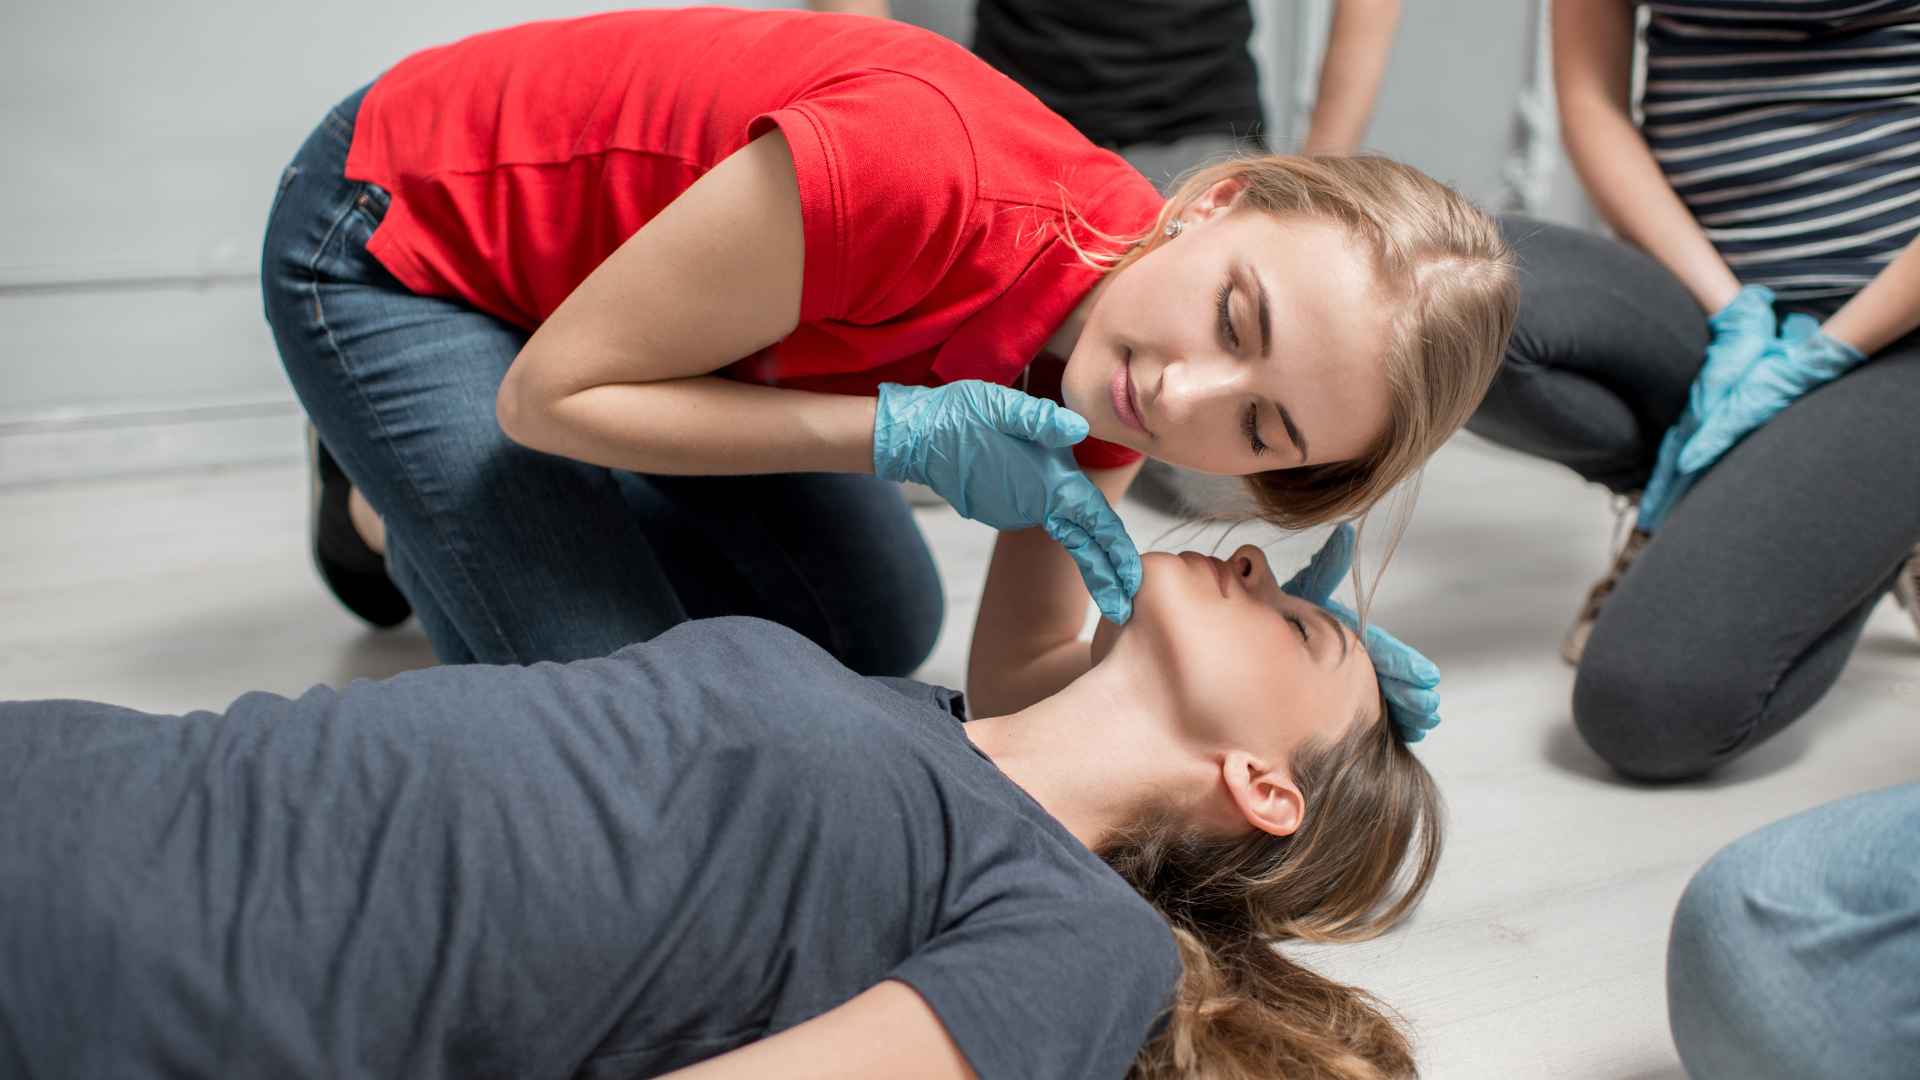
CPR and Cardiac Arrest During a Mass Casualty Event

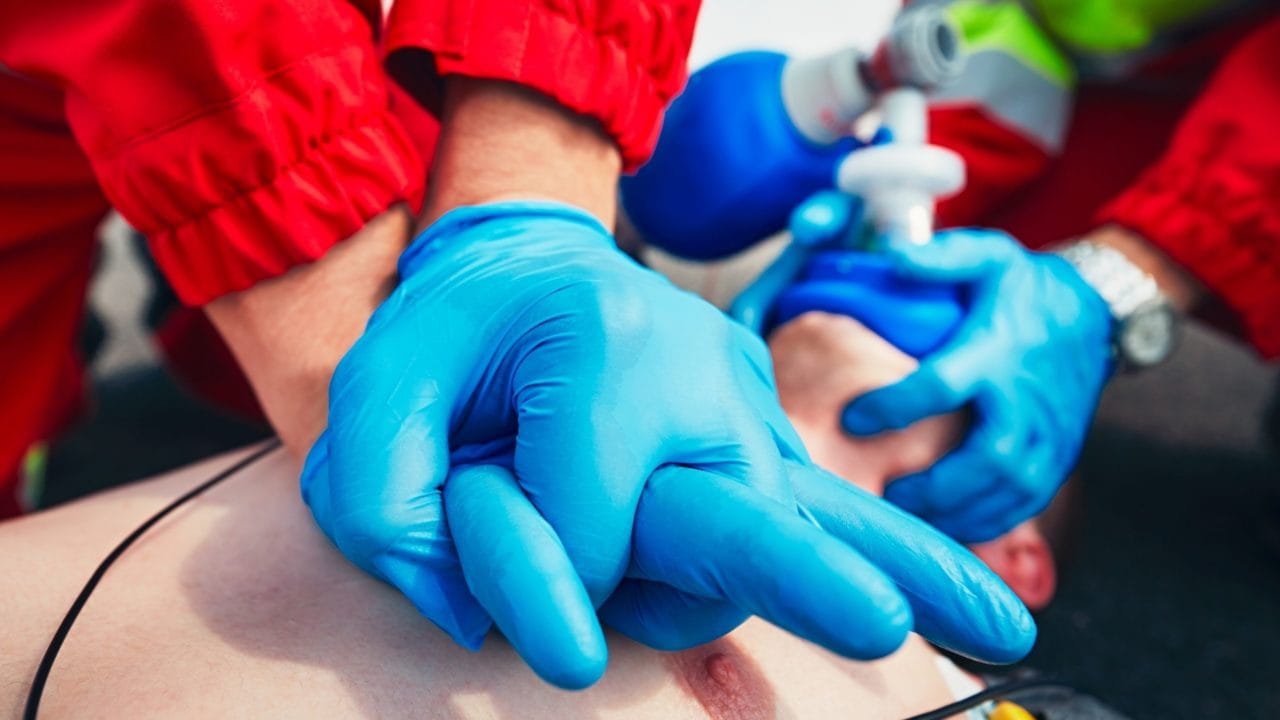
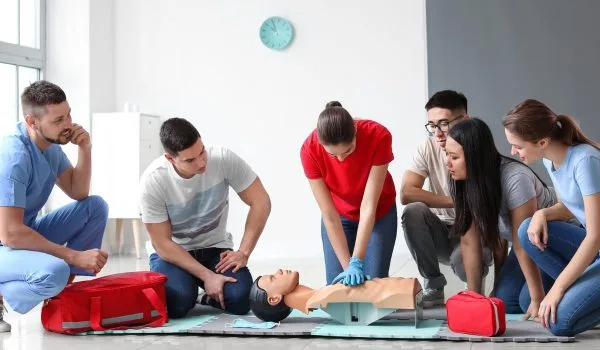
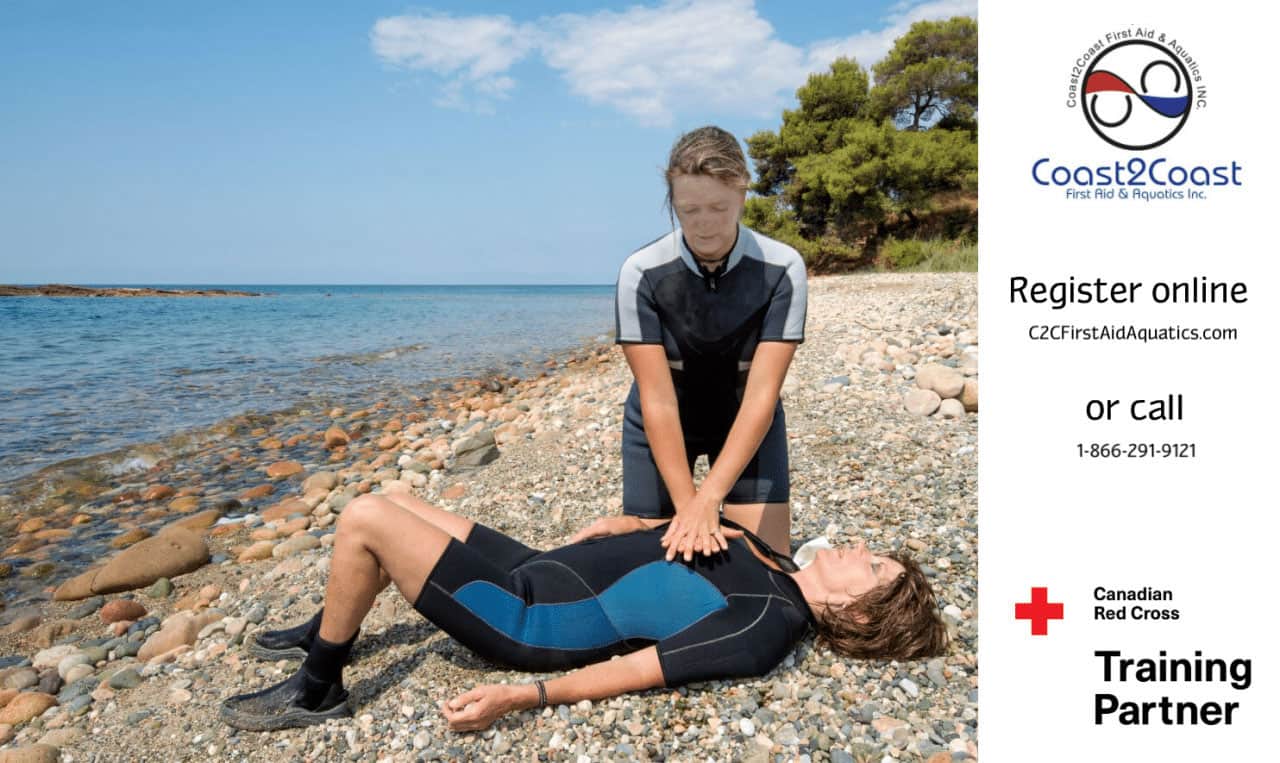
If an injured person has no pulse and is not breathing, begin CPR immediately. Cardiopulmonary resuscitation keeps oxygen flowing to the brain and organs when a person’s heart stops. Push hard and fast on the centre of the chest at a rate of 100 to 120 compressions per minute, allowing full chest recoil between compressions. If an AED is available, use it as soon as possible. CPR and AED certification courses typically include hands-on practice, real-life scenarios, and step-by-step instruction to ensure participants can respond effectively under pressure.

In a mass casualty event, prioritize victims with severe bleeding that can be controlled before those in cardiac arrest, as bleeding control affects a larger number of potentially survivable victims. If trained rescuers are available, delegate CPR to one person while others manage bleeding in additional victims.

Learn These Skills

Learn This Skill in a Real Classroom

Reading about bleeding control and CPR is a start. Hands-on practice is what builds the confidence to act when it matters. Canadian Red Cross Intermediate / Intermediate / Standard First Aid takes one day.

Get Intermediate / Intermediate / Standard First Aid Certified

Triage: Prioritizing Multiple Victims

When multiple people are injured, you must quickly assess victims to determine who needs emergency treatment most urgently. This process is called triage. As a general rule, prioritize victims with severe bleeding that can be controlled, as these individuals have the best chance of survival with immediate intervention. Adults and older children who are alert and able to walk should be directed to move to a safe area. When providing emergency first aid help to multiple victims, focus efforts where they can have the greatest life-saving impact. Do not allow further harm to occur by moving victims unnecessarily unless the scene is still dangerous.

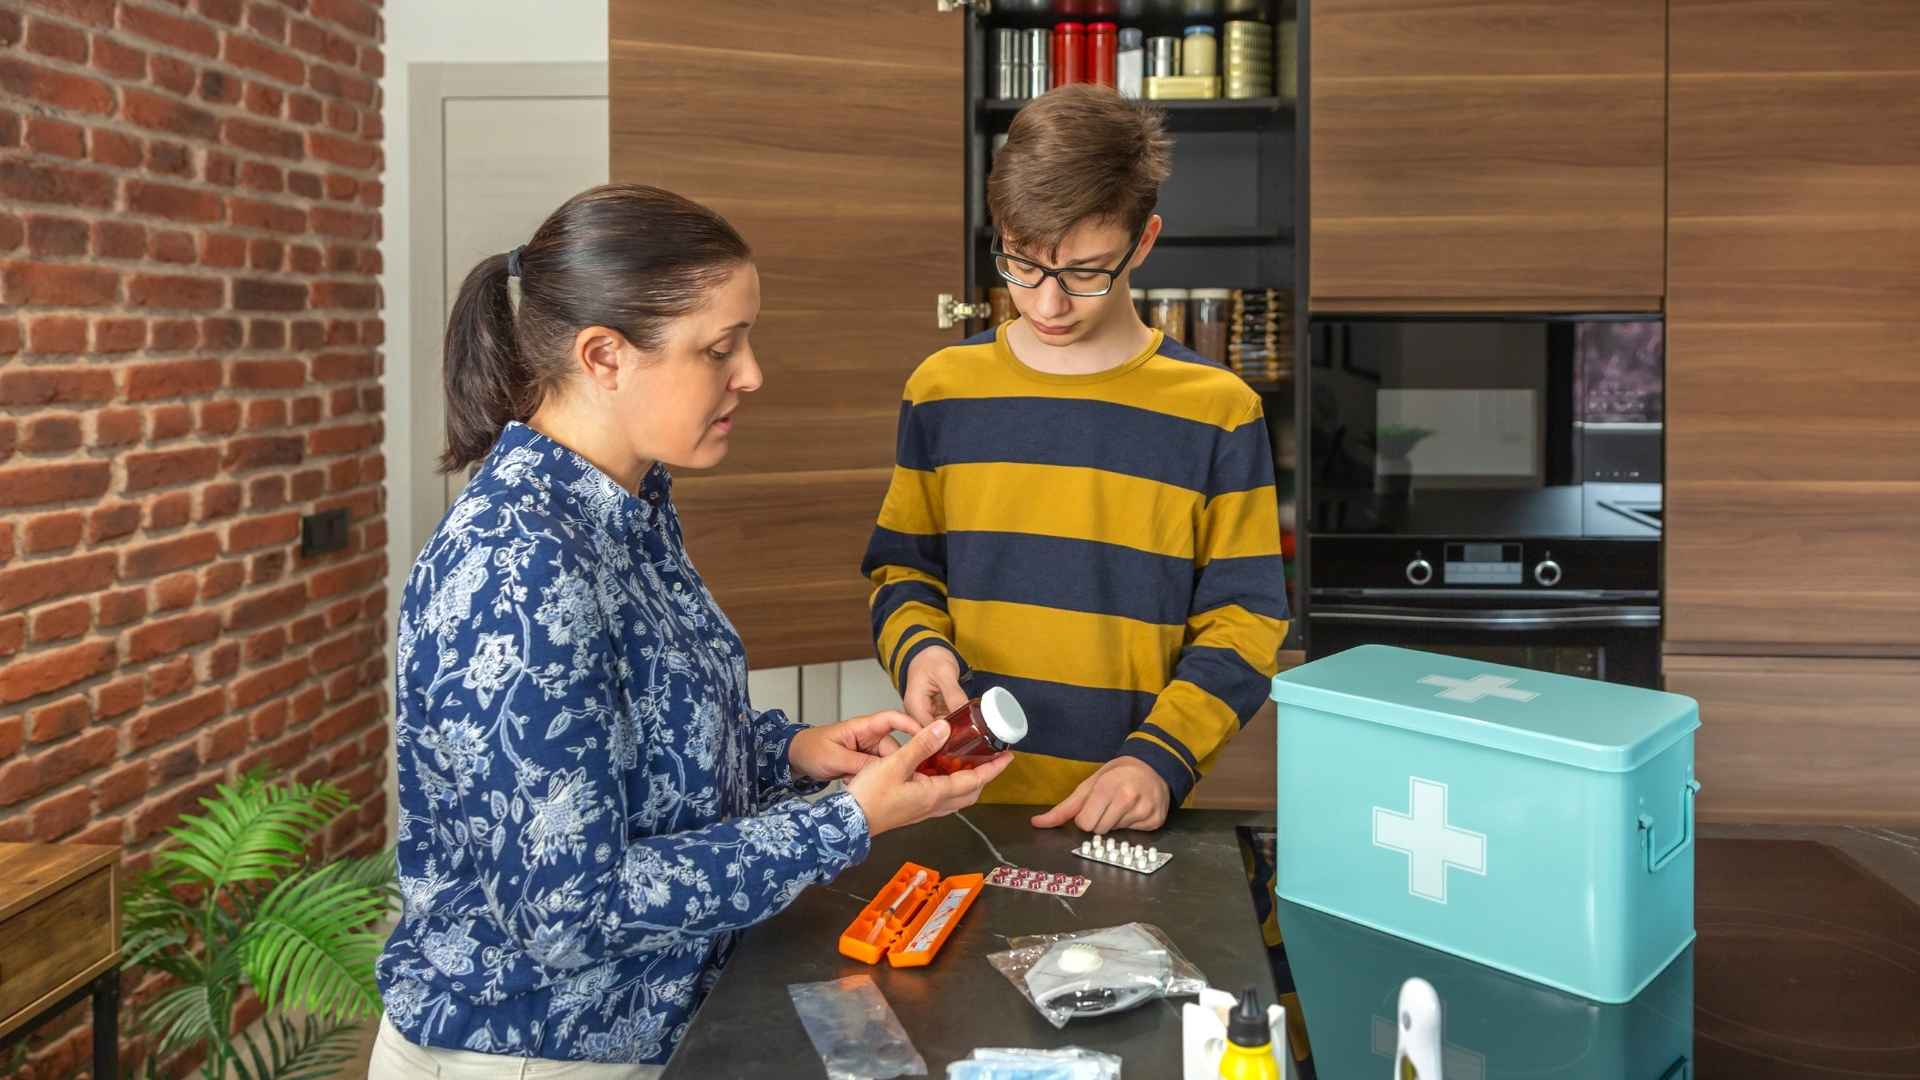
Basic / Emergency First Aid Kits: What to Carry

Having the right first aid equipment and supplies readily available can dramatically improve your ability to provide emergency first aid help. An emergency first aid certificate course will cover what to keep in a trauma kit. Consider carrying a compact kit that includes:

  • A commercial tourniquet
  • Hemostatic gauze
  • Chest seals
  • Compression bandages
  • Sterile dressings
  • Nitrile gloves
  • A CPR face shield
  • Emergency blanket

First aid kits and aid kits of this type are small enough to fit in a backpack, glove compartment, desk drawer, or car and can make the difference between effective first aid and feeling helpless in a crisis. Many first aid training providers sell or recommend specific trauma kits as part of their aid courses.

Basic First Aid Course vs Advanced Aid Training

An emergency first aid course is a structured training program designed to prepare participants with life-saving techniques such as CPR, AED use, bleeding control, and emergency scene management. Most emergency first aid courses in Canada are completed in one full day, approximately 6 to 8 hours, with some providers offering blended learning formats where theory is completed online and practical skills are practised in person. Instructors teach these skills through guided practice and scenario-based instruction.

An emergency first aid certificate is an official document confirming that you have successfully completed training in first aid, CPR, and AED use, often required by employers to meet workplace safety requirements. First aid certification typically remains valid for three years, after which recertification is required to maintain compliance with workplace and safety standards.

For those who want deeper practical skills, advanced first aid training such as the Emergency Medical Responder (EMR) program provides in-depth trauma management including advanced bleeding control, spinal immobilization, and patient assessment. EMR certification represents the gold standard of pre-hospital emergency care training.

Workplace First Aid Requirements and Aid Training

In Canada, the federal government announced the standardization of workplace first aid training in 2012, with new standards developed by the Canadian Standards Association (CSA) rolling out in 2024 to ensure consistency and quality in first aid training across the country. CSA Z1210:24 establishes standardized training requirements that affect recertification processes across all provinces and territories.

Employers in Canada are legally required to ensure that a certain number of trained first aiders are present in every workplace, with requirements varying by province, industry, and workplace size. Recertification courses often include updated training on new techniques and standards to ensure that participants are aware of the latest practices in first aid. Workplaces that handle chemicals, operate in remote locations, or expose workers to significant physical risk typically require Standard or Intermediate First Aid rather than the basic level. People who work with children may also need a course level or certification that matches their workplace requirements and responsibilities. For workplaces that want to train multiple employees at once, private group first aid training can be arranged on-site.

The Role of First Aid Training in Emergency Preparedness

While this article provides an overview of critical techniques, reading about emergency first aid help is no substitute for hands-on training that prepares people to handle unexpected emergencies. In a high-stress emergency, trained individuals perform significantly better than those without training because muscle memory and practised skills take over when the mind is overwhelmed. Comprehensive first aid courses cover these techniques in detail, providing realistic practice scenarios that build both competence and confidence.

Intermediate / Intermediate / Standard First Aid with CPR C covers emergency bleeding control, shock management, chest injuries, CPR, and AED use as part of the core curriculum. Private group training can be arranged for workplaces, schools, community organizations, and students who want practical emergency first aid skills when it matters most.

Compliance Note: CSA Z1210:24 establishes standardized workplace first aid training requirements across Canada. Employers must ensure workers hold current first aid certification. Recertification is required every three years. Requirements vary by province, workplace size, and industry risk level. Contact Coast2Coast for guidance on meeting your specific workplace first aid obligations.

Key Takeaway

In a trauma emergency, follow Check, Call, Care. Control severe bleeding using direct pressure, wound packing, or a tourniquet. Begin CPR if the person has no pulse. Treat shock by keeping the person lying down, warm, and calm. A person can bleed to death in 3 to 5 minutes, making bystander emergency first aid help critical before emergency medical services arrive. First aid certification in Canada is valid for 3 years under CSA Z1210:24 standards.

Canada’s Top-Rated Training Partner

Join 150,000+ Canadians Who Are Certified

Coast2Coast is Canada’s top-rated Canadian Red Cross Training Partner.

4.9 stars across 20,491 Google reviews. Register online in 2 minutes.

View All 30+ Locations

Frequently Asked Questions: Basic / Emergency First Aid 2026

Q1: What is emergency first aid?

A: First aid is the immediate care given to someone who is ill or injured, involving simple, life-saving techniques that can be performed by anyone. Emergency first aid focuses specifically on stabilizing a person with a life-threatening condition until emergency medical services arrive. It covers severe bleeding control, CPR, shock management, choking response, and chest wound treatment. An emergency first aid course teaches these skills through hands-on practice and real-life scenarios.

Q2: What is the most important first aid skill in a mass casualty event?

A: Controlling severe bleeding is the most critical skill in a mass casualty event. Hemorrhage is the number one cause of preventable death in trauma situations, and a person can bleed to death in three to five minutes. Prompt action using direct pressure, wound packing, or tourniquet application prevents severe blood loss and potential shock. Everyone should know these techniques before an emergency occurs.

Q3: How do I control severe bleeding as emergency first aid?

A: Apply firm, direct pressure to the wound using a clean cloth, sterile dressing, or your hands. Do not remove the dressing if blood soaks through. Add more material on top. For deep wounds in areas where a tourniquet cannot be applied, pack the wound with clean material and apply pressure. For severe limb bleeding, apply a tourniquet 5 to 7 centimetres above the wound and tighten until bleeding stops. Note the time of application and inform paramedics on arrival.

Q4: When should I perform CPR during a mass casualty event?

A: Begin CPR if an injured person has no pulse and is not breathing. Cardiopulmonary resuscitation keeps oxygen flowing to the brain and organs when the heart stops. In a mass casualty event with multiple victims, prioritize severe bleeding control before CPR, as bleeding control helps more potentially survivable victims. If an AED is available, use it as soon as possible. CPR should be continued until emergency medical services arrive and take over.

Q5: What is the Check, Call, Care framework?

A: Check, Call, Care is the standard protocol for responding to a medical emergency. Check the scene to ensure it is safe for you to approach. Call 911 or instruct someone nearby to call while you begin providing care. Care for the injured person using the first aid techniques appropriate to their injuries. This framework is the foundation of every basic first aid course and ensures that rescuers act in a safe, organized, and effective way.

Q6: How do I treat shock in an emergency?

A: Keep the victim lying down with legs elevated approximately 30 centimetres if their injuries allow. Cover them with a blanket or jacket to maintain body temperature. Do not give them anything to eat or drink. Reassure them calmly and monitor their breathing continuously. Call 911 immediately. Shock can occur rapidly after severe trauma or heavy blood loss and is a life-threatening emergency requiring professional medical care as quickly as possible.

Q7: What should be in an emergency first aid kit for trauma?

A: A trauma-focused emergency first aid kit should include a commercial tourniquet, hemostatic gauze, chest seals, compression bandages, sterile dressings, nitrile gloves, a CPR face shield, and an emergency blanket. These aid kits are compact enough for a backpack or vehicle glove compartment. Having the right supplies available before an emergency allows you to act immediately without improvising. Many first aid training providers recommend specific trauma kits as part of their courses.

More FAQs: Training, Certification, and Workplace Requirements

Q8: What does an emergency first aid course cover?

A: An emergency first aid course is a structured training program that teaches life-saving techniques including CPR, AED use, severe bleeding control, shock management, choking response, and emergency scene management. Most emergency first aid courses in Canada are completed in one full day, approximately 6 to 8 hours, with blended learning formats available. Practical skills sessions ensure participants can perform these techniques under pressure.

Q9: How long is an emergency first aid certificate valid?

A: First aid certification is typically valid for three years, after which recertification is required to maintain compliance with workplace and safety standards. Recertification courses include updated training on new techniques and standards, ensuring certified first aiders are current with the latest practices. In Canada, CSA Z1210:24 establishes the standardized requirements for workplace first aid certification across provinces and territories.

Q10: What are Canadian workplace first aid requirements?

A: In Canada, employers are legally required to ensure trained first aiders are present in every workplace, with requirements varying by province, industry, and workplace size. CSA Z1210:24 standards established in 2024 standardize first aid training requirements across the country. Workplaces with higher physical risk or remote locations typically require Standard or Intermediate First Aid. Employers must ensure employees hold current first aid certification to comply with occupational health and safety regulations.

Q11: What is the difference between basic first aid and Intermediate / Intermediate / Standard First Aid?

A: Basic Basic / Emergency First Aid is a shorter course covering essential life-saving skills including CPR, AED, bleeding control, and choking response. Intermediate / Intermediate / Standard First Aid is a more comprehensive course that adds deeper coverage of medical emergencies, trauma management, head injuries, hypothermia, severe burns, stroke recognition, and workplace-specific scenarios. Intermediate / Intermediate / Standard First Aid meets the requirements for most Canadian workplaces and provides broader competence across common medical emergencies.

Q12: How do I treat a chest wound as emergency first aid?

A: If a chest wound is bubbling or making a sucking sound, it is a sucking chest wound indicating air is entering the chest cavity. Cover the wound with a non-porous material, sealing three sides and leaving one side open to allow air to escape. This improvised chest seal prevents a tension pneumothorax. Call 911 immediately and keep the injured person as still as possible while monitoring their breathing.

Q13: What is the Platinum Ten Minutes in emergency first aid?

A: The Platinum Ten Minutes refers to the first ten minutes after a traumatic injury, during which immediate first aid intervention has the greatest impact on survival. Hemorrhage control and airway management in this window can prevent the progression of a survivable injury to a fatal one. This concept underlines why waiting for emergency medical services is not sufficient when someone is experiencing severe blood loss. Bystander emergency first aid help fills this critical gap.

Q14: What is the EMR program and how does it differ from a basic first aid course?

A: The Emergency Medical Responder (EMR) program is an advanced pre-hospital care training course that goes significantly beyond basic first aid. EMR training covers advanced patient assessments, airway management, oxygen therapy, spinal motion restriction, trauma management, and multiple casualty incident response. It is recommended for firefighters, security professionals, industrial workers in remote locations, and anyone pursuing a career in emergency services. EMR certification is the highest level of bystander emergency care training available in Canada.

Q15: Where can I take an emergency first aid course in Canada?

A: Coast2Coast First Aid and Aquatics offers Canadian Red Cross certified Basic / Emergency First Aid, Intermediate / Intermediate / Standard First Aid, and Emergency Medical Responder courses across more than 30 locations in Ontario, Nova Scotia, Alberta, and California. All courses include hands-on practice with real-life scenarios and step-by-step instruction. Online blended learning is available for those who want to complete theory at home before attending an in-person skills session.

Legal Disclaimer
The information in this article is for educational and informational purposes only and does not constitute medical advice. In any emergency, always call 911 immediately. Emergency first aid techniques should be learned and practised under the supervision of a qualified instructor. Coast2Coast First Aid Inc. assumes no liability for any outcomes resulting from the application or misapplication of information in this article.

About This Article, Expertise and Sources
Content reviewed by the Coast2Coast First Aid and Aquatics certified instructor team. Emergency first aid information sourced from the Canadian Red Cross First Aid Guidelines, the CSA Z1210:24 First Aid Training Standard, and Health Canada emergency preparedness resources. Coast2Coast First Aid Inc. is Canada’s largest Canadian Red Cross Training Partner. Last reviewed: May 2026. For corrections or additional information, contact info@c2cfirstaidaquatics.com or 1-866-291-9121.

Health Benefits of Swimming: Why Every Lap Counts for Your Body and Mind (2026)

Five children in swim caps and goggles line up at the edge of an indoor swimming pool. They are smiling and lying on their stomachs with their hands on the pool deck, ready to enter the water. One child splashes water behind them.

Besides the fact that swimming improves balance, coordination, and posture, it is also a flourishing physical activity to enhance cardio, burn calories, and gain muscle! The popularity of the sport is a result of open participation — everyone can learn how to swim! Swimming is a non-impact activity which helps those who have problems in their joints, knees, lower back, and those who are differently abled to improve their health, movement, and their accessibility.

Continue reading

Does CPR Save Lives? Why Every Canadian Should Know Cardiopulmonary Resuscitation

Instructor demonstrating the importance of first aid training by performing an airway check on a manikin during a first aid course

CPR can save lives — bystander cardiopulmonary resuscitation (CPR) doubles or triples cardiac arrest survival rates by maintaining blood flow and brain oxygenation until emergency medical services arrive. Performing chest compressions within the first 2–4 minutes prevents permanent neurological damage. This 2026 guide covers WSIB-approved techniques, AED use, hands-only CPR, conventional CPR with rescue breaths, and the legal protections bystanders receive under Ontario’s Good Samaritan Act.

Get Certified✓ WSIB & Red Cross Approved

Find a Class Near You

Canadian Red Cross CPR & First Aid courses across Ontario and Alberta. Register online in 2 minutes.

View All 30+ Locations →

How CPR can save lives — Coast2Coast instructor in Toronto demonstrating the 2026 Red Cross CPR and AED rescue sequence on a training mannequin

2–3×
Survival rate increase with immediate CPR
7–10%
Survival drop per minute without CPR
4 min
Before permanent brain damage begins

How CPR Can Save Lives: The Evidence Is Clear

Yes — CPR can save lives, and the data is unambiguous. About 90 percent of people who suffer out-of-hospital cardiac arrests die, but when cardiac arrest occurs — the moment the heart stops beating effectively — CPR can save lives by maintaining blood flow until paramedics arrive, especially when performed immediately. Immediate CPR doubles or triples a cardiac arrest victim’s chance of survival. Every minute without CPR reduces survival odds by 7 to 10 percent. With bystander CPR, that drop slows to just 3 to 4 percent per minute — a dramatic difference that comes down entirely to whether a trained person is standing nearby until emergency responders arrive on scene.

In Canada, someone suffers a sudden cardiac arrest outside a hospital setting every 12 minutes. In the Greater Toronto Area alone, paramedics respond to thousands of cardiac emergencies annually, yet the average emergency responder arrival time is 7 to 8 minutes — well beyond the 4-minute window before permanent brain damage begins. The survival gap between “bystander acts” and “bystander waits” is not a small statistical margin. It is the difference between life and death.

Knowing CPR and AED use transforms you from a helpless observer into a lifesaver. The skills are straightforward, CPR training takes less than a day, and the potential impact is immeasurable — every certified Canadian increases the odds that CPR can save lives in their community.

What Is Cardiopulmonary Resuscitation (CPR)?

Cardiopulmonary resuscitation (CPR) is an emergency lifesaving procedure performed when the heart stops beating effectively. The term “cardiopulmonary” refers to the heart (cardiac) and lungs (pulmonary) — the two systems CPR is designed to keep functioning artificially until professional help arrives.

CPR has two primary forms:

  • Hands-Only CPR (Compression-Only CPR): Involves continuous chest compressions without rescue breaths. Increasingly popular for public CPR training because it is easier to teach, avoids mouth-to-mouth breathing, and is highly effective for witnessed adult cardiac arrest.
  • Conventional CPR: Combines chest compressions with rescue breaths. Required for drowning victims, pediatric cardiac arrest, drug overdose emergencies, and all scenarios involving breathing failure rather than purely cardiac failure. This is the complete CPR skill set taught in Red Cross certified courses.

The American Heart Association uses the letters C-A-B to help people remember the sequence: Compressions first, then Airway, then Breathing.

Understanding Cardiac Arrest: An Electrical Malfunction

Cardiac arrest is frequently confused with a heart attack, but they are clinically distinct. A heart attack is a “plumbing” problem — a blockage in the blood vessels supplying the heart. Cardiac arrest is an “electrical” problem — the heart suddenly stops beating effectively, and the body stops functioning normally as circulation ceases. The heart begins to quiver chaotically (ventricular fibrillation) instead of pumping blood.

Sudden cardiac arrest (SCA) can strike anyone, at any age. While heart disease and high blood pressure rank as risk factors, SCA also affects seemingly healthy athletes and young adults due to undiagnosed heart defects or commotio cordis — cardiac arrest triggered by a blunt blow to the chest.

Without blood flow, the brain begins to suffer permanent damage within four minutes. Performing CPR keeps blood flow active in those first critical minutes, limiting brain injury. Death can occur four to six minutes after that without intervention. This is why widespread Basic Life Support (BLS) training for health care providers and CPR Level C training for the public is so critical across Canada.

Safety Tip: If you are alone and witness a cardiac arrest, call 911 first and put your phone on speaker. Then begin chest compressions immediately. Push hard and fast in the center of the chest at a rate of 100 to 120 compressions per minute. Do not stop until help arrives or you are too exhausted to continue.

The Physiology of CPR: How Chest Compressions Work

Many people ask: how can pushing on someone’s chest actually save them? The answer is the Manual Pump Theory. When you perform high-quality CPR, you physically squeeze the heart between the breastbone (sternum) and the spine. This action creates enough internal pressure to force oxygenated blood out of the heart and up to the brain, improving the chances of successful resuscitation.

Compression Depth and Rate

Compression depth and rate matter enormously. Pushing too slowly or too shallowly reduces the return of blood flow to vital organs by up to 30%. Even though CPR only provides about 25 to 30 percent of normal blood flow, that flow often keeps brain cells alive until an automated external defibrillator (AED) can restore the heart’s natural rhythm.

How to Perform Chest Compressions

To perform chest compressions, place the lower palm of your hand over the middle of the person’s chest along the nipple line. Place your other hand on top, keeping your elbows straight and your shoulders directly above your hands. Push down at least 2 inches (5 centimeters) deep at a rate of 100 to 120 compressions per minute. Allow the chest to fully recoil between compressions without lifting your hands.

For adults, compressions require significant force — this is why practicing on mannequins during CPR training helps you gauge proper pressure before a real emergency.

Watch: How To Perform CPR — Coast2Coast Official

The Critical Minutes: Why Bystander Intervention Is Non-Negotiable

When someone collapses, a countdown begins. For every minute that passes without CPR, the chance of survival decreases by 7 to 10 percent. With bystander CPR, that decrease slows to 3 to 4 percent per minute. By the time ten minutes pass without any intervention, survival from cardiac arrest is statistically unlikely. In a city like Toronto, traffic conditions and high call volumes can push emergency services response times to 8 minutes or longer — well beyond the window where CPR can save lives.

Bystander CPR is the “Bridge to Life.” When compressions begin within the first two minutes, survival rates can exceed 40 percent. These statistics confirm that the most important link in the Chain of Survival is not the doctor in the ER — it is the person standing next to the victim when they fall, who starts CPR while first responders, emergency medical services, and other emergency responders race to the scene.

Unfortunately, fewer than half of out-of-hospital cardiac arrest victims receive bystander CPR before EMS arrival. Closing that gap through community CPR training ranks among the highest-impact public health interventions available.

Safety Tip: If you witness a collapse, call 911 and put your phone on speaker. Begin chest compressions immediately. Push hard (at least 2 inches deep) and fast (100–120 compressions per minute) in the center of the chest. Do not stop until help arrives or an AED is ready to analyze the victim.

CPR Combined With AED Training: The Ultimate Life-Saving Duo

While CPR maintains blood flow, it rarely restarts the heart on its own. That is the job of the automated external defibrillator (AED). In cardiac arrest emergencies, the AED analyzes the heart’s rhythm and delivers a targeted electrical shock to reset the heart’s electrical system. When CPR and AED use are combined within the first few minutes, survival rates can climb as high as 75 percent. Every minute without CPR and an AED reduces the chance of survival by about 10 percent.

CPR training courses include instruction on the use of automated external defibrillators (AEDs), which significantly improves survival rates when the two skills are used together. AEDs now appear in public locations across Ontario — from Union Station to community centres. They are designed for use by anyone and provide step-by-step voice instructions. However, AED deployment should not be limited to trained people only — though AED training still minimizes the time to defibrillation for cardiac arrest victims.

This combination is exactly how CPR can save lives in real-world public emergencies. Taking a CPR and AED course removes the “fear factor.” In a high-stress cardiac emergency, you act on instinct — not a manual you have never read.

CPR can save lives — AED and CPR training for emergency preparedness in Ontario

Overcoming the Fear of Action: The Good Samaritan Act

The biggest barrier to bystander intervention is fear — fear of doing it wrong, fear of breaking ribs, or fear of being sued. In Ontario, the Good Samaritan Act (2001) protects you from these concerns.

You cannot be held liable for damages while providing emergency assistance in good faith, provided you act within the scope of your training and without gross negligence. A person in cardiac arrest is clinically dead — you cannot make their situation worse by attempting to save them. Yes, ribs may crack during effective compressions, but as the saying goes: “Broken ribs heal; death does not.”

It is also worth noting that in Canada, the Good Samaritan Drug Overdose Act provides similar legal protection when seeking emergency help during a suspected drug overdose — an increasingly relevant scenario as opioid emergencies continue to be a public health concern across Ontario and the country.

Ontario Compliance Note: WSIB Ontario requires all provincially regulated workplaces to maintain first aid and CPR-trained personnel on site. Confirm your workplace’s specific requirements at wsib.ca/en/firstaid.

When CPR Applies Beyond Cardiac Arrest: Drug Overdose Emergencies

CPR skills extend beyond cardiac arrest. In Canada’s ongoing opioid crisis, drug overdose emergencies represent a growing category of life-threatening situations where CPR and rescue breathing make the decisive difference between life and death.

Opioid drugs affect the part of the brain controlling breathing. When someone overdoses, breathing slows or stops entirely before the heart fails. This means rescue breaths — conventional CPR, not hands-only CPR — are especially critical in overdose situations. If you suspect a drug overdose: call 911 immediately, check for responsiveness and breathing, begin full CPR if the person is not breathing and has no pulse, starting with two rescue breaths, and mouth-to-mouth breathing may be used when no barrier device is available.

This is one reason CPR training courses that include rescue breathing remain the gold standard for healthcare providers, first responders, and anyone who works in settings where overdose risk is present, since these steps are best learned and practised through training and are especially important for trained professionals working in overdose-risk settings.

Professional vs. Public: Which CPR Course Do You Need?

Not all CPR training is the same. Choosing the right level matters both for effectiveness and for WSIB and workplace compliance.

  1. CPR Level C: The standard for the general public, parents, teachers, coaches, and most Ontario workplaces. It covers adult, child, and infant CPR — both hands-only CPR and conventional CPR with rescue breaths. Hands-only compression-only CPR has grown increasingly popular for the general public because it is easier to teach and does not require mouth-to-mouth contact.
  2. Basic Life Support (BLS): Healthcare providers previously knew this as Healthcare Provider (HCP) CPR. Nurses, doctors, paramedics, firefighters, and other health care providers need BLS, which targets trained professionals who work in team-based response. It focuses on high-performance resuscitation efforts, and a sports medicine physician may also need this level for athletic settings. BLS covers adult basic life support and pediatric basic life support protocols.
  3. Basic / Emergency First Aid with CPR: A shorter course for those who need a fundamental overview of life-saving skills alongside basic CPR skills.

The Canadian Red Cross certifies all Coast2Coast courses, which meet 2026 WSIB compliance standards.

Building CPR Skills Through Training Programs

Many training programs are available, including blended learning options that combine online cognitive learning with in-person skills practice and testing. For people learning CPR for the first time, the practical hands-on session is irreplaceable — practicing compression depth and rate on mannequins builds the muscle memory needed to perform effective compressions under pressure.

When you get certified, you aren’t just gaining a certificate. You are gaining the power to change the outcome of a tragedy — at home, at work, on public transit, or anywhere a cardiac emergency strikes without warning.

Learn How CPR Can Save Lives — Get Certified Today

Cardiac arrest doesn’t wait for a convenient time. Be ready to save a life by getting certified in First Aid and CPR with Coast2Coast.

Register Now — Find a Course Near You

Frequently Asked Questions: 2026 CPR Guidelines

Q1: Does CPR actually save lives?

A: Yes. CPR can save lives — performed immediately after cardiac arrest, it doubles or triples survival rates. About 90 percent of out-of-hospital cardiac arrests are fatal without intervention, but immediate bystander CPR combined with early defibrillation pushes survival rates significantly higher.

Q2: What does CPR stand for?

A: CPR stands for cardiopulmonary resuscitation — an emergency procedure combining chest compressions and, in full CPR, rescue breaths, designed to manually maintain blood flow when the heart has stopped beating.

Q3: Do I need to give mouth-to-mouth during CPR?

A: For untrained bystanders, hands-only CPR (compression-only CPR) is highly effective and recommended for adult victims. Mouth-to-mouth breathing is part of conventional CPR when rescue breaths are required. Conventional CPR — including rescue breathing with a pocket mask — is essential for drowning victims, pediatric cardiac arrest, and drug overdose emergencies. For children and infants, breathing emergencies are the most common cause of cardiac arrest, making rescue breaths critical.

Q4: How hard should I push during chest compressions?

A: For an adult, you must compress the chest at least 2 inches (5 cm) deep at a rate of 100 to 120 compressions per minute. Pushing too slowly or too shallowly can reduce blood flow to vital organs by up to 30 percent. Significant force is required — practicing on mannequins helps calibrate correct pressure.

Q5: What is the “4-Minute Rule” in CPR?

A: The brain begins to suffer permanent damage within approximately four minutes without oxygen-rich blood flow. This is why immediate bystander CPR is non-negotiable — you must keep blood flow active until professional help and an AED arrive.

Q6: Can anyone use an AED?

A: Yes. AEDs are designed for use by any bystander and provide step-by-step voice instructions. Deployment of AEDs should not be limited to trained people only, although CPR and AED training is strongly recommended to minimize time to defibrillation.

Q7: Can I use an AED on a child or infant?

A: Yes. Most modern AEDs have pediatric pads or a child mode. If pediatric pads are unavailable, use adult pads ensuring they do not overlap — typically one on the chest and one on the back for infants.

Q8: Can I use an AED if the person has a pacemaker?

A: Yes. Simply avoid placing the AED pad directly over the visible pacemaker lump — keep it at least one inch away. The AED will still function correctly.

Q9: What is the difference between cardiac arrest and a heart attack?

A: A heart attack is a “plumbing” problem — a blockage cutting off blood supply to the heart muscle. Cardiac arrest is an “electrical” problem — the heart stops beating effectively entirely. A heart attack can trigger cardiac arrest, but they are distinct emergencies requiring different responses.

Q10: How often do I need to recertify in CPR in Canada?

A: In Canada, CPR certifications are valid for three years. However, many healthcare and workplace settings require annual recertification to ensure skills remain sharp and up-to-date with the latest medical guidelines.

Q11: Does the Good Samaritan Act protect me if I make a mistake during CPR?

A: Yes. Under Ontario’s Good Samaritan Act (2001), you cannot be held liable for damages when providing emergency assistance in good faith, as long as you act within the scope of your training and without gross negligence.

Q12: Is CPR effective for drug overdose emergencies?

A: CPR — particularly conventional CPR with rescue breaths — is critical in overdose situations because opioids suppress breathing before the heart stops. If someone is unresponsive and not breathing after a suspected overdose, begin CPR immediately and call 911.

Q13: What is the Chain of Survival in emergency cardiovascular care?

A: The Chain of Survival is the sequence of actions that maximize cardiac arrest outcomes: early recognition and calling 911, immediate bystander CPR, rapid defibrillation with an AED, effective emergency medical services response, and post-arrest care. Every link matters, but bystander CPR and early defibrillation are the most critical steps available to the public.

Q14: Can CPR cause injuries like broken ribs?

A: Yes, rib fractures can occur during effective chest compressions, particularly in older adults. This is expected and acceptable. A person in cardiac arrest is clinically dead — the risk of a rib fracture is negligible compared to the alternative. Broken ribs heal; cardiac arrest without intervention does not.

Q15: What is the difference between hands-only CPR and conventional CPR?

A: Hands-only CPR uses continuous chest compressions with no rescue breaths and is appropriate for witnessed adult cardiac arrest caused by a cardiac event. Conventional CPR adds rescue breaths to compressions and is required for children, infants, drowning victims, drug overdose victims, and any cardiac arrest where respiratory failure was the primary cause. When conventional CPR is indicated, trained responders may give two rescue breaths before returning to compressions. CPR training teaches both techniques.

About This Article — Expertise & Sources
Content reviewed by Coast2Coast First Aid & Aquatics’ certified instructor team, including Canadian Red Cross First Aid, CPR, and Basic Life Support Instructors, an Instructor Trainer with a nursing background, and a practising paramedic. Regulatory information sourced from the WSIB Ontario First Aid Requirements, the American Heart Association 2025 Guidelines for CPR and Emergency Cardiovascular Care, the Canadian Red Cross, and the Public Health Agency of Canada. Course content meets CSA Standard Z1210-17. Coast2Coast First Aid Inc. is an active Canadian Red Cross Training Partner. Last reviewed: March 2026. For corrections or additional information, contact info@c2cfirstaidaquatics.com or 1-866-291-9121.

Summer First Aid: Why Certification is Essential for Ontario Safety?

"Red Cross First Aid student practicing drowning rescue CPR on a beach—Coast2Coast First Aid & CPR training in Toronto, Ontario."

If one thing’s sure enough, it’s this: Toronto will be absolutely hot throughout the summer. In response, many folks within the region head for the water on the weekends and holidays. Whether it’s in the form of a backyard or community pool, a beach, getting wet is that the best way to remain cool throughout the scorching summer months. However, along with all of the fun of swimming comes several dangers. In fact, drowning number one cause of accidental death for Torontonians kids aged zero to five years. These serious statistics highlight the importance of being as safe as possible when by the water this summer – and could be a reminder of the advantages of taking swimming lessons, as well.

Continue reading

Children’s Head Injuries: Concussion and First Aid Guide for Parents (2026)

Close-up of a well-loved teddy bear with a patch sewn on its head. The bear has soft, brown fur, shiny black eyes, and a white snout, creating a cute and endearing appearance. The background is a blurred dark blue color. Highlighting a head injury - Picture by Coast2Coast First Aid

Physical injuries, whether minor ones or major are inevitable, but it’s vital to differentiate whether a head damage is severe or not. There are a few recommendations that you can review beneath that will let you distinguish between extreme and non-extreme accidents; that we teach in our First Aid and CPR training locations.

Continue reading