We offer courses in Canada and the US. If you are experiencing issues with our website and need help to register, or if you have questions, please call us at 866-291-9121.
If you are facing any issues with your online course, registration, or training, please click here to submit a help request.
If you are facing any issues with your online course, registration, or training, please click here to submit a help request.
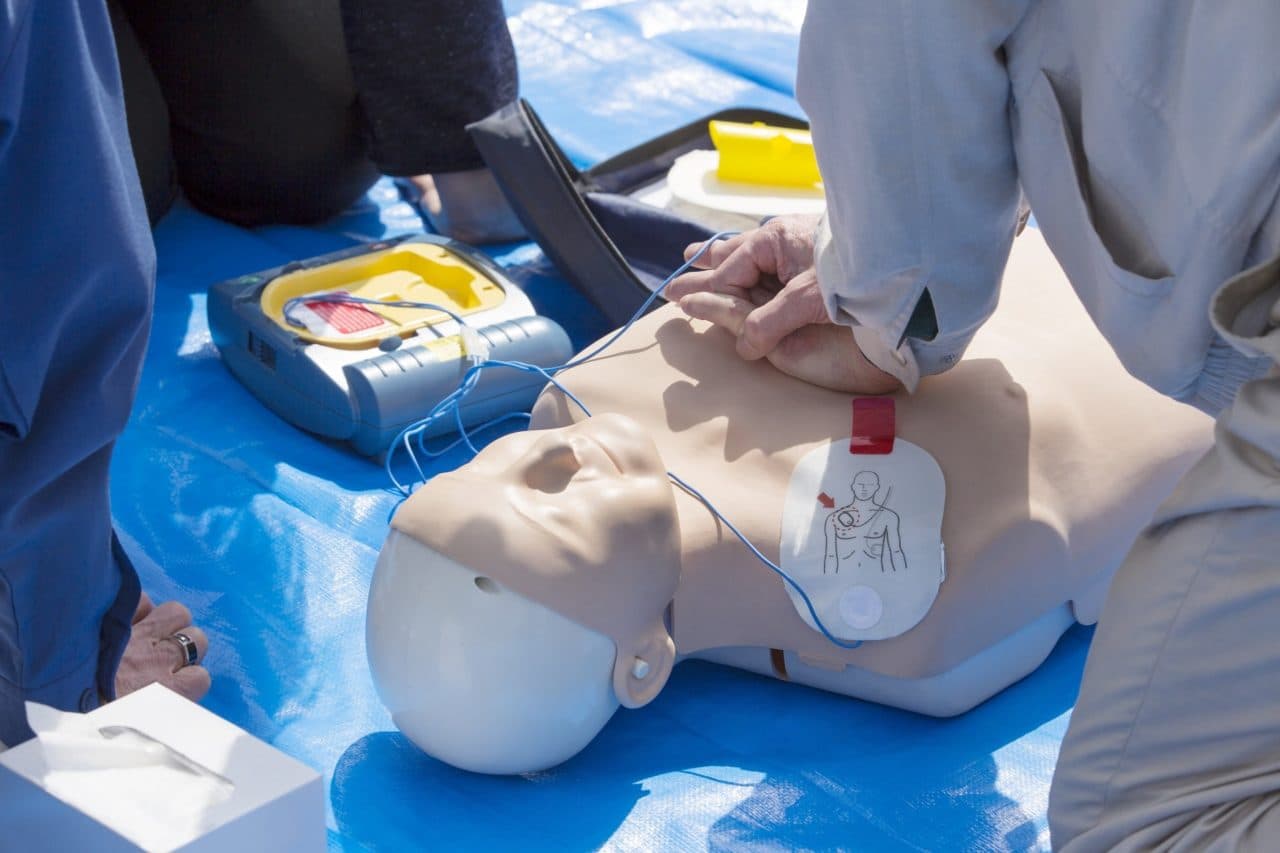
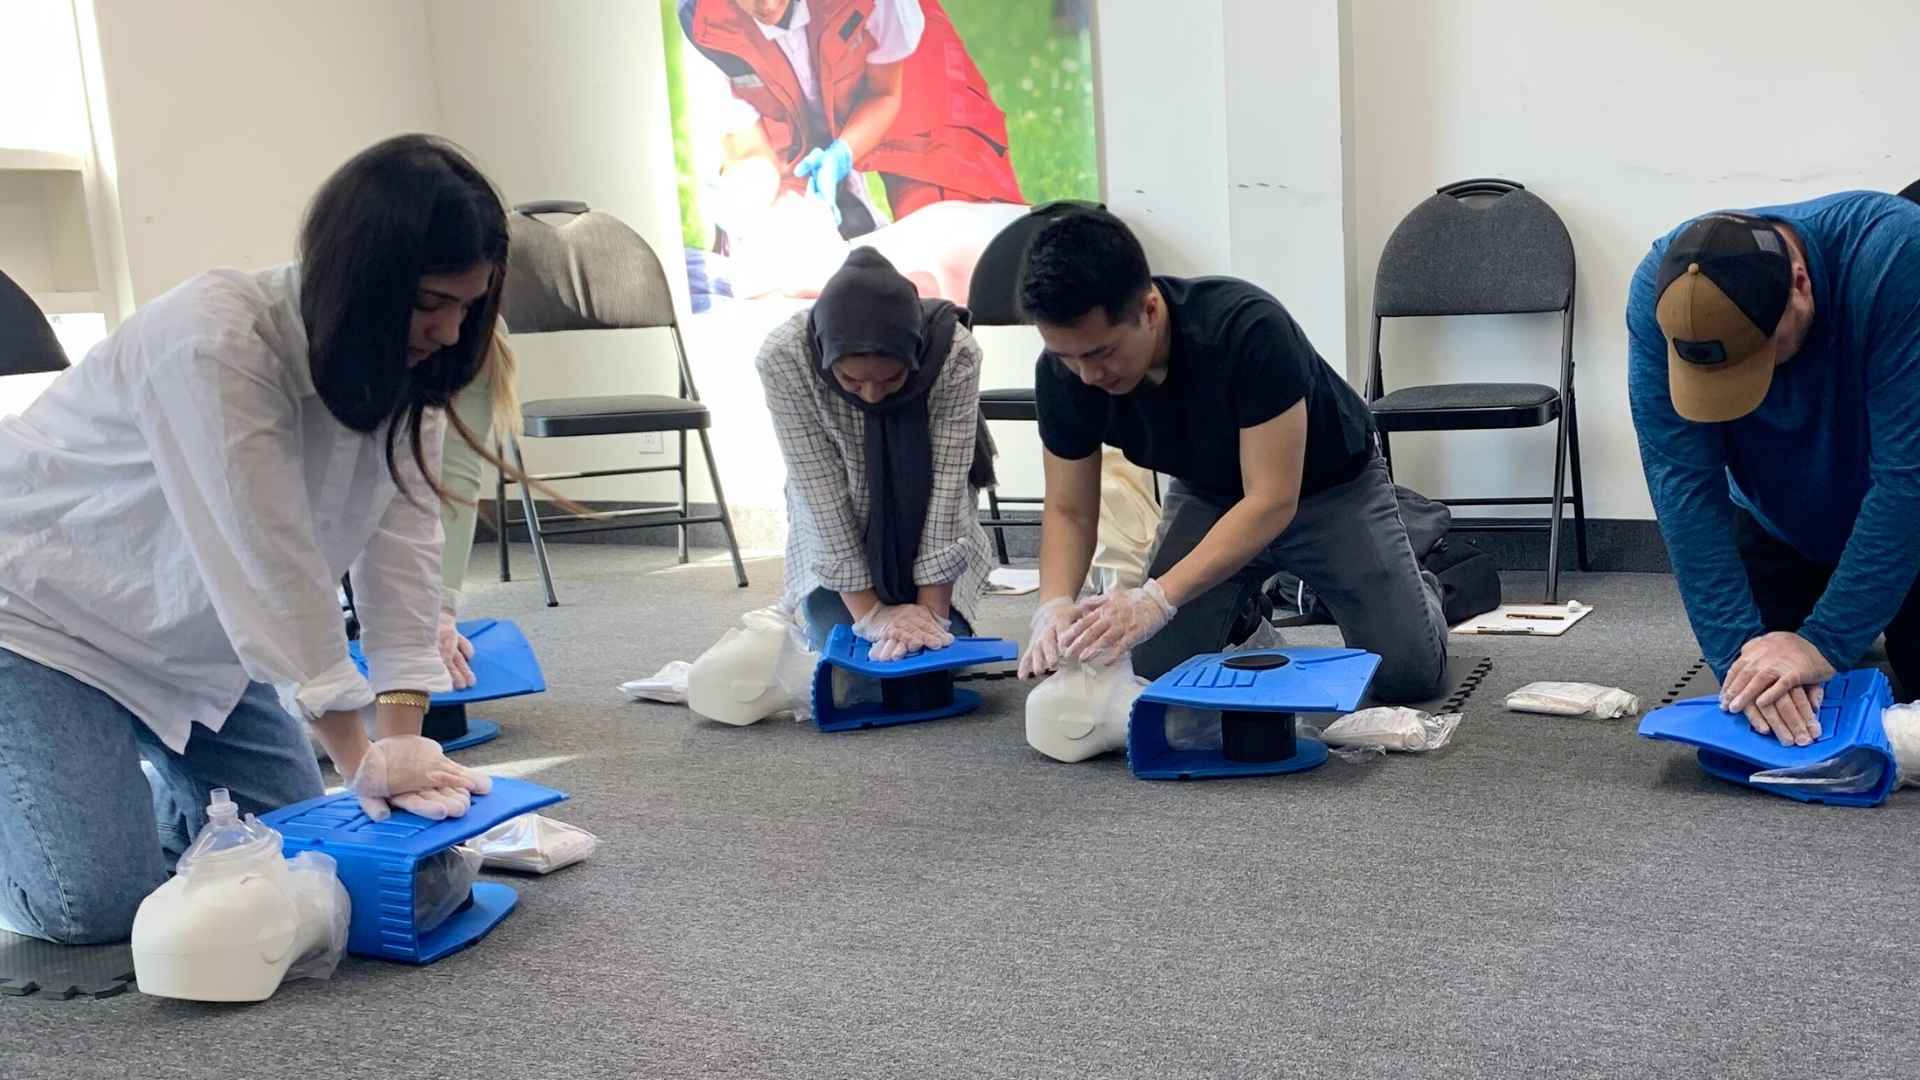
More than 300 thousand people die because of cardiac arrest every year. The risk of heart disease is higher in senior citizens. 70% of adults above the age of 60 have some kind of cardiac problem in their lifetimes. There are many different types of health issues that can be the cause of cardiac arrest as well as other social factors that can lead to this situation of life or death. Knowing CPR can save lives.
The CPR HCP (Healthcare Provider) course has been officially replaced by the Basic Life Support (BLS) certification in Canada. BLS covers everything CPR HCP taught, single rescuer and multi rescuer team CPR for adults, children and infants, advanced airway management with bag-valve mask, and AED use, and adds high performance CPR, team dynamics, closed-loop communication, and the rigorous standards modern healthcare providers need. Any employer still listing “CPR HCP” will accept BLS because it exceeds the old HCP requirements.
Get Certified✓ Canadian Red Cross BLS Approved
Find a BLS Class Near You
Canadian Red Cross BLS certification courses across Ontario and Alberta. Register online in 2 minutes.
Understanding CPR HCP vs BLS: What Healthcare Providers Need to Know
One of the most frequently asked questions we receive at Coast2Coast is: “Why don’t you offer the CPR HCP course?” The CPR HCP vs BLS conversation comes up almost every week, and it is a fair question. The answer reflects an important evolution in Canadian emergency medical training. The short answer: the CPR HCP designation has been replaced by the BLS course, which delivers more comprehensive, up-to-date training for healthcare professionals and anyone requiring healthcare-level CPR certification.
Furthermore, as a Canadian Red Cross Training Partner, Coast2Coast follows the most current training standards established by the International Liaison Committee on Resuscitation (ILCOR) and the Canadian Red Cross. Consequently, the transition from CPR HCP to BLS certification reflects a significant improvement in how healthcare-level resuscitation skills are taught, assessed, and applied in real clinical environments.
What Was the CPR HCP Course?
CPR HCP Course Content and Scope
The CPR HCP (Healthcare Provider) course was traditionally a CPR certification designed for individuals working in healthcare settings. Specifically, it covered single rescuer and two-rescuer CPR for adults, children and infants, the use of bag-valve mask (BVM) devices, automated external defibrillator (AED) operation, and management of obstructed airways. For many years, CPR HCP was the standard certification required by hospitals, dental offices, physiotherapy clinics, long-term care facilities, and other healthcare environments across Canada.
Why CPR HCP Needed an Upgrade
While CPR HCP served its purpose, the evolution of resuscitation science revealed opportunities to improve the training. In particular, the healthcare community recognized the need for stronger emphasis on team-based resuscitation, measurable high performance CPR metrics, and integration of multiple interventions during cardiac arrest management. As a result, these needs led directly to the development and adoption of the BLS course as the new standard for healthcare-level CPR training.
Why Did the Canadian Red Cross Replace CPR HCP With BLS?
The transition wasn’t just a name change. Instead, it represented a shift toward high performance CPR, a methodology proven to dramatically improve survival outcomes. According to the Heart & Stroke Foundation of Canada, high-quality chest compressions can increase survival rates by up to 40%. Notably, the old HCP curriculum lacked the rigorous team dynamics training that modern clinical environments demand.
Major Canadian training bodies replaced the historical CPR HCP designation with the standard BLS curriculum to reflect a standardized medical training approach. Moreover, this change aligns Canadian healthcare training with international ILCOR guidelines and ensures that healthcare providers across hospitals, clinics, and pre-hospital settings learn the same evidence-based protocols.
The 2026 Regulatory Landscape: CSA Z1210:24 and Healthcare
While the WSIB has transitioned to the CSA Z1210:24 standard for workplace first aid (classifying courses as Basic or Intermediate), healthcare settings demand an even higher tier. Basic Life Support (BLS) remains the gold standard for clinical environments. Intermediate / Intermediate / Standard First Aid satisfies workplace compliance for most employers, but it does not meet the resuscitation skills threshold required in healthcare. Standard CPR training is better suited to non-clinical workplace requirements, including teachers, sports coaches, daycare workers, and others who may need to provide life-saving assistance in emergencies.
Expert Insight: “In a 2026 clinical setting, a 120-second response time is the absolute maximum. BLS training ensures that teams can deploy a BVM and AED within seconds, not minutes.”, Coast2Coast Clinical Training Department
What Is the BLS Course?
The Basic Life Support (BLS) course is the modern replacement for CPR HCP. Importantly, it covers everything CPR HCP covered and significantly more. In addition, BLS training includes all core CPR skills, chest compressions, rescue breaths, and AED use for all age groups, plus advanced concepts that healthcare providers specifically need.
High Performance Multi Rescuer Team CPR
One of the most significant additions in BLS training is the emphasis on team-based resuscitation. In a real healthcare setting, cardiac arrest response involves multiple team members working simultaneously, one person performing chest compressions, another managing the airway, another operating the AED, and a team leader coordinating the effort.
BLS places a major emphasis on high-performance multi rescuer teamwork, structured role assignments, and closed-loop communication to prevent responder fatigue. Participants rotate through different roles during team-based practice scenarios, learning to communicate clearly and coordinate efforts seamlessly under pressure.
Continuous Quality Improvement and High Performance CPR Metrics
BLS training emphasizes the measurable components of high-quality CPR, the same metrics now used in clinical post-event audits:
Compression rate of 100–120 per minute
Compression depth of at least 5 centimetres (2 inches) for adults
Full chest recoil between compressions
Minimizing interruptions in compressions
Avoiding excessive ventilation
Performing pulse checks at appropriate intervals (not exceeding 10 seconds)
Participants receive real-time feedback during practice on mannequins equipped with feedback devices that measure compression rate, depth, and recoil. This ensures every graduate can deliver high performance CPR that meets clinical standards.
Advanced Airway Management
While CPR HCP covered basic BVM use, the BLS course provides more extensive training in airway management techniques relevant to healthcare settings. This includes proper bag-valve mask technique for single rescuer and two-rescuer scenarios, the use of oropharyngeal and nasopharyngeal airways, suction technique, oxygen delivery systems, and recognition of obstructed airways. Once an advanced airway is established, BLS protocol stresses maintaining continuous compressions without pausing for breaths, a critical distinction from basic CPR.
Specialized Clinical Protocols
BCLS protocols dictate the use of specialized clinical tools and techniques, such as deploying bag-valve masks and airway adjuncts, unlike standard CPR which relies on basic barrier devices. BLS also tracks advanced protocols for specialized situations including trauma response, opioid overdose with naloxone administration, and the management of cardiovascular emergencies in pre-arrest patients.
Watch: BLS Training Overview
CPR HCP vs BLS: Direct Comparison
For clarity, here is exactly how the new BLS course compares to the old CPR HCP designation:
Feature
CPR HCP (Old)
BLS (Current Standard)
Status
Discontinued
Active standard
Single rescuer CPR
✓
✓
Multi rescuer team CPR
Basic
Advanced + team dynamics
Adults, children and infants
✓
✓
AED use
✓
✓ + clinical integration
Bag-valve mask
Basic
Advanced + adjuncts
High performance CPR metrics
Not emphasized
Core curriculum
Closed-loop communication
No
Required
Continuous compressions with advanced airway
Limited
Standard protocol
Opioid overdose protocol
Limited
Included
Recertification
Annual
Annual
Both CPR and BLS courses require recertification to ensure skills remain current. In BLS vs CPR comparisons, BLS is the more advanced certification, intended for healthcare professionals and first responders, while CPR is designed for the general public and non-healthcare roles.
BLS vs Standard CPR Courses: Choosing the Right Training
The CPR HCP vs BLS comparison only covers healthcare-level training. However, it is also important to understand that BLS differs from standard CPR and AED courses designed for the general public. For example, standard CPR Level C teaches single rescuer CPR, basic AED use, and choking management, and it also includes AED training commonly required for early childhood educators and security personnel. CPR Level A is designed for those who need to administer CPR only to adults, while CPR Level C is more comprehensive because it includes adults, children, and infants.
In particular, CPR training suits a wide range of individuals including parents, teachers, coaches, and workplace responders who need basic life-saving skills for emergencies across different work environments. By contrast, BLS certification is geared toward healthcare professionals and first responders such as nurses, paramedics, and emergency medical technicians, who need advanced life-saving skills.
Therefore, individuals seeking CPR training should consider their professional requirements or personal interests. Generally, CPR Level C is sufficient for laypersons while BLS is necessary for those in clinical settings. Ultimately, if you work in healthcare, are entering a health science program, or want the most comprehensive CPR training available, BLS is the right training.
Validity and Recertification: The 1-Year Rule
This is one of the most important differences between BLS and CPR for laypersons:
CPR Level C certifications are valid for three years before requiring renewal
BLS certification is valid for one year and must be renewed annually to maintain proficiency
Standard workplace CPR certificates often carry a multi-year validity according to regional safety regulations, while BLS requires strict adherence to institutional standards with annual re-certification strongly recommended or required by many employers. This ensures healthcare providers maintain “muscle memory” for life-saving interventions in the high-stakes environment in which BLS is used.
Note: You are eligible for BLS recertification only if your current certificate is still valid and was issued by the Canadian Red Cross or another recognized training body. Expired certificates require the full BLS course.
Who Specifically Requires BLS Certification in 2026?
The list of professionals requiring BLS has expanded significantly. BLS certification is essential for a wide range of professionals and aspiring professionals in healthcare and related fields.
Healthcare Professionals and Health Care Providers
Nurses, physicians, paramedics, respiratory therapists, dentists, dental hygienists, physiotherapists, chiropractors, and other regulated healthcare providers typically need BLS certification as a condition of employment and professional licensing. In fact, many regulatory colleges mandate current BLS certification for all practitioners.
Pharmacists
Under new expanded scopes of practice in Ontario and Alberta, pharmacists now mandate BLS for compliance, particularly those administering injections, providing minor ailments assessments, or working in community pharmacy environments where cardiac emergencies may occur.
Dental Professionals
Dentists, dental hygienists, dental assistants, and orthodontists must maintain current BLS certification under Royal College of Dental Surgeons of Ontario (RCDSO) requirements and similar provincial regulations. Likewise, dental support staff in surgical or sedation practices follow the same standard.
Personal Support Workers (PSWs)
Personal support workers in long-term care, home care, and assisted living settings increasingly require BLS-level training. The aging Canadian population means PSWs frequently encounter cardiac and cardiovascular emergencies, and BLS prepares them to act decisively before EMS arrives.
Healthcare Students
Students in nursing, medicine, paramedicine, dental hygiene, respiratory therapy, and other health science programs generally must hold current BLS certification before beginning clinical placements. Specifically, paramedic students must have BLS before their first clinical placement. Additionally, obtaining BLS certification early in your program demonstrates professionalism and preparedness.
First Responders
Firefighters, police officers, lifeguards, and other emergency responders benefit from BLS-level training because they may need to provide advanced resuscitation support before paramedics arrive. BLS complements other certifications such as Intermediate / Intermediate / Standard First Aid and Emergency Medical Responder (EMR) training.
Fitness and Recreation Professionals
Personal trainers, fitness instructors, swim coaches, and recreation facility staff often need healthcare-level CPR certification due to the physical nature of the environments they work in. BLS provides these professionals with advanced skills for managing cardiac emergencies in athletic and aquatic settings.
CPR HCP vs BLS: Misconceptions Addressed
Despite the clear regulatory shift, several misconceptions still circulate about the CPR HCP to BLS transition. Therefore, here are the facts:
Misconception 1: “My employer still requires CPR HCP, so BLS won’t be accepted”
BLS exceeds CPR HCP in every measurable way. Employers who haven’t updated their policy language still accept BLS certification because it covers all HCP content plus additional clinical skills.
Misconception 2: “BLS is harder to pass than CPR HCP”
BLS is more comprehensive, but the structured team-based practice and real-time feedback make it more practical and confidence-building. Pass rates are comparable when participants attend a quality, hands-on program.
Misconception 3: “I can get a discounted online CPR HCP course”
Any online course still selling “CPR HCP” certification in Canada is using outdated terminology and may not be recognized by employers or regulatory colleges. Always verify that your training body offers current BLS certification through the Canadian Red Cross or another accredited provider. Blended learning, online theory combined with in-person skills assessment, is acceptable; fully online CPR/BLS without an in-person component is not.
Course Format, Blended Learning, and Certification
The BLS course at Coast2Coast is typically completed in a single day and includes both classroom instruction and extensive hands-on practice on feedback-enabled mannequins. The course concludes with a written test and practical skills assessment.
Blended learning options combine online theory at your own pace with mandatory in-person practical skills assessment. This format works well for busy healthcare professionals who can complete the online cognitive component on their schedule before attending the in-person component to demonstrate competency.
Upon successful completion, participants receive a BLS certification card valid for one year. Annual renewal courses are available when your certification approaches expiration, allowing you to refresh your skills and stay current with any updates to resuscitation guidelines.
Practical Skills Assessed
The BLS practical assessment verifies your ability to perform:
High performance CPR for adults, children and infants
AED operation and integration into the resuscitation sequence
BVM ventilation as single rescuer and two-rescuer
Multi rescuer team CPR with role rotation
Pulse checks at correct intervals (not exceeding 10 seconds)
Recognition and response to opioid overdose
Choking response for conscious and unconscious victims
Activating the emergency response system
How CPR and BLS Complement Each Other
Both CPR and BLS prove essential for responding to cardiac emergencies and other medical emergencies. Specifically, CPR (Cardiopulmonary Resuscitation) is a life saving CPR technique used during emergencies when someone’s heart has stopped beating. Meanwhile, BLS (Basic Life Support) includes CPR along with additional skills for healthcare professionals, airway management, team dynamics during resuscitation efforts, and integration of clinical tools.
In practical terms, CPR training helps people learn CPR and learn life saving skills such as chest compressions, rescue breaths, and how to respond to conscious and unconscious choking victims, focusing on keeping blood circulating to vital organs until emergency responders arrive. Furthermore, BLS extends this foundation with the advanced protocols that healthcare environments need, including knowing when basic CPR uses a barrier device for rescue breathing and when BLS uses bag-valve mask ventilation, where the next step in the chain of survival is happening within the same building.
As a result, many Coast2Coast students complete both: CPR Level C for personal and family preparedness, then BLS when entering a healthcare career or program. Together, the two courses reinforce each other and produce confident, capable responders.
Get Your BLS Certification Today
Need healthcare-level CPR certification? The BLS course from Coast2Coast exceeds the old CPR HCP standard and prepares you for real-world resuscitation scenarios.
A: Basic Life Support (BLS) certification has replaced the CPR HCP course in Canada. BLS covers all CPR HCP content, single rescuer and two-rescuer CPR, AED use, bag-valve mask technique, and management of obstructed airways, and adds high performance CPR metrics, multi rescuer team dynamics, and closed-loop communication training for healthcare environments.
Q2: Why was CPR HCP discontinued?
A: CPR HCP was replaced because resuscitation science evolved. The healthcare community needed stronger emphasis on team-based resuscitation, measurable high performance CPR, and clinical airway management, improvements built directly into the modern BLS curriculum by major Canadian training bodies to reflect a standardized medical training approach.
Q3: Will my employer accept BLS instead of CPR HCP?
A: Yes. BLS meets and exceeds every CPR HCP requirement. Even employers whose policies still reference “CPR HCP” accept BLS certification because it covers all HCP content plus additional healthcare-specific skills.
Q4: What is the difference between CPR and BLS?
A: CPR (Cardiopulmonary Resuscitation) is a lifesaving technique focused on chest compressions and rescue breaths to keep blood flowing to vital organs. BLS (Basic Life Support) includes CPR plus advanced skills for healthcare professionals, bag-valve mask ventilation, advanced airway management, team-based protocols, and pulse checks. BLS is intended for clinical settings; CPR is aimed at the general public.
Q5: Who needs BLS certification?
A: BLS is mandatory for healthcare professionals including doctors, nurses, paramedics, dental staff, respiratory therapists, pharmacists with expanded scopes, and personal support workers. Healthcare students need BLS before clinical placements. First responders, lifeguards, and fitness professionals often require it as well.
Q6: How long is BLS certification valid?
A: BLS certification is valid for one year and must be renewed annually. This is shorter than CPR Level C (3 years) because the high-stakes clinical environment in which BLS is used demands stronger skill retention and current protocol knowledge.
Q7: How long is CPR Level C valid for?
A: CPR Level C certifications are valid for three years before requiring renewal. Standard workplace CPR certificates often carry this multi-year validity in line with regional safety regulations like CSA Z1210:24.
Q8: Is BLS harder than CPR HCP was?
A: BLS is more comprehensive, but not necessarily harder. The team-based practice scenarios, real-time feedback on mannequins, and structured role assignments actually make BLS more practical and confidence-building than the old HCP format. Most participants pass on first attempt.
Q9: Can I take BLS online?
A: Fully online BLS is not recognized in Canada. Blended learning, online cognitive theory combined with mandatory in-person practical skills assessment, is acceptable and works well for busy healthcare professionals. Any provider offering 100% online BLS certification should be avoided.
Q10: What does BLS training cover?
A: Basic Life Support training includes advanced skills such as pulse checks, airway management with bag-valve mask, AED integration, multi rescuer team CPR techniques, closed-loop communication, opioid overdose response, and management of obstructed airways. All skills are practiced for adults, children and infants.
Q11: Do I need to take CPR Level C before BLS?
A: No. BLS can be taken without prior CPR certification. Many healthcare students go directly to BLS as their first CPR-related certification. That said, taking CPR Level C first can build a strong foundation if you are new to resuscitation training.
Q12: What is high performance CPR?
A: High performance CPR is the evidence-based methodology emphasized in modern BLS training. It includes a compression rate of 100–120 per minute, depth of at least 5 cm for adults, full chest recoil, minimized interruptions, avoidance of excessive ventilation, and structured team dynamics. The Heart & Stroke Foundation reports it can increase survival rates by up to 40%.
Q13: Is BLS the same as BCLS?
A: Yes. BLS (Basic Life Support) and BCLS (Basic Cardiac Life Support) are different terms for the same level of training. Most Canadian training bodies now use “BLS” as the standard term, replacing both “BCLS” and the older “CPR HCP” designations.
Q14: Does BLS include AED training?
A: Yes. BLS includes comprehensive automated external defibrillator (AED) training integrated into team-based resuscitation scenarios. BLS involves more intensive training on integrating AEDs into high-stress clinical environments, alongside the management of team dynamics during resuscitation efforts.
Q15: How often should healthcare providers renew BLS?
A: BLS certification must be renewed annually. Both CPR and BLS certifications require recertification to ensure skills remain current, with CPR typically needing renewal every three years and BLS annually due to the high-stakes environment in which it is used.
About This Article, Expertise & Sources
Content reviewed by the Coast2Coast First Aid & Aquatics certified instructor team. Regulatory and curriculum information sourced from the Canadian Red Cross, the International Liaison Committee on Resuscitation (ILCOR) Guidelines, the Heart & Stroke Foundation of Canada, CSA Z1210:24 First Aid Training Standard, and the Royal College of Dental Surgeons of Ontario (RCDSO) CPR/BLS requirements. Coast2Coast First Aid Inc. is an active Canadian Red Cross Training Partner with certified BLS Instructor Trainers on staff. Last reviewed: May 2026. For corrections or additional information, contact info@c2cfirstaidaquatics.com or 1-866-291-9121.
Learning to swim builds foundational swimming skills that save lives, prevent drowning, and unlock a lifetime of aquatic fitness. The best way to learn swimming as a beginner is through structured, professional swimming lessons in shallow water — progressing through water acclimation, controlled breathing, floating, kicking, and stroke development at your own pace. This 2026 step-by-step guide walks every age group through the swim progression used by the Lifesaving Society and Red Cross Swim programs in Canada.
Get Certified✓ Canadian Red Cross Approved
Find a Class Near You
Swimming lessons and aquatic programs across Ontario and Alberta. Register online in 2 minutes.
Knowing how to swim is a critical life skill that can save lives and prevent drowning incidents. Drowning ranks among the leading causes of accidental death in Canada, and the Canadian Red Cross reports that the majority of drowning victims either could not swim or overestimated their swimming ability. Water safety skills protect individuals of all ages — from infants enrolled in parent-and-tot classes to adults learning for the first time.
Swimming is more than recreation. It builds motor skills, cardiovascular endurance, and decision making skills under pressure. It develops water positive attitudes that last a lifetime. Paired with first aid skills, it creates a complete safety foundation for any aquatic environment — from backyard pools to open lakes.
Whether you are a parent enrolling a child in a YMCA preschool swim program, a teen working toward competitive swimming or a National Lifeguard certification, or an adult who never had the chance to learn — this guide walks you through every stage of the swim progression, from your first water entry to advanced strokes.
Before You Start: How to Choose Swimming Lessons
Before stepping into the water, choose the right learning environment. Nationally-accredited swim programs taught by certified swim instructors deliver consistently better outcomes than self-teaching. Certified swim instructors are essential for ensuring participants receive quality aquatic programming and develop necessary water safety skills.
Group vs. Private Swim Lessons
Group swimming lessons are affordable and social, ideal for kids who learn well alongside peers. Private swim lessons or independent swim lessons offer one instructor focused entirely on one learner — accelerating progress and addressing fears or specific stroke correction needs faster. Many beginners benefit most from a hybrid: private lessons at the start, then group classes as confidence builds.
Free Swim Assessment
Many swim programs include a free swim assessment to determine the appropriate swimming level for registration. A swim assessment also reassures parents and adults that they aren’t being placed too far above or below their actual swimming ability.
Age Groups and Preschool Levels
Swimming lessons are available for various age groups — from infants as young as 4 months through preschool levels, school-age children, teens, and adults over 18. Programs tailor instruction to motor skills, attention span, and developmental stage. Look for a swim program with clearly defined skill levels and a progression pathway — like the Lifesaving Society’s Swim for Life or the Canadian Red Cross Swim levels.
Pool Safety Standards
Confirm the facility maintains lifeguard supervision during lessons, clear pool safety rules, and appropriate water temperature for beginner lessons. Pool safety isn’t optional — it’s the baseline for any program worth joining.
Step 1: Water Acclimation and Getting Comfortable
The first and most important step in learning to swim is becoming comfortable in the water. For many beginners — particularly adults — water anxiety creates a significant barrier. Take your time with this step. Do not rush to the next one until you genuinely feel relaxed in the water. This is where you build a healthy respect for water without fear.
Water Entry and Familiarization
Start in shallow water where you can stand comfortably with your head well above the surface. Walk around the pool, feeling how the water supports your body. Practice putting your face in the water and blow bubbles — this fundamental swimming skill teaches breath control and prevents water from entering your nose. Cup water in your hands and pour it over your head. These exercises seem basic, but they build the comfort and trust in the water that every later skill depends on.
Submerging and Breath Control
Once you are comfortable with water on your face, practice submerging your entire head briefly. Take a breath, dip under the surface, and come back up. Gradually extend the time you spend underwater. Practice exhaling through your nose and mouth while submerged. Proper breathing prevents panic and helps maintain relaxation in water. Blowing bubbles underwater should become second nature before you move on to floating and swimming strokes.
Step 2: Learning to Float
Floating is the foundation of swimming. Floating allows swimmers to catch their breath and prevents panic — a survival skill as much as a swim skill. When you can float, you can rest in the water without expending energy.
Back Float
The back float is the most important survival skill in swimming because it allows you to breathe while resting in the water. Start in shallow water with a partner or instructor providing surface support. Lean back, extend your arms to the sides, and let your legs float up. Keep your ears in the water, your chin slightly tilted up, and your belly at the surface. Relax completely — tension causes your body to sink. Once you can hold the back float without support for 30 seconds or more, you have mastered a life-saving skill.
Front Float
The front float (also called the prone float or dead man’s float) teaches body position for forward swimming strokes. Take a breath, put your face in the water, and extend your arms forward. Let your legs float behind you. Maintaining a horizontal streamline position reduces drag and makes moving through water easier — your body should form a straight line at or near the surface.
Practice transitioning between front float and back float smoothly. This roll-over skill is essential for survival in deep water.
Safety Tip: Always learn to swim in a supervised environment with a qualified instructor or lifeguard present. Never attempt to learn in open water such as lakes, rivers, or oceans — currents, depth changes, and cold water create hazards that beginners are not equipped to handle.
Step 3: Kicking and Propulsion
Once you can float, adding a kick gives you the ability to move through the water. Kicking helps propel you through the water and keeps your lower body at the surface — critical for maintaining the streamline position.
Flutter Kick
The flutter kick is the most basic and widely used kick in swimming. Hold onto the pool wall or a kickboard with your arms extended. Keep your legs straight but relaxed, with a slight bend at the knee. Kick from the hips in an alternating up-and-down motion, keeping your feet just below the surface. Your toes should be pointed and your ankles loose. The kick should be continuous and rhythmic. Practice across the pool until you can maintain a steady, efficient kick that propels you forward without excessive splashing.
Whip Kick
The whip kick (used in breaststroke) is more technical. Bring your heels toward your buttocks with your knees bent, then rotate your feet outward and snap them together in a circular motion. The whip kick generates significant propulsion when timed correctly and is one of the key skills swimmers work on as they develop breaststroke.
Tip: Using training aids like fins and pullbuoys can help in learning to swim effectively by improving body position and kick technique. Fins build ankle flexibility and reinforce a strong kick; pullbuoys isolate the upper body so you can focus on stroke mechanics.
Step 4: Learning Your First Stroke — Front Crawl (Freestyle)
Front crawl (also called freestyle) is the most common and efficient swimming stroke. It combines the flutter kick with alternating arm pulls and rhythmic side breathing.
Arm Movement
Reach forward with one arm, entering the water fingertips first in front of your shoulder. Pull your hand through the water in an S-shaped pattern beneath your body, pushing back toward your hip. As one arm finishes its pull, the other arm begins its reach forward. Your arms should alternate continuously in a windmill-like pattern. Keep your fingers together and slightly cupped to maximize the pulling surface.
Breathing Technique
Breathing in front crawl involves turning your head to one side during the arm recovery phase. As your arm lifts out of the water, rotate your head to the side just enough to take a quick breath. Your mouth should barely clear the water surface. Exhale steadily through your nose and mouth while your face is in the water between breaths. Most beginners breathe every two or three strokes — find whatever rhythm feels most comfortable as you learn.
Common mistake: Looking forward while swimming drops your hips and creates a braking effect. Keep your eyes down toward the bottom of the pool and only rotate your head sideways to breathe.
Focusing on one element at a time during practice sessions enhances skill development in swimming. Master arm movement first, then breathing, then combine them — instead of trying to perfect everything simultaneously.
Watch: How to Swim Front Crawl (Freestyle)
Step 5: Adding Back Crawl and Other Swimming Strokes
Once you are comfortable with front crawl, expanding your stroke repertoire improves your versatility, fitness, and confidence in the water. Stroke improvement should be a continuous goal at every swimming level.
Back Crawl (Backstroke)
Back crawl is essentially front crawl performed on your back. It is excellent for beginners because your face stays out of the water, making breathing easy. Float on your back and use an alternating flutter kick. Your arms alternate in a windmill motion over your head, entering the water pinky-first behind your shoulder and pulling through the water beside your body. Front and back crawl together form the foundation of competitive swimming skills.
Elementary Backstroke
Elementary backstroke is a slower, restful stroke ideal for building endurance without intensity. Float on your back, bring both arms up to your shoulders simultaneously, extend them out to a T-position, then sweep them down to your sides while performing a whip kick. This stroke is often taught early because it lets beginners cover distance comfortably while reinforcing the back float and whip kick.
Breaststroke
Breaststroke is a symmetrical stroke where both arms pull simultaneously in a heart-shaped pattern while your legs perform a whip kick. Breaststroke is slower than front crawl but useful for swimming with your head above water to see where you are going.
Treading Water
Treading water is the ability to stay in one place with your head above the surface. It combines a sculling motion with your hands and an eggbeater or flutter kick with your legs. Treading water is an essential survival skill for deep water and should be practiced regularly until you can tread water comfortably for several minutes. This skill is required at every advanced swimming level and is the gateway to surface dives and water polo training.
Step 6: Building Endurance, Confidence, and Stroke Refinement
Swimming is a skill that improves with consistent practice. Set your own goals — achievable, measurable, and progressive. Start with short distances of one or two pool lengths and gain confidence by adding length gradually. Focus on technique first and speed second. A smooth, efficient stroke will always be faster and less tiring than a powerful but sloppy one.
Swimming just two or three times per week produces noticeable improvements in endurance, technique, and confidence within a few weeks. As you advance, introduce interval training — alternating fast and recovery sets — to build endurance for competitive swimming or simply for personal fitness.
Stroke correction sessions with a qualified swim instructor accelerate progress more than any amount of solo practice. An instructor sees what you can’t see in yourself and can identify the one or two changes that unlock the next swimming level.
Beyond Beginner: The Lifesaving Pathway
Once you have mastered foundational swimming skills, an entire world of advanced training opens up. The Lifesaving Society Canada and similar bodies offer a structured progression that builds from basic swimmer to professional lifeguard. Each level adds defense methods, rescue skills, and decision making skills that complement strong swimming ability.
Canadian Swim Patrol
The Canadian Swim Patrol program is an intermediate-level pathway from the Lifesaving Society that bridges learn-to-swim and lifesaving training. It develops stronger swimming skills, introduces rescue concepts, and prepares swimmers (typically ages 8 to 12) for entry into the Bronze Star and Junior Lifeguard Club programs.
Junior Lifeguard Club
The Junior Lifeguard Club introduces children ages 8 to 12 to lifeguarding skills, fitness, and water safety leadership. Participants build endurance, learn surface support techniques, and practice rescuing both conscious victims and unconscious victims in a controlled training environment. This program is excellent preparation for the certification pathway that follows.
Bronze Star
Bronze Star is typically the first formal lifesaving certification. It teaches participants the principles of judgment, knowledge, skill, and fitness — the four pillars of Lifesaving Society training. Bronze Star focuses on personal water safety, recognizing emergencies, and contacting emergency medical services when needed.
Bronze Medallion
Bronze Medallion is the foundational lifesaving certification for anyone over 13. Candidates develop swimming strokes and skills, surface dives, treading water for extended periods, and the rescue techniques used to save conscious victims and unconscious victims. Bronze Medallion is a prerequisite for almost every advanced aquatic credential in Canada.
Bronze Cross
Bronze Cross is the next step — designed for swimmers preparing to become assistant lifeguards or pursue the National Lifeguard certification. Bronze Cross builds on Bronze Medallion with stronger rescue skills, better fitness standards, and deeper first aid skills.
National Lifeguard
National Lifeguard is Canada’s professional lifeguarding certification. It requires significant swimming skills, surface support endurance, rescue ability, and complete first aid skills. Becoming a National Lifeguard opens employment at pools, waterfronts, and waterparks across the country.
Synchronized Swimming and Water Polo
Once foundational swimming skills are strong, athletes can pursue specialty disciplines like synchronized swimming or water polo. Both require highly developed swimming skills, exceptional treading water endurance, and the ability to perform complex motor skills under pressure.
Adult Swim: It’s Never Too Late to Learn
Adults make up a large and growing segment of new swimmers. If you never had the opportunity as a child, adult swim classes are designed for you — at your own pace, in a judgment-free environment, with one instructor focused on your comfort and progress.
Many adults benefit from private swim lessons during the early weeks to build confidence in deep water and overcome anxiety before joining a group. Programs that teach water safety often include activities designed to develop basic swimming skills and promote a healthy respect for water. Leisure swim sessions also let you practice skills in a relaxed, unstructured setting between formal lessons.
Water Safety Skills Every Swimmer Should Master
Learning to swim is just one part of being safe in the water. Every swimmer should also understand:
Never swimming alone — always with a buddy or in a supervised setting
How to recognize and escape rip currents in open water
The effects of cold water on the body and how it accelerates exhaustion
Proper use of personal flotation devices
How to recognize the silent signs of drowning in others
Contacting emergency medical services quickly and clearly when an emergency occurs
Basic rescue techniques that avoid putting the rescuer at risk
Pairing your swimming skills with proper first aid and CPR training creates a comprehensive safety foundation. Many lifesaving certifications require both — and any responsible swimmer eventually adds these skills regardless of certification path.
Canadian Certification Note: For official curriculum and certification requirements followed by accredited Canadian swim instructors, consult the Lifesaving Society Canada — the national authority on swim and lifesaving certifications.
Start Your Swimming Journey Today
Whether you are a complete beginner or refining your technique, Coast2Coast offers programs for every age and skill level. Find a location and register in 2 minutes.
Frequently Asked Questions: 2026 Learn to Swim Guide
Q1: What is the best way to learn swimming as a beginner?
A: The best way to learn swimming as a beginner is to take structured, professional swimming lessons and practice in shallow water. Start with water acclimation, controlled breathing, and floating before adding kicks and strokes. A certified swim instructor accelerates progress, builds confidence, and corrects technique errors before they become bad habits.
Q2: At what age can a child start swimming lessons?
A: Swimming lessons are available for various age groups, starting from infants as young as 4 months and continuing through adulthood. Parent-and-tot classes for infants focus on water comfort and parental bonding. Independent swim lessons typically begin around age 3 to 4, depending on the child’s readiness.
Q3: How long does it take to learn to swim?
A: Most beginners can swim a basic front crawl across a pool within 8 to 12 weeks of consistent lessons (one or two sessions per week). Adults often progress faster initially because they understand instructions better but may take longer to overcome water anxiety. Stroke refinement and endurance development continue for years.
Q4: Are private swim lessons better than group lessons?
A: Private swim lessons offer one instructor focused entirely on one learner, accelerating progress and addressing fears faster. Group lessons are more affordable and provide social motivation, especially for children. Many swimmers benefit most from private lessons at the start, then transitioning to group classes once foundational skills are in place.
Q5: What should I wear to my first swim lesson?
A: Wear a well-fitting swimsuit that allows full range of motion. Bring a towel, goggles (highly recommended for breath control practice), and a swim cap if you have long hair. Avoid loose clothing or cotton swimwear that creates drag.
Q6: What is a swim assessment?
A: A swim assessment is a short evaluation by a certified swim instructor that determines your appropriate swimming level for registration. Many swim programs include free swim assessments. The assessment checks comfort in water, breath control, floating, kicking, and any existing stroke ability.
Q7: Can adults really learn to swim?
A: Yes. Adult swim classes are designed specifically for learners over 18, including complete beginners. Adults often learn faster than expected once they overcome initial water anxiety. Private lessons are particularly effective for adult beginners who want to learn at their own pace.
Q8: What is the easiest swimming stroke to learn first?
A: Elementary backstroke and front crawl are the most common starting strokes. Elementary backstroke is restful and keeps the face above water, making breathing easy. Front crawl is more efficient and prepares swimmers for competitive swimming. Most instructors teach foundational floating and kicking before introducing either stroke.
Q9: How do I overcome fear of deep water?
A: Build confidence gradually. Master back floating and treading water in shallow water first. Then progress to slightly deeper sections with a wall or instructor nearby. Many adults benefit from private swim lessons that address water anxiety specifically. Never push past your comfort zone without proper surface support nearby.
Q10: What is the difference between Bronze Star, Bronze Medallion, and Bronze Cross?
A: Bronze Star is an introductory lifesaving certification focused on personal water safety. Bronze Medallion teaches rescue skills, swimming strokes and skills, treading water, surface dives, and the basics of saving conscious and unconscious victims. Bronze Cross builds on Bronze Medallion with advanced rescue techniques and is a prerequisite for the National Lifeguard certification.
Q11: Do swimming lessons include first aid training?
A: Beginner swimming lessons focus on swim skills, not first aid. However, lifesaving programs like Bronze Medallion and Bronze Cross integrate aid skills, including CPR, rescue breathing, and how to manage conscious and unconscious victims. National Lifeguard requires full first aid certification alongside swimming ability.
Q12: What is the Canadian Swim Patrol program?
A: Canadian Swim Patrol is an intermediate-level program offered through the Lifesaving Society that bridges learn-to-swim and lifesaving training. It develops stronger swimming skills, introduces rescue concepts, and prepares swimmers (typically ages 8 to 12) for entry into the Bronze Star and Junior Lifeguard Club programs.
Q13: How important is breathing technique in swimming?
A: Proper breathing prevents panic and helps maintain relaxation in water — it is one of the most important fundamental swimming skills. Most beginners struggle with rhythm rather than physical ability. Practicing exhaling underwater through the nose and mouth, then inhaling quickly during the stroke recovery, becomes second nature with consistent practice.
Q14: Can I learn to swim on my own without lessons?
A: It is possible but not recommended. Self-taught swimmers often develop technique errors that limit progress and increase injury risk. Nationally-accredited swim programs taught by certified instructors build confidence, correct form, and ensure safety. A few professional lessons at the start pay dividends for decades of safer, more efficient swimming.
Q15: What comes after learning the basic strokes?
A: After mastering front crawl, back crawl, breaststroke, and elementary backstroke, swimmers typically progress to stroke refinement, interval training for endurance, and specialty disciplines. The Lifesaving Society pathway — Canadian Swim Patrol, Junior Lifeguard Club, Bronze Star, Bronze Medallion, Bronze Cross, National Lifeguard — provides a structured progression into lifeguarding, synchronized swimming, water polo, or competitive swimming.
About This Article — Expertise & Sources Content reviewed by the Coast2Coast First Aid & Aquatics certified swim instructor team. Curriculum and certification information sourced from the Lifesaving Society Canada, Canadian Red Cross Swim programs, and the Public Health Agency of Canada drowning prevention guidelines. Coast2Coast First Aid Inc. is an active Canadian Red Cross Training Partner with certified swim instructors holding Bronze Cross, National Lifeguard, and Red Cross Water Safety Instructor credentials. Last reviewed: March 2026. For corrections or additional information, contact info@c2cfirstaidaquatics.com or 1-866-291-9121.
Free first aid training workshops give North York residents hands-on access to life saving skills at no cost. Skills include hands-only CPR, choking response, basic wound care, and emergency scene management. These awareness sessions do not provide formal certification, which requires WSIB-compliant CSA Z1210:24 courses. However, they equip community members with essential skills for cardiac arrest, choking, bleeding, and other common emergencies. Free first aid training breaks the cost barrier that keeps many Canadians from learning to save lives.
Get Certified✓ Canadian Red Cross Approved
Find a Course Near You
Canadian Red Cross First Aid & CPR certification courses across Ontario and Alberta. Register online in 2 minutes.
Coast2Coast Free First Aid Workshop: Bringing Life-Saving Skills to North York
At Coast2Coast First Aid and Aquatics, we believe everyone deserves access to life-saving knowledge, regardless of financial situation. That is why we are proud to offer free first aid training workshops to communities across the Greater Toronto Area, including North York. These workshops provide participants with essential emergency response skills at no cost, breaking down the financial barriers that prevent many Canadians from accessing quality first aid training. Our mission is simple: the more people who know basic first aid, the safer our communities become.
Furthermore, our free first aid and CPR training workshops give community members a taste of what comprehensive first aid courses involve. They also teach practical skills participants can use immediately. While these workshops do not replace full first aid certification, they provide a valuable introduction to emergency response. As a result, attendees feel confident acting in common emergencies. For many, free first aid training sparks the motivation to pursue full certification.
What You Will Learn at Our Free First Aid Workshop
Our free first aid workshops pack essential knowledge and hands-on practice into an accessible format that works for busy community members. Specifically, here is what participants can expect to learn during a typical free first aid training session.
Hands-Only CPR for Cardiac Arrest
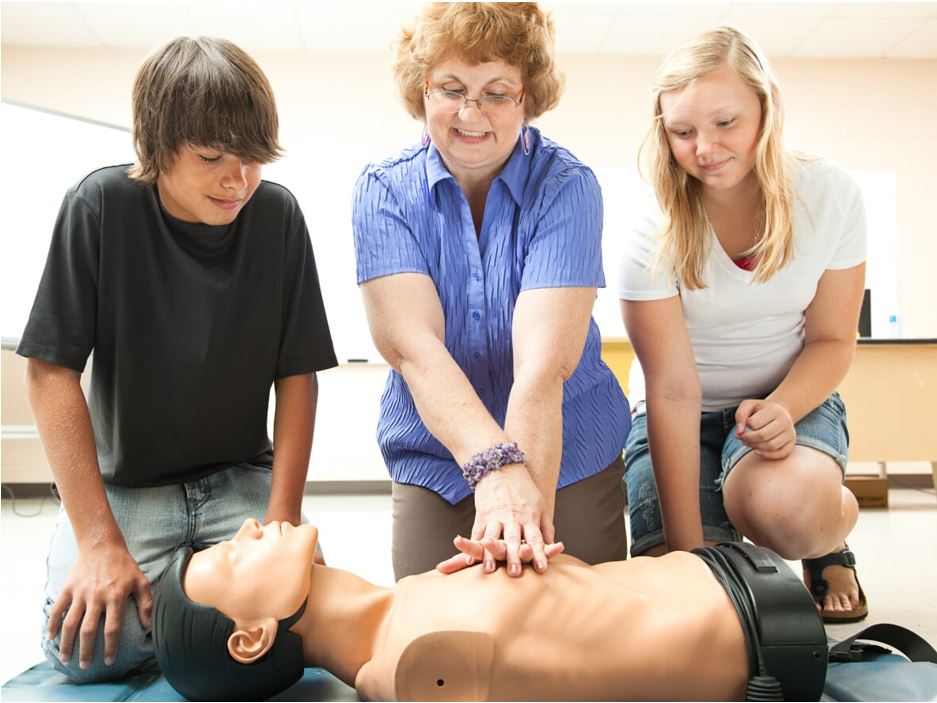
Hands-only CPR, continuous chest compressions without rescue breathing, is the recommended bystander response for adult cardiac arrest. Workshop participants learn to recognize cardiac arrest, contact emergency medical services through 911, and perform CPR at the correct rate and depth. Using practice mannequins, every participant gets the chance to feel what effective compressions should feel like. This single skill can double or triple a cardiac arrest victim’s chance of survival when applied in the critical minutes before paramedics arrive. Workshop instructors also help participants distinguish cardiac arrest from a heart attack. Cardiac arrest means the heart stops beating. A heart attack means blood flow to the heart is blocked. The response and urgency differ for each.
Choking Response Techniques
Choking is one of the most common emergencies Canadians encounter in their daily lives. Therefore, knowing how to respond can prevent a terrifying situation from becoming a fatal one. Workshop participants learn to recognize the signs of choking, perform abdominal thrusts (the Heimlich manoeuvre) on adults and children, and provide back blows for infants. These techniques are straightforward to learn but require practice to perform effectively under pressure.
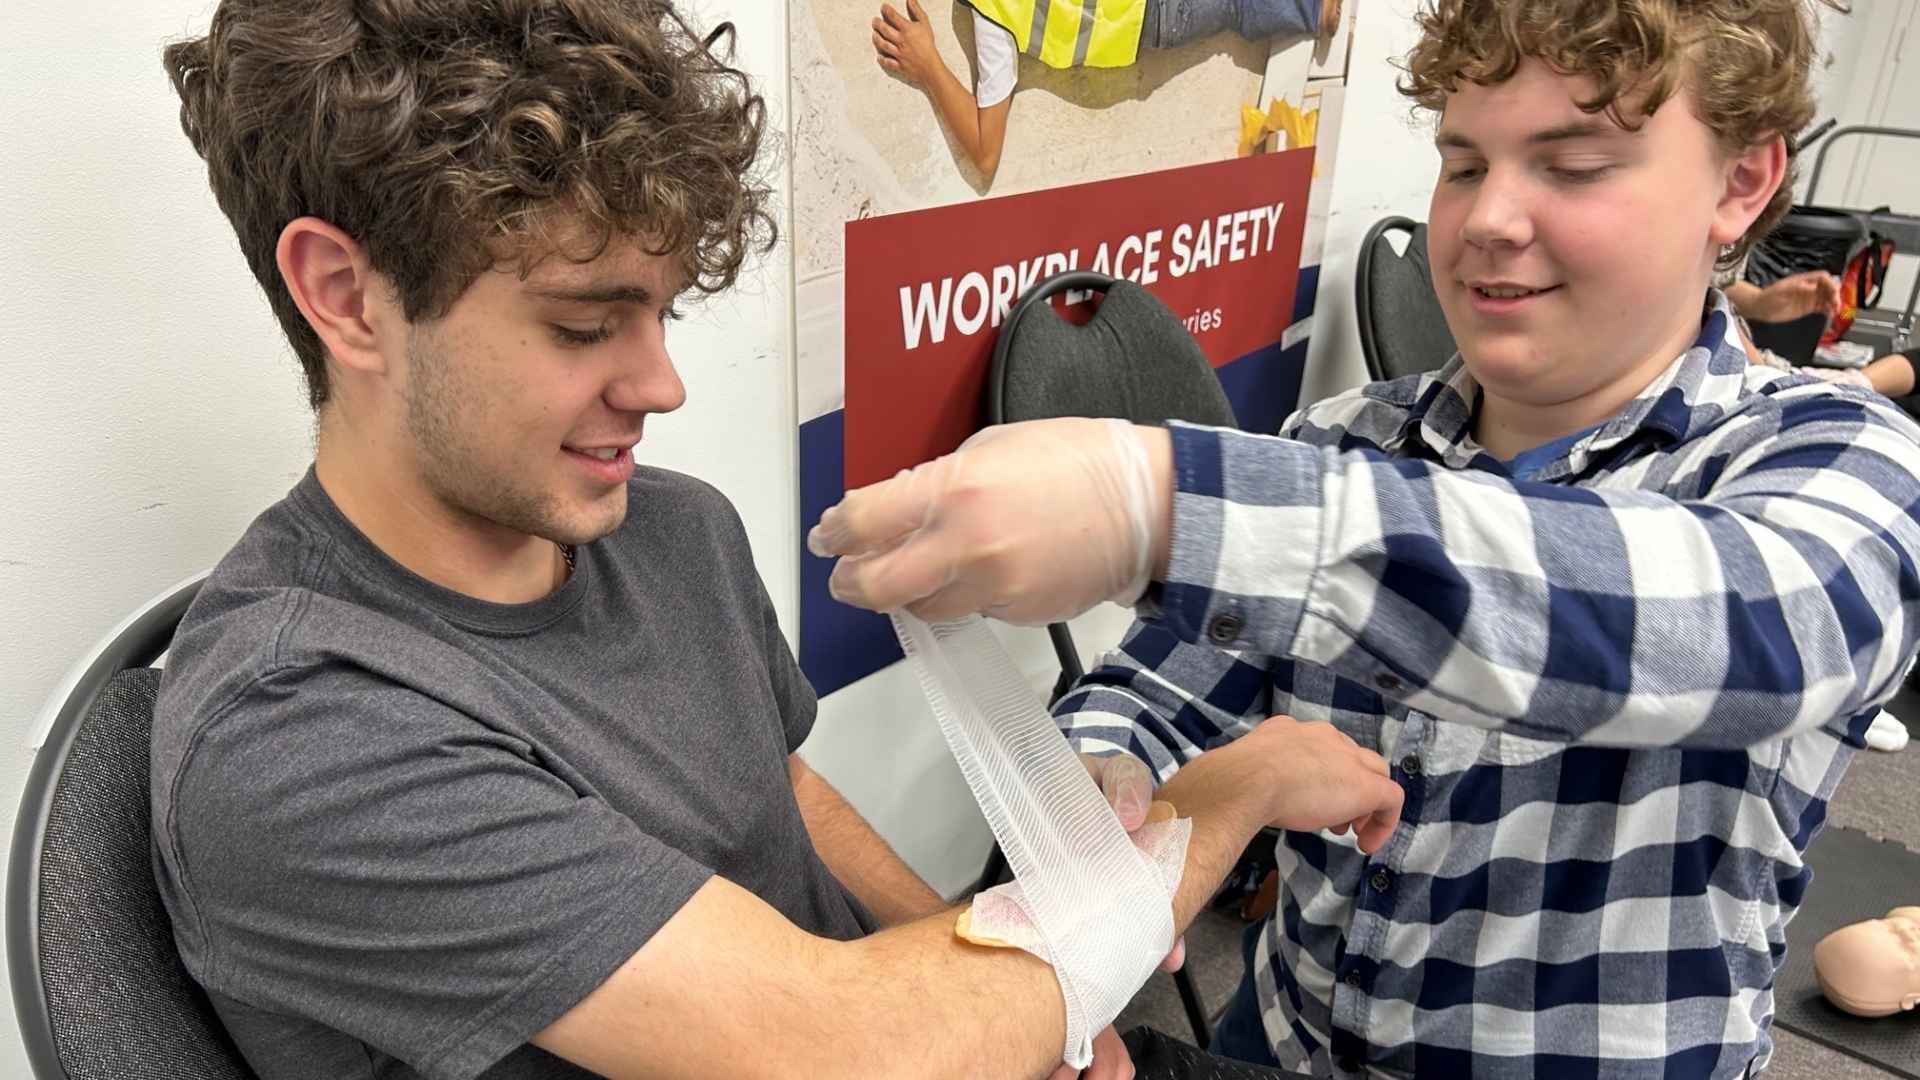
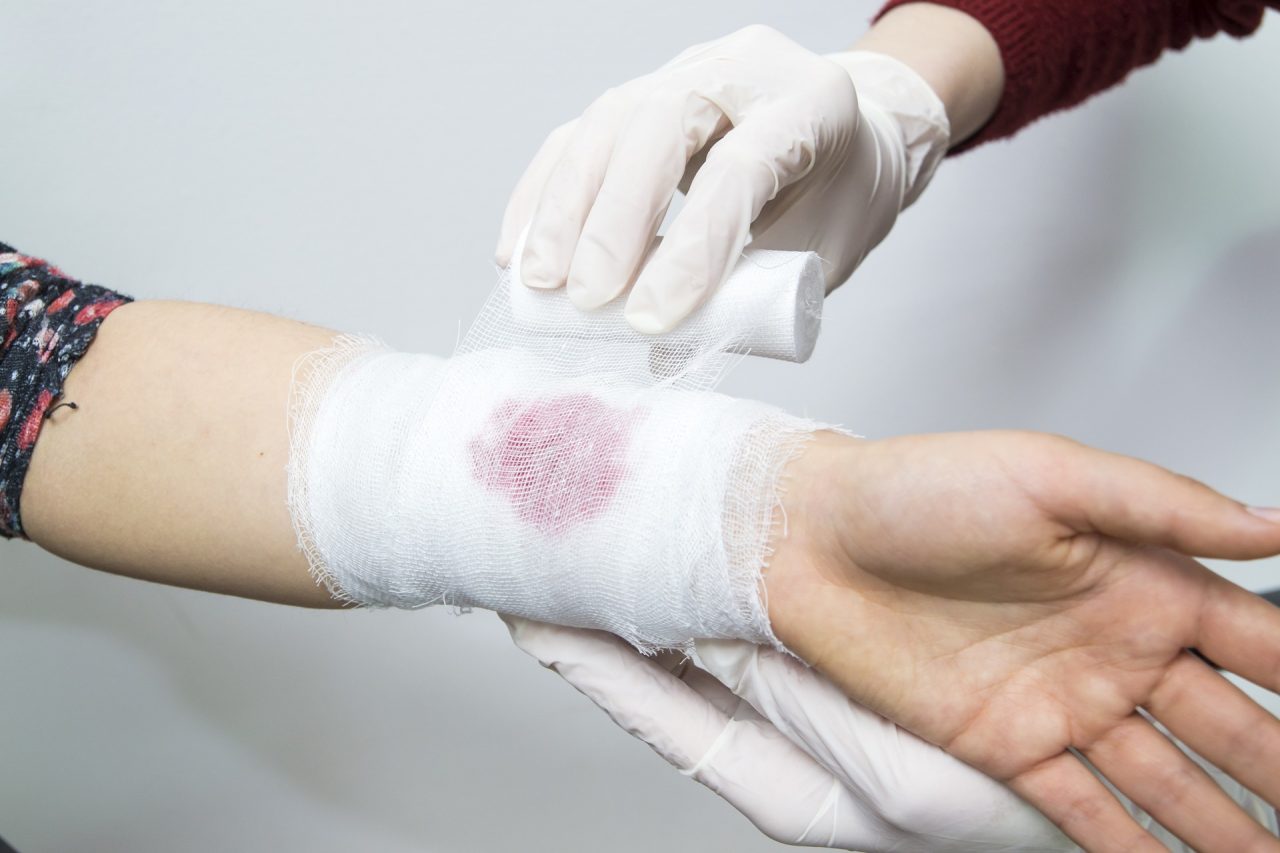
Basic Wound Care and Bleeding Control
From minor cuts to more serious lacerations, knowing how to properly clean, dress, and manage wounds is a fundamental first aid skill. Specifically, participants learn the basics of direct pressure for bleeding control, proper wound cleaning and dressing techniques, and when a wound requires professional medical attention. These skills apply to countless everyday situations, from playground injuries to kitchen accidents.
Emergency Scene Management
Before providing any first aid, you need to ensure the scene is safe and understand how to manage an emergency effectively. Workshop participants learn to assess scene safety, prioritize actions in an emergency, communicate effectively with 911 dispatchers, and coordinate with bystanders to ensure the most effective response possible.
Awareness of AED Use
While most free first aid workshops focus on hands-only CPR, instructors also introduce participants to the role of the automated external defibrillator (AED) in cardiac emergencies. Full AED use training requires a certified course. However, the awareness component helps community members recognize AEDs in public spaces. It also shows how dramatically AEDs improve survival outcomes when used alongside CPR.
Safety Tip: Keep the Poison Control Centre number and other emergency contacts saved in your phone. In a real emergency, stress can make it difficult to recall even basic information, so having critical numbers readily accessible can save valuable time.
Why North York Needs Free First Aid Training
North York is one of the most diverse and densely populated communities in the Greater Toronto Area. It is home to hundreds of thousands of residents, numerous schools, bustling commercial districts, and extensive recreational facilities. With this concentration of people comes an inevitable occurrence of medical emergencies. These include cardiac arrests in shopping centres, choking incidents in restaurants, injuries on playgrounds, and accidents on busy streets. Consequently, the more residents who possess basic first aid knowledge, the better equipped the entire community is to respond.
Research consistently shows that communities with higher rates of first aid and CPR training have significantly better survival outcomes for cardiac arrest and other medical emergencies. By bringing free first aid training directly to North York neighbourhoods, Coast2Coast invests in the community’s collective ability to protect and care for its members. As a result, every workshop participant who learns CPR becomes a potential life-saver for their neighbours, coworkers, friends, and family.
Why North York Residents Choose Coast2Coast
Whether you are a student at York University or a professional working near the North York City Centre, emergencies can happen anywhere. Our workshops have trained residents near Bayview Village, Downsview Park, and Willowdale. As a result, North York remains one of the safest hubs in the GTA. Our instructors also live and work in the community. This means free first aid workshops feel less like a classroom and more like a conversation with a knowledgeable neighbour.
Who Should Attend Our Free First Aid Workshop?
Our free first aid workshops are open to everyone. They prove particularly valuable for the following groups:
Parents and grandparents who want to protect their families
Teachers, school staff, and early childhood educators
Community volunteers and youth group leaders
Newcomers to Canada who may not have had access to first aid training
Older adults who want to refresh their emergency response knowledge
Teenagers interested in babysitting, lifeguarding, or healthcare careers
Anyone who has never taken a first aid or other courses and wants a simple starting point
Notably, no prior knowledge or experience is required. Our instructors are skilled at teaching participants of all ages and backgrounds, and the workshop format is welcoming, inclusive, and accessible. Whether you are sixteen or seventy-six, you will leave the workshop with practical skills you did not have when you arrived.
Certification vs. Awareness: Understanding the Difference
This is one of the most important things to understand about free first aid training. Free workshops provide awareness; certified courses provide compliance and credentials.
A free first aid workshop teaches you to act in an emergency, but it does not produce a certificate recognized by employers, regulatory colleges, or workplace safety bodies. By contrast, a certified course concludes with a written test, practical skills assessment, and a certification card valid for three years.
If you require first aid certification for workplace compliance under WSIB or OHS regulations, you must complete a Basic (Basic / Emergency First Aid) or Intermediate (Intermediate / Intermediate / Standard First Aid) course. Both must align with the CSA Z1210:24 standard. Free workshops do not meet these legal requirements. However, they are an excellent way to build confidence and decide whether to pursue full certification.
Compliance Note for Employers
Many Ontario employers are legally required to have a set number of certified first aid attendants on site. Specifically, the CSA Z1210:24 standard sets the floor for workplace first aid requirements in Canada, classifying courses as Basic or Intermediate. These aid requirements vary by workplace size and risk level, but every covered employer must maintain compliant training records. A free first aid workshop satisfies community awareness goals but does not satisfy workplace compliance.
Ontario Compliance Note: WSIB Ontario requires all provincially regulated workplaces to maintain first aid and CPR-trained personnel on site. Confirm your workplace’s specific requirements at wsib.ca/en/firstaid.
From Free Workshop to Full Certification
Free workshops provide an excellent introduction to first aid. However, many participants choose to continue their training with full CPR courses so they feel more prepared for real emergencies. In particular, certified first aid courses go deeper into every topic. They cover a comprehensive range of medical emergencies, injuries, and environmental hazards.
Full certification includes:
Extended hands-on practice with mannequins and training equipment
Certification valid for three years
Comprehensive training in AED use and recognition
Coverage of additional emergencies including fractures, burns, poisoning, diabetic events, and circulatory emergencies
A certification card recognized by employers and regulatory bodies across Canada
Even when your overall first aid certification remains valid for three years, the Lifesaving Society and major training bodies recommend refreshing CPR and AED skills annually. Specifically, brief annual refreshers ensure your hand position, compression rate, and AED workflow stay sharp. Free first aid training workshops are an excellent way to maintain these skills between full recertification cycles.
Other Ways to Access Free First Aid Training
Beyond Coast2Coast community workshops, several other pathways exist for accessing free first aid and CPR training in Canada:
Community-hosted free workshops: local non-profits, libraries, and faith communities frequently host introductory sessions
Workplace-funded training: many employers cover the cost of first aid certification for staff
Fully funded certifications through non-profits: some community organizations offer fully funded first aid certificates for newcomers, low-income residents, and youth
Free online digital training: free online first aid learning materials covering first aid, CPR, and AED are often available for self-paced study. Examples include First Aid for Free and the Alison Free CPR, AED and First Aid Course, though these online options may not replace in-person testing requirements for formal certification.
Importantly, organizations offering fully free, certified in-person first aid and CPR training are rare. Official certification bodies usually charge fees to cover instructors, materials, and assessment costs. Therefore, free workshops are best understood as awareness sessions, not certification shortcuts.
Bringing a Free First Aid Workshop to Your Community
Coast2Coast is committed to making first aid education accessible to communities across Canada. We work with community organizations, schools, workplaces, religious institutions, and neighbourhood groups in North York and the Greater Toronto Area. If your group would like to host a free first aid workshop, we would love to hear from you. Visit our website or contact our team to discuss how we can bring life-saving training to your community at no cost.
Additionally, we offer private group training for organizations that want comprehensive certification for their teams. Whether you need workplace compliance training, school staff certification, or team-building through first aid education, we can customize a program to meet your needs.
Take the Next Step, Get Certified
Loved the free workshop? Continue building your emergency response skills with a full Canadian Red Cross First Aid certification course from Coast2Coast.
Frequently Asked Questions: 2026 Free First Aid Training
Q1: Is the Coast2Coast first aid workshop really free?
A: Yes. Coast2Coast offers community first aid workshops at no cost as part of our commitment to making essential life-saving skills accessible to everyone in the Greater Toronto Area. There are no hidden fees and no obligation to enroll in a paid course afterward.
Q2: What is the difference between a free workshop and a certified first aid course?
A: A free workshop is an awareness session that teaches practical skills like hands-only CPR, choking response, and basic wound care. A certified course includes formal assessment, a written test, and a certification card valid for three years. Only certified courses satisfy WSIB and OHS workplace compliance requirements.
Q3: Does the free workshop include CPR training?
A: Yes. All Coast2Coast free first aid workshops include hands-only CPR training on practice mannequins. Participants learn to recognize cardiac arrest, call 911, and perform chest compressions at the correct rate and depth. Full conventional CPR with rescue breathing is taught in our certified CPR Level C course.
Q4: Can I get a certificate from the free workshop?
A: Free workshops are awareness sessions and do not produce a recognized certification card. If you need a certificate for work, school, or volunteering, you must complete a paid Intermediate / Intermediate / Standard First Aid, Basic / Emergency First Aid, or CPR Level C course. The free workshop is excellent preparation for those certifications.
Q5: Will the free workshop meet WSIB or OHS workplace requirements?
A: No. Workplace compliance under WSIB and OHS regulations requires a CSA Z1210:24 Basic (Basic / Emergency First Aid) or Intermediate (Intermediate / Intermediate / Standard First Aid) course. Free workshops are awareness sessions, not compliance training. Employers should register staff in a certified course to meet legal requirements.
Q6: How long does the free workshop last?
A: Most Coast2Coast free first aid workshops run between 60 and 120 minutes, depending on the host community’s needs and the topics covered. Workshops include both demonstration and hands-on practice.
Q7: Who can attend the free workshop?
A: Anyone can attend. Free workshops are particularly valuable for parents, teachers, community volunteers, newcomers to Canada, older adults, teens interested in babysitting or lifeguarding, and anyone who has never had access to first aid training. No prior experience is required.
Booking, Logistics & Practical Details
Q8: How can my community group request a free workshop?
A: Community organizations, schools, workplaces, religious institutions, and neighbourhood groups in the GTA can request a free first aid workshop by contacting the Coast2Coast team. We work with hosts to schedule a date, prepare materials, and tailor the workshop to the community’s needs.
Q9: What should I bring to the workshop?
A: Just yourself and comfortable clothing. Workshops include hands-on practice on mannequins, so you may want to wear something that allows you to kneel and move freely. Coast2Coast provides all training equipment and materials at no cost.
Q10: Do free workshops include AED training?
A: Free workshops include awareness of AED use, what an AED is, where to find one, and why it matters. Full AED operation training requires a certified course. AEDs greatly increase cardiac arrest survival rates when used alongside CPR. This is why the certified CPR Level C course covers them in depth.
Q11: How often should I refresh my first aid skills?
A: First aid and CPR certifications are typically valid for three years. Recertification is required to maintain status after that. Even when your certification remains valid, CPR and AED skills should be refreshed annually. Hand position, compression rate, and AED workflow are easy to forget without regular practice.
Q12: Can I find free first aid training online?
A: Yes. Educational materials related to first aid and CPR training are often accessible online for free, including videos, guides, and quizzes. However, hands-on testing is required for formal certification. Free online resources are an excellent supplement to in-person learning but cannot replace it.
Q13: Why don’t most certification bodies offer fully free courses?
A: Organizations offering fully free, certified in-person first aid and CPR training are rare. Official certification bodies must cover instructor costs, training materials, mannequins, AED trainers, and assessment overhead. Free community workshops like ours are funded as community outreach. They are not a replacement for paid certified courses.
Q14: Will I be able to perform CPR after just one free workshop?
A: Yes, in most cases. Hands-only CPR is intentionally simple to teach so that bystanders can act in an emergency. A short workshop with hands-on practice on a mannequin gives most participants the confidence to perform CPR if needed. However, regular practice and a certified course produce stronger, more sustained skills.
Q15: What happens if a free workshop is full?
A: If a workshop reaches capacity, Coast2Coast typically schedules additional sessions in the same community or refers participants to upcoming free events nearby. You can also contact us to suggest your own community as a host for a future free first aid workshop.
About This Article, Expertise & Sources
Content reviewed by the Coast2Coast First Aid & Aquatics certified instructor team. Regulatory and curriculum information sourced from the Canadian Red Cross, the Lifesaving Society of Canada, WSIB Ontario First Aid Requirements, and the CSA Z1210:24 First Aid Training Standard. Coast2Coast First Aid Inc. is an active Canadian Red Cross Training Partner. Last reviewed: May 2026. For corrections or additional information, contact info@c2cfirstaidaquatics.com or 1-866-291-9121.
Some of us think only accidents happen to those who take part in risky behavior or are on the more adventurous side, but the truth is an accident can occur anywhere at any time. Besides choking, internal and external severe bleeding are some of the most common emergencies we experience and are unaccustomed to handling unless we have proper First Aid training and a first aid kit at hand.
The story of two boys saving their grandma from death using CPR skills their mother taught them is an amazing feature, and further proves that even with just a little training, all can save lives no matter what age or size.
A man wearing an orange lifebuoy stands on a sandy beach, shielding his eyes from the sun. He faces the ocean, surrounded by greenery. The sea is calm, and the sky is clear and bright.
Poisons that enter the body through the mouth and digestion system are known as Ingested Poisons, or Swallowed Poisons as well. Many poisons that are swallowed are cleaning supplies, medication, or expired liquid products such as cosmetics or household products. More than 90% of poisonings occur in the home.
The three primary diabetic emergencies are hypoglycemia (low blood sugar), diabetic ketoacidosis (DKA), and hyperosmolar hyperglycemic state (HHS). For a conscious person with low blood sugar, give 15 grams of fast-acting sugar and wait 15 minutes. That is the Rule of 15. For DKA or HHS, call 911 immediately and do not give food or drink if the person is vomiting or unconscious. If the person is unconscious and carries a glucagon kit, administer it after calling 911.
Get Certified ✓ Canadian Red Cross Approved
Find a First Aid Course Near You
Canadian Red Cross Intermediate / Intermediate / Standard First Aid and Basic / Emergency First Aid courses covering diabetic emergencies, CPR, and more across Ontario, Nova Scotia, Alberta, and California.
Fast-acting sugar in the Rule of 15 for hypoglycemia
World Diabetes Day and Diabetic Emergencies: Why First Aid Matters
Every year on November 14th, the global community observes World Diabetes Day to raise awareness about one of the fastest-growing health conditions in the world. In Canada alone, more than 3.7 million people are living with diabetes, and that number continues to rise every year. While diabetes is primarily managed through lifestyle modifications and medical treatment, the condition can produce life-threatening emergencies that require immediate attention. Diabetic emergencies are critical situations in diabetes management that require immediate attention because they can be life-threatening.
World Diabetes Day was established in 1991 by the International Diabetes Federation and the World Health Organization. November 14th was chosen because it marks the birthday of Sir Frederick Banting, the Canadian physician who co-discovered insulin in 1921 at the University of Toronto. That breakthrough has saved millions of lives and remains one of Canada’s greatest contributions to global health.
The three primary diabetic emergencies are hypoglycemia (low blood sugar), diabetic ketoacidosis (DKA), and hyperosmolar hyperglycemic state (HHS). The two most common diabetic emergencies are diabetic ketoacidosis (DKA) and hyperosmolar hyperglycemic state (HHS), with severe hypoglycemia also being a key concern. Each requires a different first aid response, and each can be fatal without prompt action.
Types of Diabetes: What You Need to Know
Type 1 Diabetes
Type 1 diabetes is an autoimmune condition in which the body’s immune system attacks and destroys the insulin-producing cells in the pancreas. Without insulin, the body cannot move glucose from the bloodstream into cells for energy. People with Type 1 diabetes must take insulin every day to survive. DKA is most common in type 1 diabetes because the absolute shortage of insulin causes the body to produce ketones as an alternative fuel source. This type accounts for approximately 5 to 10 percent of all diabetes cases and is most commonly diagnosed in children and young adults.
Type 2 Diabetes
Type 2 diabetes is the most common form, accounting for about 90 percent of all cases. It develops when the body becomes resistant to insulin or when the pancreas gradually loses its ability to produce enough insulin. HHS is more often seen in people living with type 2 diabetes, although either condition can affect anyone with diabetes. Risk factors include family history, obesity, physical inactivity, age, and ethnicity. Regular monitoring of blood glucose levels is essential for people with diabetes, especially during periods of illness, to prevent fluctuations that can lead to emergencies.
Gestational Diabetes
Gestational diabetes develops during pregnancy and typically resolves after birth. However, women who have had gestational diabetes have a significantly higher risk of developing Type 2 diabetes later in life. Monitoring blood glucose carefully during pregnancy is essential for the health of both mother and baby, and gestational diabetes is considered a risk factor for future hyperglycemic emergencies.
The Three Primary Diabetic Emergencies
What Is Hypoglycemia: Low Blood Sugar and Its Risks?
Hypoglycemia occurs when blood glucose drops below normal levels, which can starve the brain of fuel. In clinical terms, hypoglycemia is defined as blood glucose falling below 4.0 mmol/L. This is the more common and more immediately dangerous diabetic emergency in day-to-day life. It can develop rapidly within minutes and can quickly progress to unconsciousness and seizures if not treated.
Causes of hypoglycemia include taking too much insulin, skipping meals, excessive physical activity, and alcohol consumption. Certain drugs affecting blood glucose control, including medications used for infection or other conditions, can also trigger hypoglycemic episodes. People with hypoglycemia unawareness are at particular risk because they do not experience the usual warning signs before their blood glucose drops to a dangerous level, making bystander recognition even more critical.
Early signs of hypoglycemia include: shakiness and trembling, sweating and pale clammy skin, rapid heartbeat and extreme hunger, dizziness and lightheadedness, confusion and difficulty concentrating, irritability or sudden mood changes, and blurred vision and weakness.
Severe Hypoglycemia: When Low Blood Sugar Becomes Life-Threatening
Severe hypoglycemia can result in seizures, loss of consciousness, or coma. In Ontario, in-hospital mortality in people hospitalized for acute hyperglycemia ranged from under 1 percent at ages 20 to 49 years to 16 percent in those over 75 years, underscoring the importance of early intervention. Severe hypoglycemia requires immediate attention and emergency services if the person is unconscious, having seizures, or unable to swallow safely. The incidence of severe hypoglycemic events increases significantly in older adults and in patients with long-standing diabetes who have developed hypoglycemia unawareness.
What Is Diabetic Ketoacidosis (DKA)?
DKA is a metabolic crisis caused by an absolute shortage of insulin, leading the body to produce ketones as an alternative fuel source. When insulin is absent, the body breaks down fat, producing ketones that acidify the blood. This process is called ketosis and, when severe, progresses to ketoacidosis. DKA is most common in people with type 1 diabetes but can affect anyone with diabetes who has severely uncontrolled blood glucose. Severe diabetic ketoacidosis is a life-threatening hyperglycemic crisis requiring emergency room treatment without delay.
In DKA, blood glucose levels are usually 14.0 mmol/L or above. Symptoms of diabetic ketoacidosis (DKA) include nausea, vomiting, abdominal pain, and a feeling of being unable to get enough oxygen, collectively referred to as acidosis. Common signs of DKA also include shortness of breath, fruity breath odor, and severe abdominal pain. Common triggers for DKA beyond missed insulin include infection, illness, cardiac surgery, and myocardial infarction, all of which dramatically increase the body’s insulin requirements. People recovering from surgery or a cardiac event should monitor blood glucose closely for signs of hyperglycemic crises.
Excessive thirst and frequent urination
Nausea, vomiting, and severe abdominal pain
Fruity breath odor from ketones in the urine and breath
Deep and rapid breathing (Kussmaul breathing)
Confusion and drowsiness
Eventual loss of consciousness and coma
What Is Hyperosmolar Hyperglycemic Syndrome (HHS)?
Hyperosmolar hyperglycemic syndrome (HHS), also called hyperosmolar hyperglycemic state, hyperglycemic hyperosmolar state, or hyperosmolar nonketotic coma, is a hyperglycemic emergency that typically affects older adults with type 2 diabetes. Hyperglycemia usually develops slowly and can lead to severe dehydration and life-threatening conditions like DKA or HHS if untreated. Medications including diuretics and glucocorticoids can trigger or worsen HHS by promoting dehydration and raising blood glucose levels.
In DKA, blood glucose levels are usually 14.0 mmol/L or above, while in HHS they can be significantly higher, typically 34.0 mmol/L or above, along with plasma osmolality above 320 mOsm/kg. HHS typically presents with neurological signs such as vision problems or delirium, along with increased urination and dehydration. Signs of dehydration in HHS include extreme thirst, dry mouth, sunken eyes, and rapid pulse. HHS is a critical medical emergency requiring intensive care treatment and massive fluid rehydration as a priority. Mortality is significantly higher in HHS than in DKA, particularly in older adults and patients with pre-existing conditions.
Safety Tip: If you are unsure whether someone is experiencing high or low blood sugar, always treat for low blood sugar first by giving them something sweet to eat or drink if they are conscious and able to swallow. Treating for low blood sugar when it is actually high causes minimal harm. Failing to treat dangerously low blood sugar can be fatal.
DKA vs HHS: Key Differences at a Glance
Understanding the difference between DKA and HHS helps you communicate more clearly with emergency dispatchers and medical professionals when someone experiences a hyperglycemic crisis.
Feature
DKA
HHS
Most common in
Type 1 diabetes
Type 2 diabetes
Blood glucose
14.0 mmol/L or above
34.0 mmol/L or above
Plasma osmolality
Normal or mildly elevated
Above 320 mOsm/kg
Ketones present
Yes
Minimal or absent
Onset
Hours to 1 day
Days to weeks
Breath odor
Fruity
No fruity odor
Neurological signs
Less common
Vision problems, delirium common
Dehydration
Moderate
Severe
Common triggers
Missed insulin, infection, cardiac surgery
Diuretics, glucocorticoids, illness
Treatment priority
Insulin and IV fluids
Massive fluid rehydration
First Aid for Diabetic Emergencies: Step by Step
In a diabetic emergency, assessing the person’s level of consciousness and their ability to swallow safely is the most critical first step. Never give anything by mouth to someone who is unconscious or unable to swallow, as this creates a serious aspiration risk. Intermediate / Intermediate / Standard First Aid with CPR C covers diabetic emergency response, the Rule of 15, and glucagon administration as part of the core curriculum.
The Rule of 15: First Aid for Low Blood Sugar
If blood sugar levels cannot be determined, standard protocols suggest treating as if the person has hypoglycemia. This is the safer approach because treating a high blood sugar with a small amount of sugar causes minimal harm, while failing to treat dangerously low blood sugar can be fatal.
For a conscious person who can swallow safely, follow the Rule of 15:
Step 1: Give 15 grams of fast-acting sugar immediately. Options include 4 glucose tablets, half a cup (125 mL) of fruit juice or regular soft drink, 1 tablespoon of honey or sugar, or 6 to 7 hard candies.
Step 2: Wait 15 minutes and reassess symptoms.
Step 3: If symptoms have not improved, repeat the 15-gram dose of fast-acting sugar.
Step 4: Once symptoms improve, give a more substantial snack containing both carbohydrates and protein to stabilize blood glucose levels and prevent a rebound drop.
If the person is unconscious or unable to swallow safely, do not give anything by mouth. Call 911 immediately. Place the person in the recovery position on their side to protect their airway. If the person carries a glucagon kit and you are trained to use it, administer glucagon as directed. The glucagon kit works by signaling the liver to release stored glucose into the bloodstream, raising blood glucose without requiring oral intake. Stay with the person and monitor their breathing and level of consciousness until emergency services arrive.
First Aid for Hyperglycemic Emergencies: DKA and HHS
Hyperglycemia that has progressed to DKA or HHS requires emergency room treatment and cannot be managed with first aid alone. Management of diabetic ketoacidosis (DKA) and hyperosmolar hyperglycemic state (HHS) includes restoring normal extracellular fluid volume and correcting electrolyte imbalances. Fluid therapy is essential in managing DKA, with initial intravenous normal saline administration recommended at a rate of 500 mL/h for the first four hours, followed by adjustments based on the patient’s condition.
As a bystander, your role is to call 911 immediately if the person is vomiting, has fruity-smelling breath, is breathing abnormally, or is showing signs of altered consciousness. Keep the person comfortable and calm. Place them in the recovery position if unconscious but breathing. Monitor their airway and breathing continuously. Do not give food or drink if they are vomiting or their level of consciousness is reduced. Tell paramedics what you observed, including any known diabetes diagnosis, medications, and the time symptoms began.
Hypoglycemia Unawareness: A Hidden Risk
Hypoglycemia unawareness is a condition in which a person with diabetes no longer experiences the early warning signs of low blood glucose. Over time, the body’s hormonal response to falling blood glucose becomes blunted, particularly in people who have had diabetes for many years or who have experienced frequent hypoglycemic episodes. Blood glucose can drop to dangerous levels without the person feeling any symptoms.
For bystanders and coworkers, hypoglycemia unawareness means that someone with diabetes may appear suddenly confused, unresponsive, or unconscious without warning. This makes it especially important for people around those with diabetes to know the signs of a diabetic emergency, even when the person themselves cannot signal that something is wrong. If someone with known diabetes suddenly appears confused, pale, or unresponsive, treat for hypoglycemia immediately and call 911.
The Glucagon Kit: What It Is and How It Helps
A glucagon kit is an emergency treatment for severe hypoglycemia when the person is unconscious or unable to swallow. Glucagon is a hormone that signals the liver to release stored glucose into the bloodstream. Many people with type 1 diabetes and some with type 2 diabetes carry a glucagon kit as part of their emergency preparedness.
Glucagon kits come in two forms: an injectable kit that requires reconstitution before use, and a nasal spray form that is simpler to administer. If someone collapses from a diabetic emergency and you locate a glucagon kit, call 911 first, then follow the step-by-step instructions on the kit. The correct dose is included in the kit instructions. Most modern glucagon kits are designed to be used by untrained bystanders with clear instructions. After administering glucagon, the person should begin to recover within 10 to 15 minutes. Even if they recover, paramedics should still assess them because blood glucose may drop again without follow-up treatment.
Sick-Day Plan: Preventing Diabetic Emergencies Before They Start
Preventing diabetic emergencies starts with proactive care, including creating a sick-day plan with healthcare providers to manage medications during illness. Illness and infection are among the most common triggers for both DKA and HHS, because physical stress causes blood glucose levels to rise even if the person is not eating. Sick-day management that includes capillary beta-hydroxybutyrate monitoring reduces emergency room visits and hospitalizations in young people with type 1 diabetes.
A comprehensive sick-day plan typically includes instructions for adjusting insulin or oral medication doses during illness, guidance on how frequently to check blood glucose when sick, rules for when to check for ketones in urine or blood, a threshold for when to call a healthcare provider or go to the emergency room, a list of safe foods and fluids to consume when unable to eat normally, and instructions for managing diuretics, glucocorticoids, and other drugs that affect blood glucose during illness. Regular monitoring of blood glucose levels is essential for people with diabetes, especially during periods when ill, to prevent fluctuations that lead to emergencies.
Diabetes in the Workplace
With 3.7 million Canadians living with diabetes, virtually every workplace has employees managing the condition. Employers have both a legal and ethical responsibility to ensure workplaces are safe and supportive for employees with diabetes. This includes allowing employees to monitor their blood sugar and take medications as needed, providing access to food and beverages for managing blood glucose, training designated first aiders to recognize and respond to diabetic emergencies, and including diabetes management in workplace emergency plans.
Investing in workplace first aid training that covers diabetic emergencies ensures that coworkers can respond effectively when someone experiences a blood sugar crisis. For workplaces with higher risk, private group first aid training can be customized to include specific diabetic emergency protocols. This training aligns with CSA Z1210:24 workplace first aid standards.
Diabetes Prevention: Reducing Your Risk
While type 1 diabetes cannot currently be prevented, the risk of developing type 2 diabetes can be significantly reduced through lifestyle modifications. Maintaining a healthy weight, engaging in at least 150 minutes of moderate physical activity per week, eating a balanced diet, limiting consumption of processed foods and sugary drinks, and getting regular health screenings are all proven strategies. The American Diabetes Association recommends a combination of aerobic exercise and resistance training for optimal glycemic control.
Physical activities like swimming are particularly beneficial for diabetes prevention and management because they provide excellent cardiovascular exercise while being gentle on the joints. Regular physical activity improves insulin sensitivity, helps maintain a healthy weight, and reduces stress, all of which contribute to better blood sugar control and overall health.
This World Diabetes Day: Take Action
This World Diabetes Day, consider taking action by learning the signs and symptoms of diabetic emergencies, talking to friends and family members with diabetes about their emergency action plans, ensuring your workplace has trained first aiders, and enrolling in a first aid course that covers medical emergencies including diabetes.
Basic Basic / Emergency First Aid covers the fundamentals of recognizing and responding to blood glucose crises. Intermediate / Intermediate / Standard First Aid courses go deeper, covering the Rule of 15, glucagon administration, recognition of DKA and HHS, and when to call 911. Hands-on training builds the confidence and competence to act correctly under pressure when every minute matters.
Key Takeaway
The three primary diabetic emergencies are hypoglycemia, DKA, and HHS. For a conscious person with low blood sugar, use the Rule of 15: give 15 grams of fast-acting sugar and wait 15 minutes. For DKA or HHS, call 911 immediately. Never give food or drink to someone who is unconscious. If a glucagon kit is available and the person is unconscious, call 911 first then administer glucagon. Hands-on first aid training prepares you to respond with confidence to any diabetic emergency.
Get Certified in First Aid Today
Learn to recognize and respond to diabetic emergencies, cardiac events, and more with a Canadian Red Cross First Aid course from Coast2Coast First Aid and Aquatics.
Frequently Asked Questions: 2026 Diabetic Emergencies First Aid
Q1: What are the three primary diabetic emergencies?
A: The three primary diabetic emergencies are hypoglycemia (low blood glucose), diabetic ketoacidosis (DKA), and hyperosmolar hyperglycemic state (HHS). The two most common diabetic emergencies are DKA and HHS, with severe hypoglycemia also being a key concern. Each requires a different response. Hypoglycemia is treated with fast-acting sugar for conscious patients. DKA and HHS require emergency room treatment and cannot be managed with first aid alone. In all three cases, calling 911 and monitoring the person’s airway are the most critical bystander actions.
Q2: What is the Rule of 15 for hypoglycemia?
A: The Rule of 15 is the Intermediate / Intermediate / Standard First Aid protocol for conscious hypoglycemia. Give the person 15 grams of fast-acting sugar such as 4 glucose tablets, half a cup of juice, or 1 tablespoon of honey. Wait 15 minutes and reassess. If symptoms have not improved, repeat the dose. Once symptoms resolve, give a more substantial snack to stabilize blood glucose levels. This protocol is covered in Intermediate / Intermediate / Standard First Aid and CPR certification courses.
Q3: What should I do if someone with diabetes loses consciousness?
A: Do not give anything by mouth. Call 911 immediately. Place the person in the recovery position on their side to protect their airway. If they carry a glucagon kit and you are trained to use it, administer glucagon as directed. The glucagon signals the liver to release stored glucose into the bloodstream. Monitor their breathing and level of consciousness continuously until paramedics arrive. Severe hypoglycemia can result in seizures, loss of consciousness, or coma, so acting quickly is essential.
Q4: What is the difference between DKA and HHS?
A: Both are hyperglycemic crises but differ in key ways. In DKA, blood glucose is typically 14.0 mmol/L or above and ketones are present, producing fruity breath and acidosis. In HHS, blood glucose is significantly higher at 34.0 mmol/L or above, along with plasma osmolality above 320 mOsm/kg. Ketones are minimal or absent in HHS. DKA is most common in type 1 diabetes and develops over hours. HHS typically affects older adults with type 2 diabetes, develops over days to weeks, and presents with severe dehydration and neurological signs. HHS requires massive fluid rehydration as a priority.
Q5: How do I know if someone needs 911 for a diabetic emergency?
A: Call 911 immediately if the person is unconscious or unresponsive, having seizures, unable to swallow, vomiting, breathing abnormally, showing signs of severe dehydration, or has fruity-smelling breath indicating possible DKA. Also call 911 if they do not improve after two rounds of the Rule of 15, or if you are unsure of the cause of their altered consciousness. Diabetic emergencies are critical situations in diabetes management that require immediate attention.
Q6: What is hypoglycemia unawareness?
A: Hypoglycemia unawareness is a condition in which a person with diabetes no longer experiences the early warning signs of low blood glucose. Blood glucose can drop to dangerous levels without the person feeling any symptoms. This makes bystander recognition critical. If someone with known diabetes suddenly appears confused, pale, or unresponsive without warning, treat for hypoglycemia immediately and call 911. People with hypoglycemia unawareness are at significantly higher risk of severe hypoglycemic episodes.
Q7: What is a glucagon kit and who should have one?
A: A glucagon kit is an emergency treatment for severe hypoglycemia in unconscious patients. Glucagon signals the liver to release stored glucose into the bloodstream, raising blood glucose without requiring the person to eat or drink. Many people with type 1 diabetes carry a glucagon kit as part of their emergency preparedness. Glucagon kits are available as injectable preparations or nasal sprays. Call 911 first, then administer glucagon according to the kit instructions at the correct dose. Even if the person recovers after glucagon, they still need paramedic assessment.
More FAQs: DKA, Sick-Day Plans, and Workplace Safety
Q8: What causes DKA and how is it treated?
A: DKA is a metabolic crisis caused by an absolute shortage of insulin, leading the body to produce ketones. Common triggers include missed insulin doses, illness or infection, cardiac surgery, and myocardial infarction. DKA symptoms include nausea, vomiting, abdominal pain, fruity breath, and deep rapid breathing. Treatment requires hospital care including fluid therapy, with initial intravenous normal saline at 500 mL/h for the first four hours, along with insulin and electrolyte correction. As a bystander, call 911 and monitor the person’s airway until help arrives.
Q9: What is HHS and why is it dangerous?
A: Hyperosmolar hyperglycemic syndrome (HHS), also called hyperglycemic hyperosmolar state or hyperosmolar nonketotic coma, is a life-threatening hyperglycemic emergency most common in older adults with type 2 diabetes. Blood glucose rises to 34.0 mmol/L or above, and severe dehydration causes plasma osmolality to exceed 320 mOsm/kg. HHS typically presents with neurological signs such as vision problems or delirium, along with increased urination and extreme thirst. HHS is a critical medical emergency requiring intensive care treatment and massive fluid rehydration as a priority.
Q10: What is a sick-day plan for diabetes?
A: A sick-day plan is a personalized protocol created with a healthcare provider that guides a person with diabetes through managing their condition during illness. It includes instructions for adjusting medications including diuretics and glucocorticoids, monitoring blood glucose more frequently, checking for ketones in urine, and knowing when to seek emergency care. Preventing diabetic emergencies starts with proactive care, including creating a sick-day plan. Sick-day management that includes capillary beta-hydroxybutyrate monitoring reduces emergency room visits and hospitalizations in young people.
Q11: What should I give someone having a hypoglycemic episode?
A: Give 15 grams of fast-acting sugar. Options include 4 glucose tablets, half a cup of fruit juice or regular soft drink, 1 tablespoon of honey or sugar, or 6 to 7 hard candies. Only give food or drink if the person is conscious and able to swallow safely. If blood sugar levels cannot be determined, standard protocols suggest treating as if the person has hypoglycemia. After symptoms improve, follow with a snack containing carbohydrates and protein to stabilize blood glucose.
Q12: How do I recognize DKA symptoms?
A: Common signs of DKA include shortness of breath, fruity breath odor, nausea, vomiting, and severe abdominal pain. Symptoms of diabetic ketoacidosis include a feeling of being unable to get enough oxygen, referred to as acidosis. Blood glucose in DKA is typically 14.0 mmol/L or above, and ketones will be present in urine. The person may also show confusion, drowsiness, and eventual loss of consciousness or coma. DKA symptoms develop over hours to a day, unlike hypoglycemia which can develop within minutes.
Q13: Can diabetes emergencies happen at work?
A: Yes. With 3.7 million Canadians living with diabetes, virtually every workplace has employees managing the condition. Diabetic emergencies can occur at any time, including during high-exertion work, periods of illness, or when meals are delayed. Employers are legally and ethically responsible for ensuring workplaces have trained first aiders who can recognize and respond to blood glucose crises. Private group first aid training can be tailored to include diabetic emergency protocols specific to your workplace.
Q14: What is the difference between hypoglycemia and hyperglycemia?
A: Hypoglycemia is low blood glucose, defined as blood glucose falling below 4.0 mmol/L, which can starve the brain of fuel. Early signs include shakiness, sweating, pale and clammy skin, rapid heartbeat, and extreme hunger. Hyperglycemia is high blood glucose in a hyperglycemic state, typically above 11.0 mmol/L, which develops slowly and can progress to DKA or HHS if untreated. If unsure which condition a person is experiencing, treat for hypoglycemia first, as this is the more immediately dangerous condition.
Q15: Where can I learn diabetic emergency first aid in Canada?
A: Coast2Coast First Aid and Aquatics offers Canadian Red Cross certified Intermediate / Intermediate / Standard First Aid and Basic Basic / Emergency First Aid courses across more than 30 locations in Ontario, Nova Scotia, Alberta, and California. Both course levels cover diabetic emergencies, blood glucose management, the Rule of 15, and recognizing signs of DKA and HHS. Online blended learning is available for those who want to complete theory at home before attending an in-person skills session.
Legal Disclaimer
The information in this article is for educational and informational purposes only and does not constitute medical advice. In any diabetic emergency, always call 911 or your local emergency number immediately. Coast2Coast First Aid Inc. assumes no liability for any outcomes resulting from the application or misapplication of information in this article. Proper first aid technique should be learned and practised under the supervision of a qualified instructor.
About This Article, Expertise and Sources
Content reviewed by the Coast2Coast First Aid and Aquatics certified instructor team. Diabetic emergency information sourced from the Canadian Red Cross First Aid Guidelines, the CSA Z1210:24 First Aid Training Standard, Diabetes Canada Clinical Practice Guidelines, and the American Diabetes Association Standards of Medical Care in Diabetes 2026. Coast2Coast First Aid Inc. is an active Canadian Red Cross Training Partner. Last reviewed: May 2026. For corrections or additional information, contact info@c2cfirstaidaquatics.com or 1-866-291-9121.