How to Stop Bleeding: First Aid Guide to Internal & External Bleeding Control

A healthcare professional wearing gloves is bandaging a wound on a person's wrist. The bandage has a visible bloodstain. The person receiving care has a floral-patterned sleeve, and the professional is wearing a burgundy sleeve.

Some of us think only accidents happen to those who take part in risky behavior or are on the more adventurous side, but the truth is an accident can occur anywhere at any time. Besides choking, internal and external severe bleeding are some of the most common emergencies we experience and are unaccustomed to handling unless we have proper First Aid training and a first aid kit at hand.

Continue reading

Diabetic Emergencies: First Aid for Hypoglycemia, DKA, and HHS (2026)

The three primary diabetic emergencies are hypoglycemia (low blood sugar), diabetic ketoacidosis (DKA), and hyperosmolar hyperglycemic state (HHS). For a conscious person with low blood sugar, give 15 grams of fast-acting sugar and wait 15 minutes. That is the Rule of 15. For DKA or HHS, call 911 immediately and do not give food or drink if the person is vomiting or unconscious. If the person is unconscious and carries a glucagon kit, administer it after calling 911.

Get Certified
✓ Canadian Red Cross Approved

Find a First Aid Course Near You

Canadian Red Cross Intermediate / Intermediate/Standard First Aid and Basic/Emergency First Aid courses covering diabetic emergencies, CPR, and more across Ontario, Nova Scotia, Alberta, and California.

View All 30+ Locations

3.7M
Canadians living with diabetes
4.0
mmol/L blood glucose threshold for hypoglycemia
15g
Fast-acting sugar in the Rule of 15 for hypoglycemia

World Diabetes Day and Diabetic Emergencies: Why First Aid Matters

Every year on November 14th, the global community observes World Diabetes Day to raise awareness about one of the fastest-growing health conditions in the world. In Canada alone, more than 3.7 million people are living with diabetes, and that number continues to rise every year. While diabetes is primarily managed through lifestyle modifications and medical treatment, the condition can produce life-threatening emergencies that require immediate attention. Diabetic emergencies are critical situations in diabetes management that require immediate attention because they can be life-threatening.

World Diabetes Day was established in 1991 by the International Diabetes Federation and the World Health Organization. November 14th was chosen because it marks the birthday of Sir Frederick Banting, the Canadian physician who co-discovered insulin in 1921 at the University of Toronto. That breakthrough has saved millions of lives and remains one of Canada’s greatest contributions to global health.

The three primary diabetic emergencies are hypoglycemia (low blood sugar), diabetic ketoacidosis (DKA), and hyperosmolar hyperglycemic state (HHS). The two most common diabetic emergencies are diabetic ketoacidosis (DKA) and hyperosmolar hyperglycemic state (HHS), with severe hypoglycemia also being a key concern. Each requires a different first aid response, and each can be fatal without prompt action.

Types of Diabetes: What You Need to Know

Type 1 Diabetes

Type 1 diabetes is an autoimmune condition in which the body’s immune system attacks and destroys the insulin-producing cells in the pancreas. Without insulin, the body cannot move glucose from the bloodstream into cells for energy. People with Type 1 diabetes must take insulin every day to survive. DKA is most common in type 1 diabetes because the absolute shortage of insulin causes the body to produce ketones as an alternative fuel source. This type accounts for approximately 5 to 10 percent of all diabetes cases and is most commonly diagnosed in children and young adults.

Type 2 Diabetes

Type 2 diabetes is the most common form, accounting for about 90 percent of all cases. It develops when the body becomes resistant to insulin or when the pancreas gradually loses its ability to produce enough insulin. HHS is more often seen in people living with type 2 diabetes, although either condition can affect anyone with diabetes. Risk factors include family history, obesity, physical inactivity, age, and ethnicity. Regular monitoring of blood glucose levels is essential for people with diabetes, especially during periods of illness, to prevent fluctuations that can lead to emergencies.

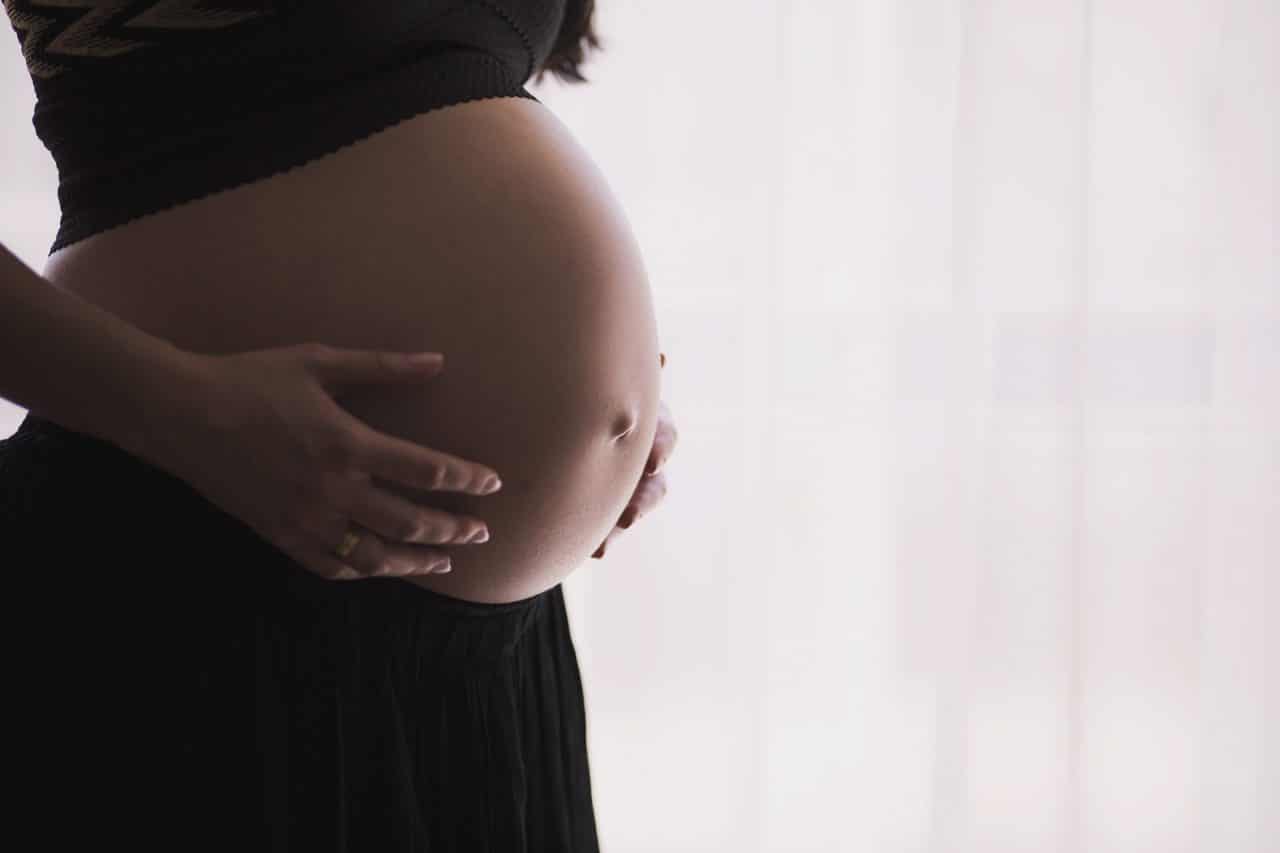
Gestational Diabetes

Gestational diabetes develops during pregnancy and typically resolves after birth. However, women who have had gestational diabetes have a significantly higher risk of developing Type 2 diabetes later in life. Monitoring blood glucose carefully during pregnancy is essential for the health of both mother and baby, and gestational diabetes is considered a risk factor for future hyperglycemic emergencies.

The Three Primary Diabetic Emergencies

What Is Hypoglycemia: Low Blood Sugar and Its Risks?

Hypoglycemia occurs when blood glucose drops below normal levels, which can starve the brain of fuel. In clinical terms, hypoglycemia is defined as blood glucose falling below 4.0 mmol/L. This is the more common and more immediately dangerous diabetic emergency in day-to-day life. It can develop rapidly within minutes and can quickly progress to unconsciousness and seizures if not treated.

Causes of hypoglycemia include taking too much insulin, skipping meals, excessive physical activity, and alcohol consumption. Certain drugs affecting blood glucose control, including medications used for infection or other conditions, can also trigger hypoglycemic episodes. People with hypoglycemia unawareness are at particular risk because they do not experience the usual warning signs before their blood glucose drops to a dangerous level, making bystander recognition even more critical.

Early signs of hypoglycemia include: shakiness and trembling, sweating and pale clammy skin, rapid heartbeat and extreme hunger, dizziness and lightheadedness, confusion and difficulty concentrating, irritability or sudden mood changes, and blurred vision and weakness.

Severe Hypoglycemia: When Low Blood Sugar Becomes Life-Threatening

Severe hypoglycemia can result in seizures, loss of consciousness, or coma. In Ontario, in-hospital mortality in people hospitalized for acute hyperglycemia ranged from under 1 percent at ages 20 to 49 years to 16 percent in those over 75 years, underscoring the importance of early intervention. Severe hypoglycemia requires immediate attention and emergency services if the person is unconscious, having seizures, or unable to swallow safely. The incidence of severe hypoglycemic events increases significantly in older adults and in patients with long-standing diabetes who have developed hypoglycemia unawareness.

What Is Diabetic Ketoacidosis (DKA)?

DKA is a metabolic crisis caused by an absolute shortage of insulin, leading the body to produce ketones as an alternative fuel source. When insulin is absent, the body breaks down fat, producing ketones that acidify the blood. This process is called ketosis and, when severe, progresses to ketoacidosis. DKA is most common in people with type 1 diabetes but can affect anyone with diabetes who has severely uncontrolled blood glucose. Severe diabetic ketoacidosis is a life-threatening hyperglycemic crisis requiring emergency room treatment without delay.

In DKA, blood glucose levels are usually 14.0 mmol/L or above. Symptoms of diabetic ketoacidosis (DKA) include nausea, vomiting, abdominal pain, and a feeling of being unable to get enough oxygen, collectively referred to as acidosis. Common signs of DKA also include shortness of breath, fruity breath odor, and severe abdominal pain. Common triggers for DKA beyond missed insulin include infection, illness, cardiac surgery, and myocardial infarction, all of which dramatically increase the body’s insulin requirements. People recovering from surgery or a cardiac event should monitor blood glucose closely for signs of hyperglycemic crises.

  • Excessive thirst and frequent urination
  • Nausea, vomiting, and severe abdominal pain
  • Fruity breath odor from ketones in the urine and breath
  • Deep and rapid breathing (Kussmaul breathing)
  • Confusion and drowsiness
  • Eventual loss of consciousness and coma

What Is Hyperosmolar Hyperglycemic Syndrome (HHS)?

Hyperosmolar hyperglycemic syndrome (HHS), also called hyperosmolar hyperglycemic state, hyperglycemic hyperosmolar state, or hyperosmolar nonketotic coma, is a hyperglycemic emergency that typically affects older adults with type 2 diabetes. Hyperglycemia usually develops slowly and can lead to severe dehydration and life-threatening conditions like DKA or HHS if untreated. Medications including diuretics and glucocorticoids can trigger or worsen HHS by promoting dehydration and raising blood glucose levels.

In DKA, blood glucose levels are usually 14.0 mmol/L or above, while in HHS they can be significantly higher, typically 34.0 mmol/L or above, along with plasma osmolality above 320 mOsm/kg. HHS typically presents with neurological signs such as vision problems or delirium, along with increased urination and dehydration. Signs of dehydration in HHS include extreme thirst, dry mouth, sunken eyes, and rapid pulse. HHS is a critical medical emergency requiring intensive care treatment and massive fluid rehydration as a priority. Mortality is significantly higher in HHS than in DKA, particularly in older adults and patients with pre-existing conditions.

Safety Tip: If you are unsure whether someone is experiencing high or low blood sugar, always treat for low blood sugar first by giving them something sweet to eat or drink if they are conscious and able to swallow. Treating for low blood sugar when it is actually high causes minimal harm. Failing to treat dangerously low blood sugar can be fatal.

DKA vs HHS: Key Differences at a Glance

Understanding the difference between DKA and HHS helps you communicate more clearly with emergency dispatchers and medical professionals when someone experiences a hyperglycemic crisis.

Feature DKA HHS
Most common in Type 1 diabetes Type 2 diabetes
Blood glucose 14.0 mmol/L or above 34.0 mmol/L or above
Plasma osmolality Normal or mildly elevated Above 320 mOsm/kg
Ketones present Yes Minimal or absent
Onset Hours to 1 day Days to weeks
Breath odor Fruity No fruity odor
Neurological signs Less common Vision problems, delirium common
Dehydration Moderate Severe
Common triggers Missed insulin, infection, cardiac surgery Diuretics, glucocorticoids, illness
Treatment priority Insulin and IV fluids Massive fluid rehydration

First Aid for Diabetic Emergencies: Step by Step

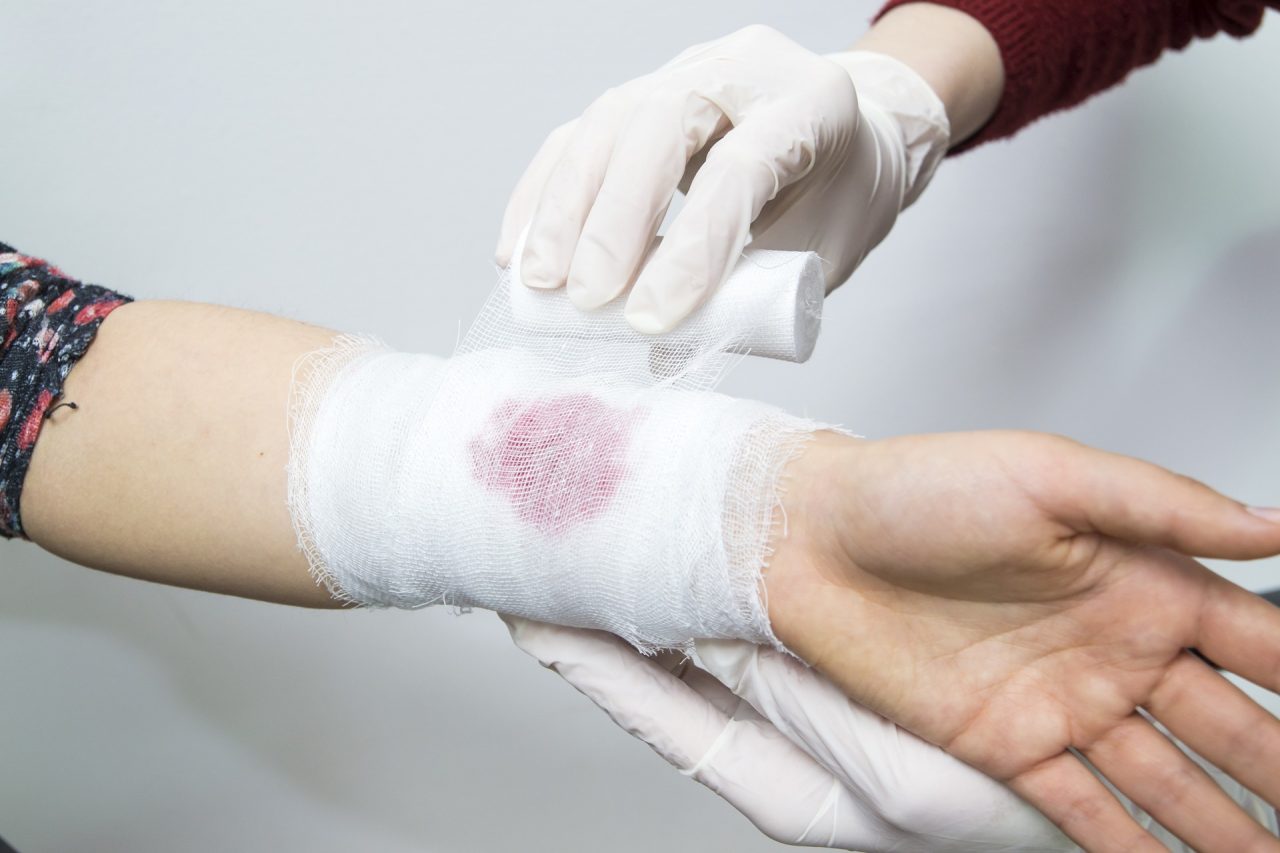
In a diabetic emergency, assessing the person’s level of consciousness and their ability to swallow safely is the most critical first step. Never give anything by mouth to someone who is unconscious or unable to swallow, as this creates a serious aspiration risk. Intermediate / Intermediate/Standard First Aid with CPR C covers diabetic emergency response, the Rule of 15, and glucagon administration as part of the core curriculum.

The Rule of 15: First Aid for Low Blood Sugar

If blood sugar levels cannot be determined, standard protocols suggest treating as if the person has hypoglycemia. This is the safer approach because treating a high blood sugar with a small amount of sugar causes minimal harm, while failing to treat dangerously low blood sugar can be fatal.

For a conscious person who can swallow safely, follow the Rule of 15:

  • Step 1: Give 15 grams of fast-acting sugar immediately. Options include 4 glucose tablets, half a cup (125 mL) of fruit juice or regular soft drink, 1 tablespoon of honey or sugar, or 6 to 7 hard candies.
  • Step 2: Wait 15 minutes and reassess symptoms.
  • Step 3: If symptoms have not improved, repeat the 15-gram dose of fast-acting sugar.
  • Step 4: Once symptoms improve, give a more substantial snack containing both carbohydrates and protein to stabilize blood glucose levels and prevent a rebound drop.

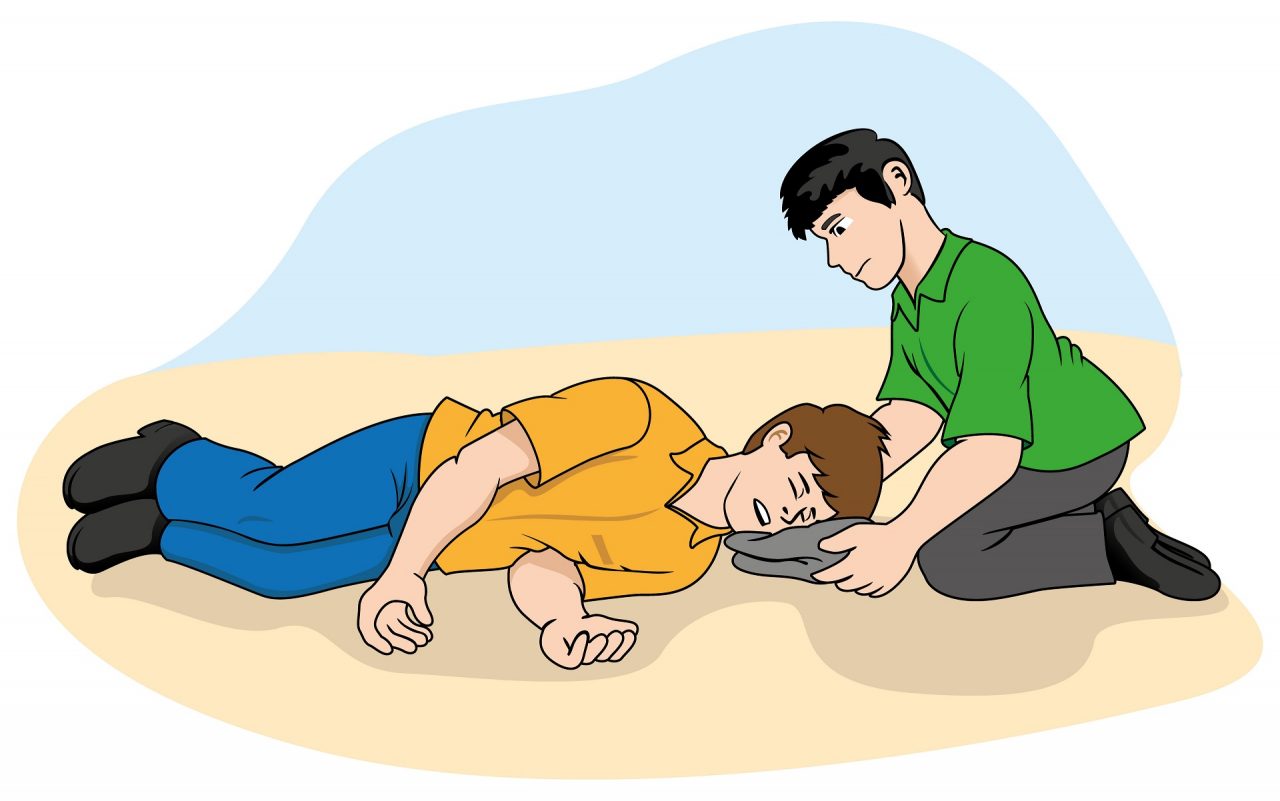
If the person is unconscious or unable to swallow safely, do not give anything by mouth. Call 911 immediately. Place the person in the recovery position on their side to protect their airway. If the person carries a glucagon kit and you are trained to use it, administer glucagon as directed. The glucagon kit works by signaling the liver to release stored glucose into the bloodstream, raising blood glucose without requiring oral intake. Stay with the person and monitor their breathing and level of consciousness until emergency services arrive.

First Aid for Hyperglycemic Emergencies: DKA and HHS

Hyperglycemia that has progressed to DKA or HHS requires emergency room treatment and cannot be managed with first aid alone. Management of diabetic ketoacidosis (DKA) and hyperosmolar hyperglycemic state (HHS) includes restoring normal extracellular fluid volume and correcting electrolyte imbalances. Fluid therapy is essential in managing DKA, with initial intravenous normal saline administration recommended at a rate of 500 mL/h for the first four hours, followed by adjustments based on the patient’s condition.

As a bystander, your role is to call 911 immediately if the person is vomiting, has fruity-smelling breath, is breathing abnormally, or is showing signs of altered consciousness. Keep the person comfortable and calm. Place them in the recovery position if unconscious but breathing. Monitor their airway and breathing continuously. Do not give food or drink if they are vomiting or their level of consciousness is reduced. Tell paramedics what you observed, including any known diabetes diagnosis, medications, and the time symptoms began.

Hypoglycemia Unawareness: A Hidden Risk

Hypoglycemia unawareness is a condition in which a person with diabetes no longer experiences the early warning signs of low blood glucose. Over time, the body’s hormonal response to falling blood glucose becomes blunted, particularly in people who have had diabetes for many years or who have experienced frequent hypoglycemic episodes. Blood glucose can drop to dangerous levels without the person feeling any symptoms.

For bystanders and coworkers, hypoglycemia unawareness means that someone with diabetes may appear suddenly confused, unresponsive, or unconscious without warning. This makes it especially important for people around those with diabetes to know the signs of a diabetic emergency, even when the person themselves cannot signal that something is wrong. If someone with known diabetes suddenly appears confused, pale, or unresponsive, treat for hypoglycemia immediately and call 911.

The Glucagon Kit: What It Is and How It Helps

A glucagon kit is an emergency treatment for severe hypoglycemia when the person is unconscious or unable to swallow. Glucagon is a hormone that signals the liver to release stored glucose into the bloodstream. Many people with type 1 diabetes and some with type 2 diabetes carry a glucagon kit as part of their emergency preparedness.

Glucagon kits come in two forms: an injectable kit that requires reconstitution before use, and a nasal spray form that is simpler to administer. If someone collapses from a diabetic emergency and you locate a glucagon kit, call 911 first, then follow the step-by-step instructions on the kit. The correct dose is included in the kit instructions. Most modern glucagon kits are designed to be used by untrained bystanders with clear instructions. After administering glucagon, the person should begin to recover within 10 to 15 minutes. Even if they recover, paramedics should still assess them because blood glucose may drop again without follow-up treatment.

Sick-Day Plan: Preventing Diabetic Emergencies Before They Start

Preventing diabetic emergencies starts with proactive care, including creating a sick-day plan with healthcare providers to manage medications during illness. Illness and infection are among the most common triggers for both DKA and HHS, because physical stress causes blood glucose levels to rise even if the person is not eating. Sick-day management that includes capillary beta-hydroxybutyrate monitoring reduces emergency room visits and hospitalizations in young people with type 1 diabetes.

A comprehensive sick-day plan typically includes instructions for adjusting insulin or oral medication doses during illness, guidance on how frequently to check blood glucose when sick, rules for when to check for ketones in urine or blood, a threshold for when to call a healthcare provider or go to the emergency room, a list of safe foods and fluids to consume when unable to eat normally, and instructions for managing diuretics, glucocorticoids, and other drugs that affect blood glucose during illness. Regular monitoring of blood glucose levels is essential for people with diabetes, especially during periods when ill, to prevent fluctuations that lead to emergencies.

Diabetes in the Workplace

With 3.7 million Canadians living with diabetes, virtually every workplace has employees managing the condition. Employers have both a legal and ethical responsibility to ensure workplaces are safe and supportive for employees with diabetes. This includes allowing employees to monitor their blood sugar and take medications as needed, providing access to food and beverages for managing blood glucose, training designated first aiders to recognize and respond to diabetic emergencies, and including diabetes management in workplace emergency plans.

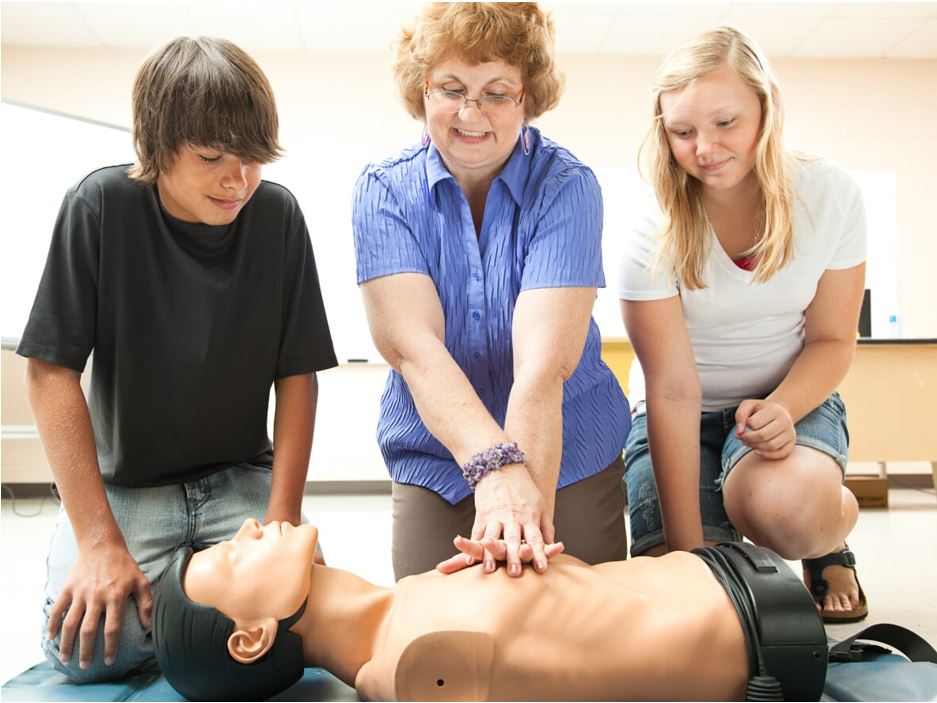
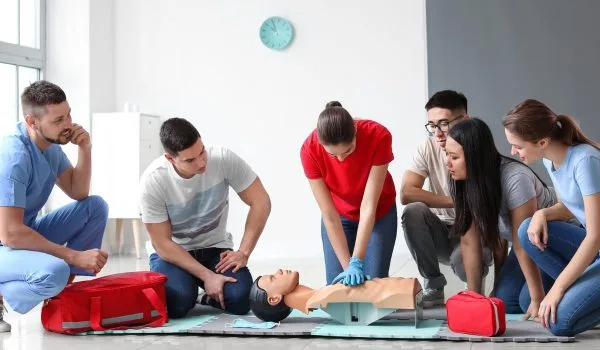
Investing in workplace first aid training that covers diabetic emergencies ensures that coworkers can respond effectively when someone experiences a blood sugar crisis. For workplaces with higher risk, private group first aid training can be customized to include specific diabetic emergency protocols. This training aligns with CSA Z1210:24 workplace first aid standards.

Diabetes Prevention: Reducing Your Risk

While type 1 diabetes cannot currently be prevented, the risk of developing type 2 diabetes can be significantly reduced through lifestyle modifications. Maintaining a healthy weight, engaging in at least 150 minutes of moderate physical activity per week, eating a balanced diet, limiting consumption of processed foods and sugary drinks, and getting regular health screenings are all proven strategies. The American Diabetes Association recommends a combination of aerobic exercise and resistance training for optimal glycemic control.

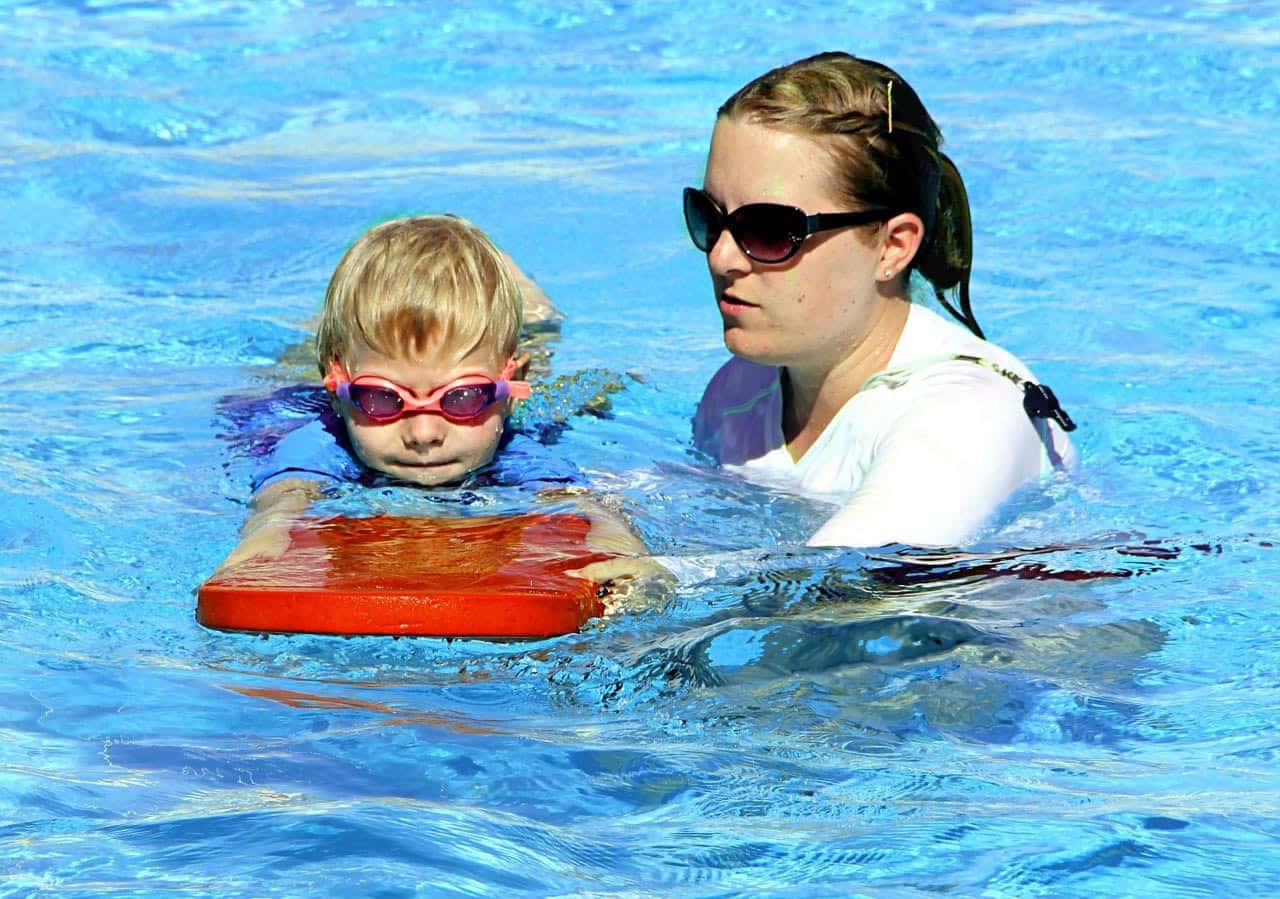
Physical activities like swimming are particularly beneficial for diabetes prevention and management because they provide excellent cardiovascular exercise while being gentle on the joints. Regular physical activity improves insulin sensitivity, helps maintain a healthy weight, and reduces stress, all of which contribute to better blood sugar control and overall health.

This World Diabetes Day: Take Action

This World Diabetes Day, consider taking action by learning the signs and symptoms of diabetic emergencies, talking to friends and family members with diabetes about their emergency action plans, ensuring your workplace has trained first aiders, and enrolling in a first aid course that covers medical emergencies including diabetes.

Basic Basic/Emergency First Aid covers the fundamentals of recognizing and responding to blood glucose crises. Intermediate / Intermediate/Standard First Aid courses go deeper, covering the Rule of 15, glucagon administration, recognition of DKA and HHS, and when to call 911. Hands-on training builds the confidence and competence to act correctly under pressure when every minute matters.

Key Takeaway

The three primary diabetic emergencies are hypoglycemia, DKA, and HHS. For a conscious person with low blood sugar, use the Rule of 15: give 15 grams of fast-acting sugar and wait 15 minutes. For DKA or HHS, call 911 immediately. Never give food or drink to someone who is unconscious. If a glucagon kit is available and the person is unconscious, call 911 first then administer glucagon. Hands-on first aid training prepares you to respond with confidence to any diabetic emergency.

Get Certified in First Aid Today

Learn to recognize and respond to diabetic emergencies, cardiac events, and more with a Canadian Red Cross First Aid course from Coast2Coast First Aid and Aquatics.

Find a Course Near You

Frequently Asked Questions: 2026 Diabetic Emergencies First Aid

Q1: What are the three primary diabetic emergencies?

A: The three primary diabetic emergencies are hypoglycemia (low blood glucose), diabetic ketoacidosis (DKA), and hyperosmolar hyperglycemic state (HHS). The two most common diabetic emergencies are DKA and HHS, with severe hypoglycemia also being a key concern. Each requires a different response. Hypoglycemia is treated with fast-acting sugar for conscious patients. DKA and HHS require emergency room treatment and cannot be managed with first aid alone. In all three cases, calling 911 and monitoring the person’s airway are the most critical bystander actions.

Q2: What is the Rule of 15 for hypoglycemia?

A: The Rule of 15 is the Intermediate / Intermediate/Standard First Aid protocol for conscious hypoglycemia. Give the person 15 grams of fast-acting sugar such as 4 glucose tablets, half a cup of juice, or 1 tablespoon of honey. Wait 15 minutes and reassess. If symptoms have not improved, repeat the dose. Once symptoms resolve, give a more substantial snack to stabilize blood glucose levels. This protocol is covered in Intermediate / Intermediate/Standard First Aid and CPR certification courses.

Q3: What should I do if someone with diabetes loses consciousness?

A: Do not give anything by mouth. Call 911 immediately. Place the person in the recovery position on their side to protect their airway. If they carry a glucagon kit and you are trained to use it, administer glucagon as directed. The glucagon signals the liver to release stored glucose into the bloodstream. Monitor their breathing and level of consciousness continuously until paramedics arrive. Severe hypoglycemia can result in seizures, loss of consciousness, or coma, so acting quickly is essential.

Q4: What is the difference between DKA and HHS?

A: Both are hyperglycemic crises but differ in key ways. In DKA, blood glucose is typically 14.0 mmol/L or above and ketones are present, producing fruity breath and acidosis. In HHS, blood glucose is significantly higher at 34.0 mmol/L or above, along with plasma osmolality above 320 mOsm/kg. Ketones are minimal or absent in HHS. DKA is most common in type 1 diabetes and develops over hours. HHS typically affects older adults with type 2 diabetes, develops over days to weeks, and presents with severe dehydration and neurological signs. HHS requires massive fluid rehydration as a priority.

Q5: How do I know if someone needs 911 for a diabetic emergency?

A: Call 911 immediately if the person is unconscious or unresponsive, having seizures, unable to swallow, vomiting, breathing abnormally, showing signs of severe dehydration, or has fruity-smelling breath indicating possible DKA. Also call 911 if they do not improve after two rounds of the Rule of 15, or if you are unsure of the cause of their altered consciousness. Diabetic emergencies are critical situations in diabetes management that require immediate attention.

Q6: What is hypoglycemia unawareness?

A: Hypoglycemia unawareness is a condition in which a person with diabetes no longer experiences the early warning signs of low blood glucose. Blood glucose can drop to dangerous levels without the person feeling any symptoms. This makes bystander recognition critical. If someone with known diabetes suddenly appears confused, pale, or unresponsive without warning, treat for hypoglycemia immediately and call 911. People with hypoglycemia unawareness are at significantly higher risk of severe hypoglycemic episodes.

Q7: What is a glucagon kit and who should have one?

A: A glucagon kit is an emergency treatment for severe hypoglycemia in unconscious patients. Glucagon signals the liver to release stored glucose into the bloodstream, raising blood glucose without requiring the person to eat or drink. Many people with type 1 diabetes carry a glucagon kit as part of their emergency preparedness. Glucagon kits are available as injectable preparations or nasal sprays. Call 911 first, then administer glucagon according to the kit instructions at the correct dose. Even if the person recovers after glucagon, they still need paramedic assessment.

More FAQs: DKA, Sick-Day Plans, and Workplace Safety

Q8: What causes DKA and how is it treated?

A: DKA is a metabolic crisis caused by an absolute shortage of insulin, leading the body to produce ketones. Common triggers include missed insulin doses, illness or infection, cardiac surgery, and myocardial infarction. DKA symptoms include nausea, vomiting, abdominal pain, fruity breath, and deep rapid breathing. Treatment requires hospital care including fluid therapy, with initial intravenous normal saline at 500 mL/h for the first four hours, along with insulin and electrolyte correction. As a bystander, call 911 and monitor the person’s airway until help arrives.

Q9: What is HHS and why is it dangerous?

A: Hyperosmolar hyperglycemic syndrome (HHS), also called hyperglycemic hyperosmolar state or hyperosmolar nonketotic coma, is a life-threatening hyperglycemic emergency most common in older adults with type 2 diabetes. Blood glucose rises to 34.0 mmol/L or above, and severe dehydration causes plasma osmolality to exceed 320 mOsm/kg. HHS typically presents with neurological signs such as vision problems or delirium, along with increased urination and extreme thirst. HHS is a critical medical emergency requiring intensive care treatment and massive fluid rehydration as a priority.

Q10: What is a sick-day plan for diabetes?

A: A sick-day plan is a personalized protocol created with a healthcare provider that guides a person with diabetes through managing their condition during illness. It includes instructions for adjusting medications including diuretics and glucocorticoids, monitoring blood glucose more frequently, checking for ketones in urine, and knowing when to seek emergency care. Preventing diabetic emergencies starts with proactive care, including creating a sick-day plan. Sick-day management that includes capillary beta-hydroxybutyrate monitoring reduces emergency room visits and hospitalizations in young people.

Q11: What should I give someone having a hypoglycemic episode?

A: Give 15 grams of fast-acting sugar. Options include 4 glucose tablets, half a cup of fruit juice or regular soft drink, 1 tablespoon of honey or sugar, or 6 to 7 hard candies. Only give food or drink if the person is conscious and able to swallow safely. If blood sugar levels cannot be determined, standard protocols suggest treating as if the person has hypoglycemia. After symptoms improve, follow with a snack containing carbohydrates and protein to stabilize blood glucose.

Q12: How do I recognize DKA symptoms?

A: Common signs of DKA include shortness of breath, fruity breath odor, nausea, vomiting, and severe abdominal pain. Symptoms of diabetic ketoacidosis include a feeling of being unable to get enough oxygen, referred to as acidosis. Blood glucose in DKA is typically 14.0 mmol/L or above, and ketones will be present in urine. The person may also show confusion, drowsiness, and eventual loss of consciousness or coma. DKA symptoms develop over hours to a day, unlike hypoglycemia which can develop within minutes.

Q13: Can diabetes emergencies happen at work?

A: Yes. With 3.7 million Canadians living with diabetes, virtually every workplace has employees managing the condition. Diabetic emergencies can occur at any time, including during high-exertion work, periods of illness, or when meals are delayed. Employers are legally and ethically responsible for ensuring workplaces have trained first aiders who can recognize and respond to blood glucose crises. Private group first aid training can be tailored to include diabetic emergency protocols specific to your workplace.

Q14: What is the difference between hypoglycemia and hyperglycemia?

A: Hypoglycemia is low blood glucose, defined as blood glucose falling below 4.0 mmol/L, which can starve the brain of fuel. Early signs include shakiness, sweating, pale and clammy skin, rapid heartbeat, and extreme hunger. Hyperglycemia is high blood glucose in a hyperglycemic state, typically above 11.0 mmol/L, which develops slowly and can progress to DKA or HHS if untreated. If unsure which condition a person is experiencing, treat for hypoglycemia first, as this is the more immediately dangerous condition.

Q15: Where can I learn diabetic emergency first aid in Canada?

A: Coast2Coast First Aid and Aquatics offers Canadian Red Cross certified Intermediate / Intermediate/Standard First Aid and Basic Basic/Emergency First Aid courses across more than 30 locations in Ontario, Nova Scotia, Alberta, and California. Both course levels cover diabetic emergencies, blood glucose management, the Rule of 15, and recognizing signs of DKA and HHS. Online blended learning is available for those who want to complete theory at home before attending an in-person skills session.

Legal Disclaimer
The information in this article is for educational and informational purposes only and does not constitute medical advice. In any diabetic emergency, always call 911 or your local emergency number immediately. Coast2Coast First Aid Inc. assumes no liability for any outcomes resulting from the application or misapplication of information in this article. Proper first aid technique should be learned and practised under the supervision of a qualified instructor.

About This Article, Expertise and Sources
Content reviewed by the Coast2Coast First Aid and Aquatics certified instructor team. Diabetic emergency information sourced from the Canadian Red Cross First Aid Guidelines, the CSA Z1210:24 First Aid Training Standard, Diabetes Canada Clinical Practice Guidelines, and the American Diabetes Association Standards of Medical Care in Diabetes 2026. Coast2Coast First Aid Inc. is an active Canadian Red Cross Training Partner. Last reviewed: May 2026. For corrections or additional information, contact info@c2cfirstaidaquatics.com or 1-866-291-9121.

What is the Coast2Coast Mobile Swim School?

mobile swimming or public swimming

The Coast2Coast Mobile Swim School brings certified swimming instructors directly to your home pool, backyard pool, or community pool across Canada. Private and semi-private lessons are available for all ages and skill levels, from toddlers to competitive swimmers, with flexible scheduling including evenings and weekends. Formal swim lessons reduce the risk of drowning in children under 5 by up to 88 percent, making this one of the most important investments a Canadian family can make.

Book Now
✓ Certified Instructors · Fully Insured

Book Mobile Swim Lessons Near You

Professional swimming instruction delivered to your home pool, backyard pool, or community pool. Flexible scheduling across Canada.

Contact Us to Book

88%
Reduction in drowning risk with formal swim lessons for children under 5
2-3x
Faster skill progression in private vs group lessons
All Ages
Toddlers through seniors, all skill levels

What Is a Mobile Swim School and How Does It Work?

A mobile swim school is a swim instruction program where certified swimming instructors travel to the student rather than the student travelling to a fixed facility. Instead of fitting your schedule around a swim school’s class times, a mobile swim program fits around you. Lessons are booked at times that work for your family, including evenings and weekends, and take place at a pool of your choosing.

Coast2Coast Mobile Swim School operates across Canada, delivering certified private swim and semi-private instruction directly to residences and community pools. Most mobile swim programs tailor lesson plans according to standard Canadian aquatic levels, ensuring your child progresses through a recognized, nationally consistent curriculum. Lessons can be booked individually or in packages, and programs are designed to suit all ages and skill levels, with beginners starting with the basics before progressing to more advanced skills, from toddlers taking their first lesson to competitive swimmers preparing for tryouts.

Why Choose Mobile Swim Lessons Over a Traditional Swim School?

Flexible Scheduling Around Your Family

Mobile swim lessons are built around your schedule. There are no fixed class times, no waitlists, and no need to rearrange your week. Coast2Coast offers flexible scheduling including evenings and weekends. For families juggling work, school, and extracurricular activities, the ability to offer flexible scheduling around existing commitments is one of the most significant advantages of mobile swim lessons.

Private Swimming Lessons vs Group Classes

Unlike large group classes where each child receives only a fraction of the instructor’s attention, private swimming lessons place the instructor’s full focus on one student. In a standard group class with six to eight students, meaningful instruction time is limited. Private swim lessons eliminate this problem entirely, delivering individual attention in every session and producing measurably faster skill development.

Individual Attention and Faster Progress

Mobile swim lessons typically involve one-on-one or small group instruction, which allows for more individual attention and faster skill development compared to traditional group classes. Swimmers who receive private instruction often progress two to three times faster than those in large group settings, helping them feel confident in the water sooner. Individual attention also means issues with technique are identified and corrected immediately rather than being reinforced through repetition.

Personalized Lesson Plans for Every Swimmer

Every swimmer is different. Coast2Coast instructors create personalized lesson plans tailored to each student’s current ability, learning style, and goals. Whether a swimmer needs to overcome a fear of water, master a specific stroke such as learning freestyle after the basics are in place, or prepare for a swim team tryout, the lesson plan is built around their individual needs. Instructors bring all necessary teaching equipment to each lesson so families do not need to provide anything beyond access to the pool.

Fun, Confidence-Building Lessons for Kids

Lessons at Coast2Coast are designed to be fun and engaging, particularly for young learners. When kids enjoy their lessons, they stay motivated, build confidence faster, and develop a lifelong positive relationship with water. A fantastic instructor who connects with your child makes all the difference. Every family deserves a fantastic instructor who understands their child’s personality, pace, and learning style. Finding that right match is something we take seriously at Coast2Coast.

Best Learning Experience for Special Needs

Instructors specializing in adaptive aquatics and behavioral support techniques are trained to work with individuals with special needs, ensuring the best learning experience in a safe and effective environment. Private mobile lessons are particularly well-suited to swimmers who benefit from one-on-one attention, reduced sensory distractions, and a consistent routine in a familiar environment.

We Come to You

Learn to Swim in Your Own Pool

No travel, no crowded change rooms, no fixed schedules. Our certified swim instructors come to your home pool, backyard pool, or community pool across Canada.

Book Your First Lesson

What Do Mobile Swim Lessons Cover?

Water Safety Fundamentals

Every swimming journey begins with water safety. Younger and newer swimmers learn essential survival skills including safe pool entry and exit, floating on their back, treading water, recognizing water hazards, and understanding pool rules and boundaries. Water safety education extends beyond the pool, covering the dangers of open water swimming and waves, the importance of life jackets when boating or kayaking, and how to recognize the signs of drowning, which often looks nothing like the dramatic scenes depicted in movies or TV dramas.

Home Swim Lessons: Learning in Your Own Pool

Learning to swim in your own pool transforms the experience for many students. Home swim lessons in a familiar environment remove the anxiety that comes with unfamiliar public facilities, allowing swimmers to focus entirely on skill development. Kids transition from water play to structured instruction more naturally at home, and adults who feel self-conscious in public pools find private home lessons far more comfortable. Home lessons are conducted at your home pool, backyard pool, or preferred community pool, wherever you are most comfortable.

Advanced Stroke Development and Competitive Swimmers

For advanced swimmers looking to refine technique, Coast2Coast mobile lessons offer instruction focused on stroke efficiency, endurance, race starts and turns, and competitive preparation. Advanced lessons may include video analysis and interval training sets tailored to competitive goals. Competitive swimmers benefit from the focused, distraction-free environment that mobile lessons provide.

Adult Swimming Lessons

It is never too late to learn to swim. Many adults never had the opportunity as children or experienced a water event that left them fearful. Private mobile lessons provide a judgment-free environment where adults can learn at their own pace without the discomfort of a crowded public pool. Adult lessons cover the same progression from water safety fundamentals through to full stroke development, adapted for adult learners at all starting points.

Toddlers and Young Children

Mobile swim lessons are particularly effective for toddlers and young children. The familiar environment of a home pool or backyard pool allows young swimmers to transition from water play to structured instruction naturally. Early lessons build water confidence by teaching the basics and essential safety concepts first, while giving parents peace of mind knowing their kids have fundamental survival skills in and around water.

Our Swim Instructors: Certified, Experienced, and Insured

Every Coast2Coast Mobile Swim School instructor is a certified, experienced instructor and aquatic professional. Our team includes instructors who specialize in toddlers, children with special needs, adults with water anxiety, seniors, and competitive swimmers. Every student is matched with the instructor best suited to their needs, skill levels, and goals.

First Aid Certified Instructors

Certified swimming instructors are required to hold current certifications in lifesaving, swimming instruction, CPR, and first aid. Many also hold Basic Life Support (BLS) certification. All Coast2Coast instructors hold current Intermediate First Aid certification aligned with CSA Z1210:24 standards, meaning every lesson takes place in the presence of someone trained to respond to any aquatic emergency. This combination of swimming expertise and first aid knowledge makes Coast2Coast instructors uniquely qualified to keep your family safe in and around water.

Insured Instructors and Full Peace of Mind

Coast2Coast instructors are fully insured. Swim instructors are vetted through background checks and must demonstrate experience and expertise in delivering effective swim lessons before joining our team. Using a trusted Canadian mobile swim network ensures insured instructors are professional, certified, and fully insured, giving parents and families complete peace of mind. It is advisable to always use trusted Canadian mobile swim networks to ensure instructors are professional, certified, and insured.

For Organizations and Communities

Pair Swimming with First Aid Training

Complete aquatic safety means knowing how to swim and knowing how to respond in an emergency. Coast2Coast offers both: Canadian Red Cross certified first aid alongside professional swim instruction.

Find a First Aid Course

Who Is the Coast2Coast Mobile Swim School For?

Mobile swim lessons are designed to suit all ages and skill levels. Coast2Coast serves:

  • Toddlers and young children: building water confidence and foundational safety skills
  • School-age kids: progressing through Canadian aquatic levels at their own pace
  • Children with special needs: adaptive instruction in a low-stress, familiar environment
  • Teenagers: stroke refinement and competitive preparation
  • Adults: learning to swim for the first time or overcoming water anxiety
  • Seniors: low-impact aquatic fitness and safety skills
  • Competitive swimmers: advanced technique, endurance, and race preparation

Backyard Pool Lessons: What to Expect Before Your First Lesson

If you have a backyard pool or home pool, basic pool safety measures should be in place before lessons begin. Ensure your pool is surrounded by a four-sided fence at least 1.2 metres high with a self-closing, self-latching gate. The fence should not have footholds children could use to climb over. Never rely on pool covers as a substitute for proper fencing. Remove pool toys from the water after each use to avoid attracting young kids unsupervised to the pool area.

Your instructor will arrive with all teaching equipment needed for the session. You simply need to ensure the pool is clean, the water temperature is comfortable for swimming, and that you have towels available. Whether you are booking for summer lessons or a year-round program, our team will advise on any specific preparation needed for your pool and swimmer.

These safety measures, combined with formal swimming instruction, provide the strongest possible protection against drowning for your family.

Safety Tip: If you have a backyard pool, ensure it is surrounded by a four-sided fence with a self-closing, self-latching gate. Pool fences should be at least 1.2 metres high. Never rely on pool covers as a substitute for proper fencing, and always supervise children around water regardless of their swimming ability.

How to Book Mobile Swim Lessons

Booking mobile swim lessons with Coast2Coast is straightforward. Contact our team to discuss your needs, schedule, and preferred pool location. We will match you with a qualified experienced instructor and create personalized lesson plans tailored to the swimmer’s current ability and goals. Lessons can be booked individually or in packages with flexible scheduling to suit your family’s routine.

Whether you are a parent looking to give your child the gift of swimming, an adult wanting to finally learn, a senior looking for low-impact aquatic fitness, or a competitive swimmer seeking to take your skills to the next level, the Coast2Coast Mobile Swim School is here to help you achieve your aquatic goals safely and effectively.

Key Takeaway

Mobile swim lessons at home in Canada bring certified, insured instructors directly to your pool, eliminating travel and scheduling barriers. Formal swim lessons reduce drowning risk in children under 5 by up to 88 percent. Private lessons produce 2 to 3 times faster skill progression than group classes. Coast2Coast serves all ages from toddlers to seniors, with personalized lesson plans, flexible scheduling, and first aid certified instructors at every session.

Canada’s Top-Rated Aquatic Safety Provider

Join 150,000+ Canadians Trained by Coast2Coast

Canada’s largest Canadian Red Cross Training Partner. Swimming instruction and first aid certification under one roof.

4.9 stars across 20,491 Google reviews.

Book Mobile Swim Lessons

Frequently Asked Questions: Mobile Swim Lessons in Canada

Q1: What is a mobile swim school?

A: A mobile swim school is a swimming instruction program where certified swim instructors travel to the student’s location rather than the student attending a fixed facility. Lessons take place at your home pool, backyard pool, community pool, or indoor pool. Coast2Coast Mobile Swim School operates across Canada, providing private swim and semi-private swimming lessons tailored to all ages and skill levels.

Q2: Who are mobile swim lessons suitable for?

A: Mobile swim lessons are suitable for all ages and skill levels, from toddlers taking their first lesson to competitive swimmers refining advanced technique. Programs are designed to suit children, adults, seniors, and individuals with special needs. Every student is matched with an experienced instructor whose expertise aligns with their specific goals and learning needs.

Q3: Where do mobile swim lessons take place?

A: Lessons can take place at your home pool, backyard pool, community pool, or indoor pool, wherever you swim. Coast2Coast instructors travel to your preferred location across Canada including North York, Toronto, and communities nationwide. If you do not have your own pool, we can help identify a suitable community pool.

Q4: How are mobile swim instructors certified?

A: All Coast2Coast Mobile Swim School instructors hold current certifications in lifesaving, swimming instruction, CPR, and first aid, with many also certified in Basic Life Support (BLS). Insured instructors are vetted through background checks before joining our team. All hold Intermediate First Aid certification aligned with CSA Z1210:24 standards.

Q5: How quickly do swimmers progress with private lessons?

A: Swimmers in private mobile swim lessons typically progress two to three times faster than those in large group classes because the instructor’s full attention is on one student. Personalized lesson plans, flexible scheduling, and a familiar comfortable environment all contribute to faster skill development and help swimmers feel confident sooner.

Q6: Can mobile swim lessons help children with special needs?

A: Yes. Coast2Coast instructors specializing in adaptive aquatics and behavioral support techniques are trained to work with children and adults with special needs. Private mobile lessons are particularly well-suited to swimmers who benefit from one-on-one attention, reduced sensory distractions, and a consistent routine in a familiar environment.

Q7: Do you offer adult swimming lessons?

A: Yes. It is never too late to learn to swim. Coast2Coast Mobile Swim School provides private swimming lessons for adults in a judgment-free environment where adults can learn at their own pace. Adult home swim lessons cover everything from basic water safety and floating to full stroke development, adapted for adult learners at all starting points.

More FAQs: Scheduling, Safety, and Booking

Q8: How do I book mobile swim lessons?

A: Contact the Coast2Coast team to discuss your needs, schedule, and preferred pool location. We will match you with a qualified experienced instructor and create lesson plans tailored to the swimmer’s current ability and goals. Lessons can be booked individually or in packages with flexible scheduling to suit your family’s routine.

Q9: What ages do you teach?

A: Coast2Coast Mobile Swim School teaches swimmers of all ages from toddlers through to adults and seniors. Our experienced instructors adapt their teaching approach to the developmental stage of each learner, ensuring lessons are age-appropriate, fun, and effective for every student.

Q10: Are your instructors insured?

A: Yes. All Coast2Coast Mobile Swim School instructors are fully insured. Using a trusted Canadian mobile swim network ensures that every instructor is professional, certified, and insured, providing parents and families with complete peace of mind.

Q11: What is covered in a beginner home swim lesson?

A: Beginner home lessons focus on water safety fundamentals including safe pool entry and exit, floating on the back, treading water, and understanding pool rules and water hazards. These foundational survival skills are taught before any stroke technique, ensuring every swimmer has life-saving knowledge from their very first lesson.

Q12: Can lessons take place in a community pool?

A: Yes. If you do not have a home pool or backyard pool, lessons can be arranged at a community pool or indoor pool of your choice. Coast2Coast instructors travel to your preferred aquatic facility, maintaining all the benefits of private swimming lessons in a setting that works for your family.

Q13: What is the difference between private and semi-private lessons?

A: Private swim lessons involve one instructor and one student, providing maximum individual attention and the fastest skill progression. Semi-private lessons involve two to three students with one instructor, offering a balance of personalized instruction and peer interaction. Both formats provide far more individual attention than a standard group class.

Q14: How does drowning prevention fit into mobile swim lessons?

A: Drowning prevention is at the core of every Coast2Coast lesson. Drowning is the leading cause of death for children under 5, but formal swim lessons reduce that risk by up to 88 percent. Every swimmer learns essential water safety skills alongside stroke development, and our instructors integrate safety education throughout the curriculum at every level.

Q15: How is the Coast2Coast Mobile Swim School different from other swim programs?

A: Coast2Coast combines professional aquatic instruction with the broader safety expertise of Canada’s largest Canadian Red Cross Training Partner. Every instructor holds first aid and CPR certification, lessons are fully insured, and the curriculum integrates water safety education at every level. This holistic approach combining swimming skill with emergency preparedness sets Coast2Coast apart from standard mobile swim providers.

Legal Disclaimer
The information in this article is for educational and informational purposes only. Swimming lessons do not guarantee drowning prevention. Always supervise children around water regardless of their swimming ability. Coast2Coast First Aid Inc. assumes no liability for any outcomes resulting from aquatic activities. All instructors hold current certifications and insurance as described.

About This Article, Expertise and Sources
Content produced by the Coast2Coast First Aid and Aquatics team. Drowning statistics sourced from the Public Health Agency of Canada and the Lifesaving Society of Canada. Swim instruction methodology aligned with Canadian Red Cross and Lifesaving Society aquatic standards. CSA Z1210:24 first aid certification requirements apply to all Coast2Coast instructors. Coast2Coast First Aid Inc. is Canada’s largest Canadian Red Cross Training Partner. Last reviewed: May 2026. For information contact info@c2cfirstaidaquatics.com or 1-866-291-9121.

The Need to Know’s of an Emergency Medical Responder Course

A person wearing blue gloves performs CPR chest compressions on another individual lying on the ground. A second person assists with a bag-valve mask in the background, providing ventilation. Both wear red uniforms, indicating emergency medical services.

What Is an Emergency Medical Responder (EMR) Course?

An Emergency Medical Responder (EMR) course is an advanced pre-hospital care training program that prepares individuals to provide immediate life-saving medical assistance in emergency situations. Unlike standard first aid or CPR/AED courses, EMR training goes significantly deeper into patient assessment, trauma management, medical emergencies, and the use of specialized equipment. EMR-certified individuals serve as the critical bridge between the moment an emergency occurs and the arrival of paramedics or hospital-based care, making this certification invaluable for anyone working in high-risk environments or pursuing a career in emergency services.

In Canada, the EMR certification program is designed to meet the standards set by provincial regulatory bodies and is recognized nationally as a foundational credential in the emergency medical services profession. Whether you are a firefighter, lifeguard, security professional, remote worker, or someone considering a career in paramedicine, EMR training provides the knowledge and skills to manage complex medical emergencies with competence and confidence.

Emergency Medical Responder training course in Canada

Who Should Take an EMR Course?

While EMR certification is valuable for virtually anyone, certain groups benefit particularly from this advanced level of training:

Aspiring Paramedics and Healthcare Professionals

For individuals pursuing a career in paramedicine, nursing, or emergency medicine, EMR certification serves as an essential stepping stone. Many paramedic programs across Canada either require or strongly recommend EMR certification as a prerequisite for admission. The course provides a solid foundation in patient care principles, medical terminology, and clinical skills that prepare students for the more advanced training that follows in paramedic college programs.

Firefighters and Law Enforcement Officers

First responders such as firefighters and police officers are frequently the first to arrive at emergency scenes. EMR training equips these professionals with the medical knowledge to assess patients, manage injuries, and provide stabilizing care while waiting for ambulance services. Many fire departments and police services across Canada require or encourage their members to hold EMR certification.

Industrial and Remote Workers

Workers in mining, oil and gas, forestry, construction, and other industrial sectors often operate in remote locations where ambulance response times may be 30 minutes or longer. For these workers, EMR-level training can be the difference between life and death, as they may need to manage serious injuries and medical emergencies for extended periods before professional medical help arrives. Many employers in these industries require EMR certification as a condition of employment.

Lifeguards and Aquatic Professionals

Aquatic environments present unique emergency scenarios including drowning, spinal injuries from diving accidents, and hypothermia. Lifeguards with EMR certification possess advanced assessment and management skills that complement their water rescue training, making them more effective at managing complex aquatic emergencies. BLS certification is often a companion credential for aquatic professionals alongside EMR.

Safety Tip: EMR training teaches the systematic patient assessment approach used by all emergency medical professionals. Learning to assess a patient from head to toe using a structured method ensures that no injuries or conditions are missed during an emergency.

What You Will Learn in an EMR Course

An EMR course covers an extensive curriculum designed to prepare you for a wide range of medical emergencies. The training combines theoretical classroom instruction with hands-on practical skills sessions and realistic emergency simulations. Here is an overview of the major topics covered:

Core Competencies of an Emergency Medical Responder Course

Enrolling in an Emergency Medical Responder course transitions a student from basic first aid to advanced clinical intervention. The primary objective of an Emergency Medical Responder course is to master the “Primary Survey,” where you learn to identify and treat life-threatening issues with the airway, breathing, and circulation (ABCs) in seconds. Throughout an Emergency Medical Responder course, you will move beyond simple bandages to utilizing specialized equipment like manual suction units, oxygen cylinders, and cervical collars. By the end of an Emergency Medical Responder course, participants are capable of leading a medical team during multi-system trauma events, ensuring that high-level care is maintained until a paramedic transport unit arrives.

Patient Assessment

The cornerstone of EMR training is learning how to systematically assess a patient. You will learn to perform primary surveys to identify and address immediately life-threatening conditions, followed by secondary surveys that involve a thorough head-to-toe physical examination. You will also learn to obtain a patient history using standardized questioning techniques, take vital signs including blood pressure, pulse, respiratory rate, and oxygen saturation, and document your findings accurately for handover to paramedics.

Airway Management and Oxygen Therapy

Managing a patient’s airway is the single most critical skill in emergency medicine. EMR training covers advanced airway management techniques including the use of oropharyngeal and nasopharyngeal airways, suctioning equipment, and supplemental oxygen delivery systems. You will learn to recognize and manage airway obstructions, perform advanced rescue breathing techniques, and use bag-valve-mask (BVM) devices for assisted ventilation.

Trauma Management

Traumatic injuries — from motor vehicle accidents, falls, workplace incidents, and other causes — require specialized knowledge to manage effectively. The EMR course covers wound care, splinting and immobilization of fractures and dislocations, spinal motion restriction techniques, management of chest and abdominal injuries, burn treatment, and multi-system trauma assessment. You will learn to rapidly identify the most serious injuries and prioritize treatment accordingly.

Medical Emergencies

Beyond trauma, EMR students learn to recognize and manage a wide range of medical conditions including cardiac emergencies, stroke, diabetic emergencies, seizures, respiratory distress, allergic reactions and anaphylaxis, poisoning, and environmental emergencies such as hypothermia and heat stroke. Understanding these conditions and their management is essential for providing effective pre-hospital care.

first responder course

CPR and Defibrillation

EMR training includes comprehensive CPR and AED certification at the healthcare provider level. This goes beyond basic CPR to include two-rescuer CPR techniques, advanced airway management during resuscitation, and the integration of AED use into a coordinated resuscitation effort. You will practice these skills extensively to develop the muscle memory needed to perform them effectively under the stress of a real cardiac arrest.

Watch: What EMR Training Involves

Course Structure and Duration

The EMR course is significantly more comprehensive than standard first aid training. Depending on the training provider and delivery format, the course typically ranges from 40 to 80 hours of instruction. This includes classroom lectures covering medical theory and protocols, hands-on skills labs where you practice techniques on mannequins and simulated patients, scenario-based training using realistic emergency simulations, and written and practical examinations to assess your competence.

Some training providers offer intensive formats that condense the course into consecutive days, while others spread the training over several weekends to accommodate working professionals. Blended learning options may also be available, allowing you to complete theoretical components online before attending in-person practical sessions. Regardless of the format, the practical skills component requires in-person attendance, as hands-on practice is essential for developing the competence needed to perform these skills in real emergencies.

EMR Certification Requirements and Recertification

To earn your EMR certification, you must successfully complete all course components and pass both written and practical examinations. The written exam tests your theoretical knowledge of anatomy, physiology, pathophysiology, and treatment protocols. The practical exam evaluates your ability to perform patient assessments and manage simulated emergency scenarios under timed conditions. Most provinces require a minimum passing grade of 70 to 75 percent on both components.

EMR certification is typically valid for three years, after which you must complete a recertification course to maintain your credentials. Recertification ensures that your skills remain current and that you are updated on any changes to treatment protocols or best practices. Staying current with your certification demonstrates professionalism and commitment to providing the highest standard of emergency care.

Career Opportunities with EMR Certification

EMR certification opens doors to a variety of career paths in emergency services and beyond. Certified EMRs work in fire departments, industrial sites, event management companies, private ambulance services, remote medical facilities, security firms, and outdoor recreation organizations. The certification also serves as a competitive advantage for lifeguards, security professionals, and fitness instructors who want to differentiate themselves in the job market.

For those pursuing paramedicine as a career, EMR certification provides invaluable practical experience that strengthens paramedic school applications and prepares students for the academic rigour of advanced emergency medical training. Many successful paramedics credit their EMR training as the foundation that gave them the confidence and clinical thinking skills needed to excel in their careers.

Executive Summary: An Emergency Medical Responder (EMR) course provides the advanced clinical skills necessary to manage complex trauma and medical crises. Far exceeding Basic or Intermediate First Aid, this 80-hour program aligns with 2026 CSA Z1210:24 standards for high-risk workplace responders. Whether you are preparing for a career in paramedicine or securing a remote industrial site, EMR certification ensures you can provide emergency room level assessment and stabilization in the field.


Start Your EMR Training Journey

Take your emergency response skills to the next level with an Emergency Medical Responder course from Coast2Coast First Aid and Aquatics. Prepare for a rewarding career in emergency services with comprehensive, hands-on training.

Register Now

A

About the Author

Ashkon Pourheidary, B.Sc. (Hons) — Co-Founder, Coast2Coast First Aid & Aquatics

Ashkon has been a certified First Aid and CPR instructor since 2011 and an Instructor Trainer since 2013. He is also a certified Emergency Medical Responder (EMR) instructor, Psychological First Aid instructor, and BLS (Basic Life Support) instructor. Ashkon graduated with honours with a Bachelor of Science in Neuroscience from the University of Toronto in 2016. As co-founder of Coast2Coast First Aid & Aquatics, he has helped grow the organization to over 30 locations across Canada and into the United States. Connect on LinkedIn

Child Choking First Aid: How to Help a Choking Child (2026)

If a child is choking and cannot breathe, speak, or cough, call 911 and begin the five-and-five approach: alternate 5 back blows between the shoulder blades with 5 abdominal thrusts just above the belly button. For infants under one year old, use chest thrusts instead of abdominal thrusts. If the child becomes unresponsive, begin CPR immediately. Do not perform a blind finger sweep.

Get Certified
✓ Canadian Red Cross Approved

Find a First Aid Course Near You

Canadian Red Cross Intermediate / Intermediate/Standard First Aid and Child Care First Aid courses covering child and infant choking response across Ontario, Nova Scotia, Alberta, and California.

View All 30+ Locations

5+5
Back blows and abdominal thrusts: the five-and-five approach
Under 1
Use chest thrusts, never abdominal thrusts, for infants
Under 4
Age group at highest risk of choking on small objects

How to Recognize When a Child Is Choking

Choking occurs when the airway becomes partially or completely blocked by a foreign object, which can lead to unresponsiveness and death if not addressed quickly. In young children, choking is particularly common, and certain behaviours such as talking or laughing with a full mouth or eating too quickly can increase the risk. A child who is choking typically has a panicked, confused, or surprised facial expression and may place one or both hands on their throat. Signs of choking include the inability to speak, cry, or cough forcefully if the airway is completely blocked, and the child’s skin may turn pale or bluish as oxygen is deprived.

Mild Choking vs Severe Choking

Not all choking emergencies require intervention. A mild blockage means the airway is only partially blocked and the child can still cough, speak, or cry. For children over 1 year old who are choking but are still making sounds, encourage them to cough. Encouraging a child to cough is an effective way to naturally clear an airway blockage without intervention. Do not interfere with a child who is coughing forcefully.

A severe choking emergency means the airway is completely blocked. Signs of severe choking include silent coughing, inability to speak or cry, blue or pale skin, clutching the throat with one or both hands, and high-pitched sounds or no sounds at all. If a child is showing signs of severe choking, such as silent coughing or bluish skin, immediate action is required to clear the blockage.

Child Choking First Aid: Step by Step

Step 1: Assess the Situation and Call for Emergency Help

If a child is choking and cannot breathe, speak, or cough, call 911 immediately or instruct someone nearby to call while you begin first aid. Do not leave the child alone. If you are alone, perform 5 cycles of back blows and abdominal thrusts before calling 911 if the obstruction has not cleared.

Step 2: Five Back Blows

Lean the child forward into a forward leaning position, supporting their upper body with one arm across their chest. Using the heel of your free hand, deliver 5 firm back blows between the child’s shoulder blades. Each blow should be a separate, distinct strike aimed at creating an artificial cough effect to dislodge the foreign object. Check the child’s mouth after each set of back blows to see if the object has been expelled. If you can see the object in the child’s mouth, carefully remove it with your fingers. Do not perform a blind finger sweep, as doing so may push the obstruction deeper into the airway.

Step 3: Perform Abdominal Thrusts (Heimlich Maneuver)

The Heimlich maneuver, also known as abdominal thrusts, is a first aid technique used to relieve choking by applying pressure to the abdomen to expel an object blocking the airway. It is recommended for adults and children over the age of one who are choking and cannot speak, cry, or breathe. To perform child abdominal thrusts:

  • Kneel or stand behind the child and wrap your arms around their waist
  • Make a clenched fist with one hand and place the thumb side of your fist against the child’s upper abdomen, slightly above the belly button and well below the breastbone
  • Grasp your fist with your other hand
  • Pull sharply inwards and upwards with quick, firm thrusts
  • Give 5 abdominal thrusts, each a separate and distinct movement

After 5 abdominal thrusts, check the child’s mouth again. If the object is visible, remove it carefully. Do not perform a blind finger sweep.

Step 4: Alternate Five Back Blows and Five Abdominal Thrusts

Alternate between 5 back blows and 5 abdominal thrusts, checking the child’s mouth after each cycle. Continue this pattern until the object is expelled, the child can breathe normally, emergency help arrives, or the child becomes unresponsive. Use this sequence for a choking person who cannot speak, cry, or cough forcefully.

Step 5: Begin CPR If the Child Becomes Unresponsive

If the child loses consciousness, carefully lower them to a flat surface. Call 911 if not already done. Begin CPR immediately, starting with chest compressions. Before giving rescue breaths, look in the child’s mouth each time you open the airway. If you can see the foreign object, remove it. Never perform a blind finger sweep on an unresponsive child. Continue cardiopulmonary resuscitation until emergency help arrives or the child begins breathing normally. Intermediate / Intermediate/Standard First Aid with CPR C covers the full transition from choking response to CPR as part of the core curriculum.

Safety Tip: Do not perform a blind finger sweep. Only remove an object from the child’s mouth if you can clearly see it. Blind finger sweeps risk pushing the obstruction deeper into the airway and can cause serious injury.

Infant Choking First Aid: Under One Year Old

For infants under one year old, the technique is different. Abdominal thrusts are never used on infants because they risk serious injury to internal organs. Instead, use chest thrusts.

Infant Back Blows

Hold the infant face down along your forearm, supporting the baby’s face in your hand with the baby’s head lower than the chest. Using the heel of your other hand, deliver 5 firm back blows between the infant’s shoulder blades. Support the infant’s head carefully throughout.

Chest Thrusts for Infants

After 5 back blows, turn the infant face up on your forearm, keeping the head lower than the body. Place two fingers on the centre of the child’s chest, just below the nipple line. Give chest thrusts 5 times, pressing down approximately one-third to one-half the depth of the chest. Check the infant’s mouth after each cycle. If an object is visible, remove it carefully. Do not perform a blind finger sweep. Alternate 5 back blows and 5 chest thrusts until the object is cleared or the infant becomes unresponsive. If the infant loses consciousness, begin infant CPR immediately and call 911.

What NOT to Do with an Infant

  • Do not perform abdominal thrusts on an infant under one year old
  • Do not shake or hang the infant upside down during a choking emergency as this risks further injury
  • Do not perform a blind finger sweep
  • Do not give liquids or force the infant to vomit, as this may worsen the airway blockage

For Parents and Caregivers

Learn This Skill in a Real Classroom

Reading about choking first aid is a start. Hands-on practice is what builds the confidence to act in a real emergency. Child Care First Aid courses are specifically designed for parents, grandparents, and childcare workers.

View Child Care First Aid

Performing Abdominal Thrusts

Perform Abdominal Thrusts on a Child

To correctly perform abdominal thrusts on a child, stand or kneel behind the child. Wrap your arms around their waist. Make a clenched fist with one hand. Place the thumb side of your fist against the child’s upper abdomen, between the belly button and the lower end of the breastbone. Grasp your fist firmly with your other hand. Pull sharply inwards and upwards in five quick, distinct thrusts. Each thrust should apply enough pressure to create an artificial cough that dislodges the object.

Performing Abdominal Thrusts on Yourself

To perform the Heimlich maneuver on yourself if you are choking and alone, place a clenched fist slightly above your belly button and grasp it with the other hand. Bend over a hard surface such as a chair back or countertop and thrust inward and upward firmly. This self-applied pressure can dislodge a foreign object when no one is available to help.

Aid Choking: What NOT to Do

Knowing what not to do is as important as knowing the correct steps. Common mistakes can worsen the obstruction or injure the child.

Do not perform a blind finger sweep. Only remove an object from the child’s mouth if you can clearly see it. Blind finger sweeps risk pushing the obstruction deeper into the airway.

Do not give liquids or force vomiting. Do not give the child anything to eat or drink or force them to vomit, as this may worsen the airway blockage.

Do not shake or hang the child upside down. This risks further injury and does not help clear the blockage.

Do not slap a choking child on the back while they are upright. Back blows must be delivered with the child leaning forward so gravity assists the dislodging of the object.

Do not delay calling 911. If back blows and abdominal thrusts do not clear the blockage within the first two cycles, call 911 while continuing the five-and-five approach.

Emergency Help: When to Call 911 for a Choking Child

Call 911 immediately in any of the following situations:

  • The child cannot breathe, speak, or cough
  • Back blows and abdominal thrusts have not cleared the blockage after several cycles
  • The child becomes unresponsive or loses consciousness
  • The child’s skin turns blue or grey
  • The child is an infant under one year old with a suspected airway blockage
  • The object has been removed but the child is still having difficulty breathing

After a choking incident, even if the object has been successfully removed, seek medical help. Internal injuries from abdominal thrusts or residual airway inflammation may require assessment. The Canadian Red Cross recommends that any child who received abdominal thrusts during a choking emergency be evaluated by a healthcare professional.

How to Prevent Choking in Children

Prevention is the most effective approach to child choking emergencies. The following strategies reduce choking risk significantly.

Foods That Pose a Choking Risk

Parents should supervise mealtimes with young children and avoid giving them foods that can easily get lodged in the throat, such as hot dogs, nuts, hard candies, grapes, large pieces of meat, popcorn, and raw carrots. Cut all food into small pieces appropriate for the child’s age. Teach children to sit while eating, eat slowly, and not talk or laugh with food in their mouth.

Small Objects and Toys

To prevent choking in children, keep small objects like marbles, coins, latex balloons, and button batteries out of reach, especially for children under 4 years old. Small toys or toys with small parts should be kept out of the child’s reach. Regularly inspect play areas for small objects that could be swallowed.

Supervision and Safe Habits

Supervise young children during mealtimes and playtime. Teach older children about choking risks. Ensure toys are age-appropriate and inspect them regularly for broken pieces. Keep the child’s reach clear of small objects at floor level.

How First Aid Training Prepares You for Choking Emergencies

First aid training courses often include instruction on how to respond to choking emergencies, teaching techniques such as back blows and abdominal thrusts. Certified first aid training courses are designed to prepare individuals to act quickly and effectively in choking emergencies, which can be life-threatening. Hands-on practice in a training environment builds the muscle memory needed to perform these techniques confidently under the pressure of a real emergency.

Intermediate / Intermediate/Standard First Aid with CPR C courses cover adult, child, and infant choking response, including the Heimlich maneuver, back blows, chest thrusts, and the transition to CPR when a choking victim becomes unresponsive. Child Care First Aid courses provide additional training specifically focused on pediatric emergencies, making them ideal for parents, grandparents, childcare workers, and teachers.

The Canadian Red Cross recommends that anyone who regularly cares for children complete first aid and CPR certification that covers pediatric choking response. Private group training can be arranged for daycares, schools, and organizations that want to ensure their entire team is prepared.

Key Takeaway

If a child is choking, use the five-and-five approach: alternate 5 back blows between the shoulder blades with 5 abdominal thrusts above the belly button. For infants under one year old, replace abdominal thrusts with chest thrusts. Never perform a blind finger sweep. If the child becomes unresponsive, begin CPR immediately and call 911. Hands-on first aid training is the most effective way to build the confidence and competence to act correctly under pressure.

Canada’s Top-Rated Training Partner

Join 150,000+ Canadians Who Are Certified

Coast2Coast is Canada’s top-rated Canadian Red Cross Training Partner.

4.9 stars across 20,491 Google reviews. Register online in 2 minutes.

View All 30+ Locations

Frequently Asked Questions: Child Choking First Aid 2026

Q1: What is the first thing to do if a child is choking?

A: If a child is choking and cannot breathe, speak, or cough, call 911 immediately and begin the five-and-five approach. Lean the child forward and deliver 5 firm back blows between the shoulder blades. Then give 5 abdominal thrusts by placing a clenched fist above the belly button and pulling sharply inwards and upwards. Alternate between back blows and abdominal thrusts until the object is dislodged or emergency help arrives.

Q2: How do you perform abdominal thrusts on a child?

A: Stand or kneel behind the child and wrap your arms around their waist. Make a clenched fist and place the thumb side against the child’s upper abdomen, above the belly button and below the breastbone. Grasp your fist with your other hand and pull sharply inwards and upwards. Give 5 abdominal thrusts in quick, distinct movements. Check the child’s mouth after each cycle for the object, removing it only if clearly visible.

Q3: What is the difference between child and infant choking first aid?

A: For children over one year old, the five-and-five approach uses 5 back blows and 5 abdominal thrusts. For infants under one year old, abdominal thrusts are never used because they risk injuring internal organs. Instead, alternate 5 back blows with 5 chest thrusts, using two fingers placed just below the nipple line on the infant’s chest. Hold the infant face down for back blows and face up for chest thrusts.

Q4: What should I do if the choking child becomes unresponsive?

A: If the child loses consciousness, carefully lower them to a flat surface. Call 911 if not already done. Begin CPR immediately, starting with chest compressions. Each time you open the airway to give rescue breaths, look in the child’s mouth. If you can see the foreign object, remove it carefully. Do not perform a blind finger sweep. Continue cardiopulmonary resuscitation until emergency help arrives.

Q5: What is the Heimlich maneuver?

A: The Heimlich maneuver, also known as abdominal thrusts, is a first aid technique used to relieve choking by applying pressure to the abdomen to expel a foreign object blocking the airway. It is recommended for children over one year old and adults who are choking and cannot speak, cry, or breathe. The technique involves placing a clenched fist above the belly button and pulling sharply inwards and upwards in five quick thrusts.

Q6: Should I do a finger sweep to remove the object?

A: Only remove an object from the child’s mouth if you can clearly see it. Do not perform a blind finger sweep, as this may push the obstruction deeper into the airway. After each cycle of back blows and abdominal thrusts, look in the child’s mouth. If the object is visible, carefully remove it with your fingers.

Q7: When should I call 911 for a choking child?

A: Call 911 immediately if the child cannot breathe, speak, or cough, if back blows and abdominal thrusts have not cleared the blockage within several cycles, if the child becomes unresponsive, if their skin turns blue, or if the child is an infant. After the object is removed, seek medical help regardless, as internal injury from abdominal thrusts or residual airway swelling may require assessment.

More FAQs: Prevention, Infants, and Training

Q8: What foods are most likely to cause choking in children?

A: Foods most likely to cause choking in young children include hot dogs, grapes, nuts, hard candies, popcorn, raw carrots, large pieces of meat, and chunks of cheese. Cut all food into small pieces appropriate to the child’s age. Supervise mealtimes and teach children to sit while eating and not talk or laugh with food in their mouth.

Q9: How do I perform infant choking first aid?

A: For infants under one year old, hold the infant face down along your forearm with the head lower than the body. Deliver 5 firm back blows between the shoulder blades. Then turn the infant face up and give 5 chest thrusts using two fingers placed just below the nipple line on the chest. Alternate between back blows and chest thrusts, checking the mouth after each cycle. Never use abdominal thrusts on an infant.

Q10: What objects are most likely to cause choking in young children?

A: Young children most commonly choke on food and small objects including coins, marbles, button batteries, small toys, latex balloons, and small pieces of broken toys. Keep all small objects out of the child’s reach, especially for children under 4 years old. Inspect play areas regularly and ensure toys are age-appropriate.

Q11: Can a child choke on something and still be able to breathe?

A: Yes. A mild or partial airway blockage allows some air to pass, so the child may still be able to cough, speak, or breathe with difficulty. In mild choking, encourage the child to cough, as this is the most effective way to naturally clear a partial blockage. Only intervene with back blows and abdominal thrusts if the child cannot breathe, speak, or cough at all.

Q12: What is the five-and-five approach?

A: The five-and-five approach is the primary first aid procedure for a conscious, severely choking child or adult. It involves alternating between 5 back blows to the area between the shoulder blades and 5 abdominal thrusts to the upper abdomen. After each set of five, check the mouth for the object. Continue alternating until the object is dislodged, the person can breathe normally, or emergency services take over.

Q13: Is choking first aid different for large children vs small children?

A: The technique is the same for all children over one year old, but the amount of force applied should be proportional to the child’s size. For a small child, gentler back blows and abdominal thrusts are appropriate. For a larger child approaching adult size, more force may be needed. The positioning and mechanics of the five-and-five approach remain consistent regardless of the child’s size.

Q14: What should I do after a child has been successfully treated for choking?

A: After the object has been removed and the child can breathe normally, seek medical help. The Canadian Red Cross recommends that any child who received abdominal thrusts during a choking emergency be evaluated by a healthcare professional. Internal injuries, rib bruising, or residual airway swelling may not be immediately apparent. Keep the child calm, monitor their breathing, and transport to a healthcare provider.

Q15: Where can I learn child choking first aid in Canada?

A: Coast2Coast First Aid and Aquatics offers Canadian Red Cross certified Intermediate / Intermediate/Standard First Aid and Child Care First Aid courses across more than 30 locations in Ontario, Nova Scotia, Alberta, and California. All course levels cover child and infant choking response, including back blows, abdominal thrusts, chest thrusts, and the transition to CPR. Online blended learning is available for those who prefer to complete theory at home before attending an in-person skills session.

Legal Disclaimer
The information in this article is for educational and informational purposes only and does not constitute medical advice. In any choking emergency, always call 911 immediately. Choking response techniques should be learned and practised under the supervision of a qualified first aid instructor. Coast2Coast First Aid Inc. assumes no liability for any outcomes resulting from the application or misapplication of information in this article.

About This Article, Expertise and Sources
Content reviewed by the Coast2Coast First Aid and Aquatics certified instructor team. Child choking first aid information sourced from the Canadian Red Cross First Aid Guidelines, the CSA Z1210:24 First Aid Training Standard, and Health Canada child safety guidelines. Coast2Coast First Aid Inc. is Canada’s largest Canadian Red Cross Training Partner. Last reviewed: May 2026. For corrections or additional information, contact info@c2cfirstaidaquatics.com or 1-866-291-9121.